The Clone Wars (22-19 BBY), occasionally referred to as the Clone War, the Separatist War, or the Droid War, was a major, three-year war between the Galactic Republic and the Confederacy of Independent Systems. The war is named after the army of clone troopers used by the Republic against the Confederacy's battle droid army. With both being fielded in enormous numbers by each respective side, the Grand Army of the Republic and the Separatist Droid Army were two of the largest military forces in galactic history, and fighting between them swept through the galaxy upon the outbreak of war in 22 BBY.
Prelude
A millennium-old vendetta
The origins of the Clone Wars dated back to the time of the Old Republic, which reigned over a millennium prior to the war. That era marked a dark age in galactic history, as the Sith battled their ancient enemies, the Jedi, for control of the galaxy. The Sith suffered from infighting, which ultimately led to their defeat, but although the Jedi believed they had vanquished their foes, the Sith had merely retreated into hiding. Darth Bane, the last surviving Dark Lord of the Sith, founded a philosophy known as the Rule of Two, which dictated that the entire Sith Order would be comprised solely of a master and an apprentice. Operating in the shadows, the Sith accumulated power and influence in preparation for the endgame of their grand plan: galactic domination and revenge against the Jedi.
From the remnants of the Old Republic, a modern Galactic Republic was formed. For the first time, a Galactic Senate afforded political representation to hundreds of worlds and star systems. The Old Republic's armed forces were disbanded. leading the Jedi Order to assume a peacekeeping role within the Republic, serving at the behest of the Senate and its Supreme Chancellor. Over time, the Senate incurred notoriety for its stagnant bureaucracy and corruption, and rifts emerged as the central Core Worlds—including the Republic's capital, Coruscant became reputed for their willingness to exploit the resources of the outlying Outer Rim Territories. Adding to the morass of bureaucracy and inaction was the fact that corporate blocs such as the Trade Federation, the InterGalactic Banking Clan, and the Techno Union were granted Senate representation alongside the Republic's member worlds.
Nearly a thousand years into the Republic's reign, Darth Sidious became the ruling Dark Lord of the Sith. Using his alter ego of Senator Sheev Palpatine of Naboo, he devised a complex scheme to unseat the incumbent Supreme Chancellor, Finis Valorum, and install himself as the Republic's next head of state: as the Republic became embroiled in a dispute over the taxation of trade routes, Sidious secretly allied himself with Nute Gunray, the Viceroy of the Trade Federation, and ordered the Trade Federation to blockade his homeworld of Naboo. When the Senate's characteristic stagnation proved ineffectual at overturning the Invasion of Naboo, Queen Padmé Amidala of Naboo called for a Vote of No Confidence in Valorum's leadership. The Senate thereafter elected Palpatine as Valorum's successor, and the Jedi Order aided the Royal Naboo Security Forces in ending the blockade, though not before the Sith revealed themselves in the form of Darth Maul, Sidious' current apprentice. Maul was defeated by the Jedi Knights and presumed dead, leading the Jedi High Council to suspect the existence of a second Sith Lord.
The Creation of the Clone Army
Sidious found a replacement for Maul in Count Dooku, a former Jedi Master who had left the Order and become integral to the Sith plan for galactic conquest. Sidious and Dooku, the latter of whom adopted the name Darth Tyranus, plotted to manipulate the Republic into a sham war with an opposing state. The Jedi would be forced to serve as generals for a Republic army of soldiers, who would eventually serve as their executioners. Furthermore, the conflict would destabilize the Republic and render it vulnerable to the Sith takeover.
Prior to the Invasion of Naboo, the Jedi High Council dismissed one of its members, Master Sifo-Dyas, due to his unorthodox belief that the Republic would need to raise an army for a full-scale conflict that he had foreseen. Undeterred, Sifo-Dyas contacted the Kaminoans, a species reputed for its cloning industry, and ordered the production of a clone army on behalf of the Republic. In so doing, Sifo-Dyas circumvented both the Senate and the High Council, purporting to have the support of the former. When the Sith discovered the existence of the clone army, they went to extreme lengths to hijack the project. At the time, then-Chancellor Valorum asked Sifo-Dyas to oversee confidential negotiations between the Republic and the Pyke Syndicate, a rising spice cartel that had begun to dominate the Coruscant underworld. Unaware of Valorum's request, the High Council separately dispatched Sifo-Dyas to resolve a tribal dispute on the planet Felucia.
Sifo-Dyas never reached Felucia, and the resulting events became enmeshed in a web of subterfuge that would take the Jedi Order many years to unravel. Dooku, as Tyranus, hired the Pykes to assassinate his old friend Sifo-Dyas, and his T-6 shuttle was subsequently shot down over the moon of their homeworld Oba Diah, killing Sifo-Dyas in the crash, while Valorum's personal attaché Silman, who had accompanied him on the mission, survived the attack. The Pykes delivered Sifo-Dyas's corpse to Tyranus, but covertly kept Silman hostage as potential leverage in the future. The Jedi Order, meanwhile, believed Sifo-Dyas to have died on Felucia after he failed to negotiate peace between the local tribes.
After seizing control of the cloning project, the Sith selected the renowned bounty hunter Jango Fett as the genetic template for their army. Chief Medical Scientist Nala Se served as one of the project's main engineers. On the Kaminoan homeworld of Kamino, Fett provided both genetic samples and training for his so-called clone troopers, who were subjected to growth acceleration and thereby aged at twice the normal rate of humans. As a result, the first generation of troops was ready within a decade of Sifo-Dyas's original order.
Implanted within each clone's brain was a structural inhibitor chip that was the key to the Sith's revenge against the Jedi. The Kaminoan scientists believed the chips were designed to preclude aggression within each subject, and that Sifo-Dyas had ordered the installation of the chips as a countermeasure against betrayal from rogue Jedi. In truth, the chips would force each clone to comply with Protocol 66, a directive for the soldiers to execute their Jedi commanders. Thus, the Sith would be able to massacre the entire Jedi Order via its subordinate soldiers.
Separatist Crisis
Eight years after the Invasion of Naboo, a pan-galactic Confederacy of Independent Systems began to take shape when Count Dooku commandeered a HoloNet relay station in the Raxus system and berated the Republic with condemning rhetoric. Over the next two years, a Separatist Crisis arose when thousands of star systems seceded from the Republic and flocked to the Confederacy. The Separatist Crisis sent the Republic into a frenzy, particularly as Dooku repeatedly spurned Palpatine's public requests for negotiation. The Republic Senate soon became divided over the passage of a Military Creation Act. Advocates of the bill argued that the Republic required a military force to defend itself from the Separatists, whereas others such as now-Senator Padmé Amidala believed that the measure would provoke full-scale civil war between the Republic and the Confederacy. Such a war became increasingly inevitable, with the Sith Lords poised to lead both sides of the approaching conflict that would tear the galaxy asunder.
By 22 BBY, the Sith had nearly completed preparations for open conflict between the Republic and the Confederacy. Nominally the Confederacy functioned as a democracy, and delegates from its myriad member worlds formed a Separatist Senate. At the same time, the galaxy's major corporations pledged their support and resources to the Confederacy, and their leaders thereby earned seats on Dooku's Separatist Council. Its members included Chairman San Hill of the InterGalactic Banking Clan, Foreman Wat Tambor of the Techno Union, Magistrate Passel Argente of the Corporate Alliance, Presidente Shu Mai of the Commerce Guild, and Archduke Poggle the Lesser of the Geonosian hives, as well as Senators Po Nudo of Ando and Tikkes of Mon Cala.
Nute Gunray's condition for joining the Separatist Council was that Amidala be killed in revenge for her humiliating defeat of him at the Battle of Naboo. Jango Fett and his associate, Zam Wesell, undertook the bounty that Gunray subsequently issued on Amidala. Just before the Senate's vote on the Military Creation Act, Wesell mounted an unsuccessful attempt on Amidala's life, resulting in the High Council designating Jedi Knight Obi-Wan Kenobi and his Padawan, Anakin Skywalker—both of whom had been instrumental in the Republic's victory at the Battle of Naboo—as Amidala's personal bodyguards. Wesell's second attempt on Amidala's life similarly failed, and Fett used a Kamino saberdart to execute Wesell before Kenobi and Skywalker could extract information from her. Nevertheless, Kenobi identified the saberdart's connection to Kamino, and was alarmed when his research revealed that the planet had been erased from the Jedi Archives. Without the help of Grand Master Yoda he pinpointed Kamino's location above the galactic plane, just south of the Rishi Maze, and traveled there as part of his investigation into Amidala's assailant.
When Kenobi arrived at Kamino's capital of Tipoca City, Prime Minister Lama Su greeted him and revealed the existence of the Clone Army. By this time, 200,000 troopers were ready for deployment, with a million more soldiers nearing completion. A shocked Kenobi reported his discovery to the High Council, which ordered him to detain Fett and bring him to the Jedi Temple on Coruscant for questioning. Fett escaped from Tipoca City with his son, an unaltered clone whom he named Boba, and fled to the Confederate capital of Geonosis. Kenobi tracked the Fetts and, after engaging in a starfighter dogfight that led them to believe him dead, followed them to the planetary surface. There, he discovered that the Geonosians were manufacturing millions of battle droids in their droid foundries. He also witnessed a meeting between Dooku and the Separatist Council, discovering that they were preparing to merge their resources into a Separatist Droid Army. The Geonosians thereafter captured Kenobi, though not before he sent a message to Skywalker.
Skywalker was with Amidala on the nearby world of Tatooine and relayed Kenobi's message to Coruscant, where Palpatine and the High Council heard the news that the commerce guilds had joined the Confederacy. Against the Council's orders, Amidala and Skywalker rushed to rescue Kenobi on Geonosis. While Kenobi was in his custody, Dooku claimed that the entire Republic was under the sway of a Dark Lord of the Sith named Darth Sidious, and tried to persuade Kenobi to help him destroy the Sith. Kenobi refused, and after Amidala and Skywalker were similarly captured, the Geonosians sentenced all three of them to execution in the Petranaki arena.
Despite Kenobi's report that the Confederacy was raising an army, Senator Bail Organa of Alderaan and other members of the Senate still believed that the Military Creation Act would not be passed in time to contend with the Separatists. Consequently, Junior Representative Jar Jar Binks of Naboo motioned that the Senate grant emergency powers to Palpatine, who could then use his newfound authority to formally approve the creation of a Grand Army of the Republic. Though Palpatine promised to relinquish his emergency powers once the crisis had passed, that was never to be the case. While Master Yoda traveled to Kamino to marshal the clone troopers for the Grand Army, Master Mace Windu assembled an assault team of 212 Jedi, drawn from the Masters of the High Council and the Order's ranks of Knights and Padawans, to save Kenobi from imprisonment on Geonosis. The galaxy teetered on the brink of civil war.
The War
Year One (22BBY-21BBY)
First Battle of Geonosis
The Battle of Geonosis commenced when Windu and his Jedi strike team infiltrated the Petranaki arena to save Amidala, Kenobi, and Skywalker from gladiatorial combat with three beasts: an acklay, a nexu, and a reek. While the Geonosian spectators fled the arena, Dooku unleashed a massive infantry of B1 battle droids, B2 super battle droids, and droidekas against the Jedi. During the ensuing ground battle, Council member Coleman Trebor came within seconds of ending the conflict when he nearly managed to kill Dooku, but Jango Fett gunned him down before he could do so. Windu thereafter beheaded Fett, an act that would earn him the ire of his son, Boba. Within a short span, only Amidala, Kenobi, Skywalker, Windu, and a fraction of their Jedi allies were still standing. With his battle droids encircling the ring of survivors, Dooku demanded their unconditional surrender, but Windu refused to allow himself and his comrades to become hostages.
Just as Windu and the other survivors were about to be executed, Yoda swept in with reinforcements, the Grand Army of the Republic: 192,000 clone troopers aboard Acclamator-class transgalactic military assault ships, with LAAT/i gunships ferrying them into the Petranaki arena to defend and extract the surviving Jedi. Amidala, Kenobi, Skywalker, Windu, and the other Jedi survivors withdrew from the arena aboard Yoda's gunships and rushed to Geonosis's red sand plains, where a ground campaign was taking shape. Jedi such as Aayla Secura, Kit Fisto, and many others immediately accepted command positions and led the clone troopers into battle against the Separatist Droid Army, working to decimate the enemy infantry and prevent the Techno Union's Hardcell transports from escaping. While Yoda proceeded to the Republic's forward command center, Windu oversaw an assembly area, where Clone Commander CT-411 handed him command of five special commando units. Colonel Meebur Gascon and other top strategists from Republic High Command advised the Grand Army on its battlefield tactics.
A frenetic offensive ensued, as the Republic's All Terrain Tactical Enforcers went head-to-head with the Separatists' IG-227 Hailfire-class droid tanks and OG-9 homing spider droids. Yoda ordered the Grand Army's Self-Propelled Heavy Artillery Turbolaser walkers to ground a number of Trade Federation core ships before they could escape. On the ground, the Jedi and their clone troopers were forced to contend with the enemy battle droids and DSD1 dwarf spider droids, but they made gradual headway against the Separatists. Overwhelmed by the Republic's assault, Dooku and the Separatist Council ordered a retreat. Poggle the Lesser entrusted Dooku with the Geonosians' plans to the Ultimate Weapon, and Dooku headed for a remote hangar where his Punworcca 116-class interstellar sloop was docked. En route to the hangar, Dooku crossed paths with Amidala, Kenobi, and Skywalker and they gave chase aboard their LAAT/i gunship. When Dooku's escort of Nantex-class territorial defense starfighters retaliated, Amidala was dislodged from the gunship, while Kenobi and Skywalker pursued the Count.
When Kenobi and Skywalker reached the hangar, Dooku defeated them in a lightsaber duel, injuring Kenobi and severing Skywalker's right forearm. The duel continued when Yoda, Dooku's former Jedi Master, arrived and proved more than a challenge for the Sith Lord. Dooku was able to escape only by collapsing a pillar on top of Kenobi and Skywalker, forcing Yoda to choose between pressing his attack and saving his fellow Jedi. Amidala arrived at the hangar with another gunship, but she and her squad of clone troopers were unable to shoot down Dooku's solar sailer. Although Dooku and the Separatist Council had escaped with their forces, the Republic declared victory in the Battle of Geonosis.
Dooku secretly traveled to Coruscant, where he met with Darth Sidious and reported that the intergalactic conflict which they had worked to instigate was finally underway. Though Kenobi believed that the clone troopers had been instrumental to the Republic's victory on Geonosis, Yoda knew that it was not a victory: The Clone Wars had begun. From Coruscant, the Republic deployed tens of thousands of clone troopers and a fleet of warships and assault craft, which formed the Republic Navy, as part of its war machine. The Confederacy, meanwhile, moved its capital from Geonosis to the planet Raxus, which served as the headquarters of the Separatist Senate.
Conflict Spreads
As the Clone Wars engulfed world after world across the galaxy, the Jedi were forced to relinquish their traditional roles as peacekeepers in favor of military commands within the Grand Army of the Republic. Knights and Masters accepted the new rank of Jedi General. Even Padawans contributed to the Republic's war effort, with some serving as battlefield commanders. Among the newly promoted Jedi Generals was Anakin Skywalker, whom the Jedi High Council elevated to Knighthood. Unbeknownst to his colleagues, Skywalker had secretly married Padmé Amidala following the Battle of Geonosis, a relationship that would have repercussions for the entire war.
To satisfy the Republic's increased demand for troops, Kamino continued its production and training of clone troopers. In turn, the Republic Navy blockaded Kamino, and the Grand Army established a network of listening posts to monitor Separatist activity in the vicinity. Due to the death of Jango Fett, the Kaminoan scientists stretched the preexisting samples of his DNA in order to decant more clones. The Jedi High Council selected one of its members, Master Shaak Ti, to oversee the training of clone cadets in Kamino's Tipoca City, assisted by contracted mercenaries such as Bric and El-Les to help supervise the clones' combat instruction.
The Republic attracted both internal and external criticism for its use of clone troopers, whom some viewed as slaves to the Jedi. One trooper deserted from the Grand Army after the Confederacy annihilated his unit; he fled to the planet Saleucami, where he took the name Cut Lawquane and started a family. On the other hand, the Separatist citizenry took pride in the fact that officers in the Confederacy military were willing participants, while its armed forces mainly sacrificed expendable battle droids for their cause. One Confederate officer, the husband of Separatist Senator Mina Bonteri, was slain while defending a new base on the planet Aargonar from Republic forces. At the same time, the Confederate populace was insulated from reports of war crimes that were committed in its name. The primary cause of the carnage was General Grievous, a cyborg warlord from Kalee who oversaw the Droid Army.
In addition to Grievous, Dooku recruited another agent as his lieutenant and emissary: Asajj Ventress, a slave-turned-Jedi from Dathomir who fell to the dark side of the Force and became Dooku's apprentice. Though Grievous and Ventress developed a long-standing rivalry, both were motivated by a deep-seated hatred for the Jedi Order. Grievous and Ventress made a habit of claiming as trophies the lightsabers of their fallen Jedi victims, and Dooku collected the pilfered weapons in his palace on Serenno. Ventress acquired one such lightsaber from Jedi Master Tholme, whom she bested in combat during a major campaign. She elected to slay Tholme rather than accept his surrender.
The outbreak of the Clone Wars shifted the balance of power on numerous worlds. Since the Separatist Crisis, a schism had fractured the Gotal population of Antar 4, with the Confederacy backing terrorist groups to combat the moon's Republic loyalists. The loyalists remained in power until shortly after the Battle of Geonosis, when the Confederacy conquered Antar 4, and the moon briefly served as a headquarters for Dooku. While millions of Gotal refugees fled to their colony world of Atzerri, an influx of Koorivar, Gossams, and other Confederate-allied species immigrated to Antar 4. The resulting political crisis on the moon gave rise to one of the Republic's first resistance cells. Gotal and Koorivar loyalists executed numerous acts of sabotage against the Separatist regime, with the Republic covertly sponsoring their guerrilla campaign. Despite their efforts, the Confederacy retained control of Antar 4 throughout the war.
Early in the Clone Wars, the Confederacy seized the Outer Rim world of Lola Sayu, the site of the infamous Republic prison known as the Citadel. The Citadel had been constructed five centuries earlier to hold Jedi who turned against the Republic. The Separatists converted the facility into a prisoner-of-war camp, using it to house Republic captives. The Separatists also invaded Millius Prime, one of the thousand moons of the remote planet Iego, and drove away its inhabitants, the peaceful Angels. The Separatists established military sites on both Iego and Millius Prime, but later withdrew from the system. Before departing, they seeded Iego's asteroid field with a security grid of laser emitters that trapped its residents on the surface.
Other planets swept up in the Clone Wars included Akiva, where a Confederate droid factory turned the planet into a battlefield between the Jedi and the Separatists; and Sedratis, which hosted the Battle of Sedratis. During the latter campaign, Jedi ace pilots Skywalker and Huulik proved instrumental in securing a Republic victory over the Confederacy's droid starfighter forces. During the war, a number of manufacturers converted freighters and transports into combat vessels. New vehicles loaded with weapons were also made.
Diversion at Christophsis
In the immediate aftermath of the Battle of Geonosis, Grievous and the Separatist Droid Army wrested control of the galaxy's major hyperspace lanes, isolating the Republic from the bulk of its Grand Army. Since their forces were spread thin, the Jedi Generals were unable to gain traction in the Outer Rim Territories, especially as worlds continued to flock to the Confederacy. As such, the Hutt Clan—which controlled Hutt Space with its network of supply routes reaching to the Outer Rim—became a coveted ally for both the Republic and the Confederacy. In a bid to secure the Hutts' supply routes for the Separatists, Dooku hatched a plot to kidnap Rotta, the son of Hutt crime lord Jabba Desilijic Tiure, and frame the Jedi Order for the crime. Dooku collaborated with Jabba's uncle Ziro, who hoped to depose his nephew as leader of the Hutt Clan. The first stage of Dooku's plan required that the Jedi's attention be diverted elsewhere; to that end, Dooku ordered his forces to conquer Christophsis, a crystalline Outer Rim world valued for its location and resources, and also the site of a Republic relief effort overseen by Senator Bail Organa. The Confederate Admiral Trench blockaded Christophsis with a massive detachment from the Confederacy navy, while Separatist ground forces subjugated the planet's inhabitants. After a number of native Christophsians mounted a futile defense of their homeworld, they requested aid from the Jedi High Council.
Jedi Generals Obi-Wan Kenobi and Anakin Skywalker, alongside Admiral Wullf Yularen, were dispatched with a task force to rescue Organa and the besieged Christophsians. Although their fleet of Venator-class Star Destroyers was unable to penetrate Trench's immense blockade of warships, Skywalker and Yularen used an experimental stealth ship to outmaneuver Trench and obliterate his flagship, the Invincible (although Trench narrowly survived his dreadnought's vaporization and later returned to active duty). Having broken through the blockade, Skywalker and Yularen delivered the much-needed relief supplies to Organa's refugee camp on the surface, while Kenobi exploited the hole in the Confederate armada to overwhelm the opposing fleet long enough to land a Republic invasion force on the planet. The Separatists likewise fortified their ground troops with reinforcements, concealing their true numbers from the Republic.
By this time, Dooku had dispatched Asajj Ventress to Christophsis to further hamper the Republic's progress. As Kenobi and Skywalker planned to ambush the battle droid forces in a major city plaza, a spy within the Republic ranks, Clone Sergeant Slick, apprised the Separatists of the Jedi's attack plan. Slick's actions transformed a potential Republic victory into a retreat, and Kenobi and Skywalker withdrew their men to the Republic's base. Suspecting the existence of an informant, Kenobi and Skywalker departed to gather information behind enemy lines, while Clone Commander CC-2224 and Clone Captain CT-7567—nicknamed "Cody" and "Rex," respectively—personally launched an investigation into the source of the intelligence leak. After they exposed Slick as the spy, he bombed the Republic's weapons depot, leading Rex and Cody to mobilize a swift manhunt. They arrested Slick and sent him to lock-up, though the damage was already done. Most of the Republic's arsenal was reduced to wreckage, with only a quartet of AV-7 Anti-vehicle Artillery Cannons surviving his sabotage.
At the Confederate headquarters, Kenobi and Skywalker encountered Ventress and engaged her in a lightsaber duel, which she used to buy time for Slick's sabotage. Both Jedi halted their attack once they witnessed the sheer size of the Separatists' landing force. After Kenobi and Skywalker escaped back to their base, General Whorm Loathsom assumed command of the droid infantry and commenced an assault on the city, while Ventress left to execute the next phase of Dooku's plan: kidnapping Rotta the Huttlet. She traveled to Tatooine aboard her personal starship, the Trident, and spirited Rotta away from his homeworld.
In addition to Slick's sabotage of their weapons depot, the Republic forces lost their naval support when the Separatists' orbital defenses ousted Yularen and his fleet from the Christoph system. Though they were severely outnumbered, Kenobi, Skywalker, and their clone soldiers managed to repel Loathsom's infantry from the city. Octuptarra tri-droids lent their support to the Separatists' second wave, but the AV-7 Anti-vehicle Cannons halted the advance of Loathsom's rearguard of Armored Assault Tanks. Meanwhile, believing that renegades had kidnapped Rotta, Jabba contacted Sheev Palpatine to request the Republic's assistance in rescuing his son. Since Kenobi and Skywalker were the only Jedi available for such a task, Yoda dispatched a messenger to Christophsis to recall the two Jedi Generals from the battlefront. The messenger was Skywalker's new Padawan learner, Ahsoka Tano.
Yularen briefly returned to Christophsis aboard his flagship, the Resolute, to send Tano to the planetary surface aboard a shuttle, then withdrew to rendezvous with reinforcements from the Republic Navy. Tano reached Kenobi and Skywalker just as they were preparing defenses for the next droid attack. Due to the continued lack of support from the Republic Navy, Kenobi and Skywalker remained trapped on-world with their troops, unable to comply with Yoda's order to return to Coruscant. Loathsom mounted another strike on the Republic forces, this time utilizing a mobile deflector shield to maintain a perimeter just beyond his advancing droid troops. The shield rendered the AV-7 Anti-vehicle Cannons useless, forcing the Jedi and clones to devise another strategy.
While Kenobi and Rex scrambled their men in a last-ditch defense of the city, and Kenobi feigned surrender to buy time for Skywalker and Tano to infiltrate the Separatist lines and destroy the shield generator, exposing droids to renewed barrages from the AV-7 Anti-Vehicle Cannons, and forcing Loathsom to capitulate. The Republic victory coincided with the arrival of naval reinforcements led by Yularen and Yoda, who smashed the Separatist blockade and drove it into retreat. Even as Yularen's fleet deployed infantry reinforcements to aid the invasion force in securing Christophsis, much of the planet remained in ruins. The Republic, meanwhile, imprisoned Loathsom on Coruscant for treason.
Alliance with the Hutt Clan
Ventress brought the captive Rotta to an abandoned B'omarr Order Monastery on the jungle planet Teth, located in Wild Space, and fortified the site with two full battalions of battle droids. After a scouting team of Republic Advanced Recon Force troopers tracked Rotta to Teth, Skywalker and Tano proceeded there with Captain Rex and Torrent Company, Rex's command unit within the Grand Army's famed 501st Legion, to rescue the Huttlet. Kenobi, meanwhile, entered into negotiations with Jabba, who granted the Republic a single planetary rotation to save Rotta and return him safely to Tatooine.
As the monastery sat perched atop a cliff, Skywalker, Tano, and Torrent Company were forced to mount a vertical assault, relying on ascension cables and a pair of AT-TE walkers to reach the fortress at the summit. Though they lost one of their AT-TE walkers and endured numerous casualties, the Jedi and clones broke through the Separatist droid defenses and retrieved Rotta from the monastery's detention level. However, Tano discovered that Rotta was severely ill, jeopardizing their chances of delivering him to Tatooine alive. Skywalker suspected Dooku's involvement in the kidnapping, given that both the Republic and the Confederacy sought an alliance with the Hutt Clan.
Unbeknownst to the Jedi, Ventress used the protocol droid 4-A7 to record Skywalker and Tano as they retrieved Rotta. Ventress transmitted the holorecording to Dooku, who presented it to Jabba as evidence that the Jedi were responsible for Rotta's abduction. After persuading Jabba to consider joining the Confederacy, Dooku ordered Ventress to recover Rotta so that they could claim credit for his rescue. Marshaling her assault force of battle droids, Ventress mounted a counter-strike on the monastery, swiftly crushing the Republic's last AT-TE walker and remaining assault craft. With no means of escape, Rex, Skywalker, and Tano barricaded themselves inside the monastery's antechamber with Rotta and Torrent Company. While Rex remained behind with Torrent Company to hold off Ventress and her droid infantry, Skywalker and Tano departed with Rotta to find a secondary exit from the monastery.
Despite their best efforts, Rex and his men were vastly outnumbered, and the battle droids slew all of them save for Rex and five other troopers. The droids held the clone survivors prisoner in the compound's eastern courtyard. Nonetheless, it was not long before Kenobi arrived at Teth with Commander Cody and a detachment of reinforcements. After punching through the Separatists' aerial squadrons of vulture droid starfighters, Cody and his soldiers reached the monastery aboard LAAT/i gunships. They and Kenobi provided support for Rex and the survivors of Torrent Company, while Skywalker and Tano narrowly evaded Ventress and escaped with Rotta on board an old spice freighter called the Twilight.
When Kenobi entered the monastery in search of Skywalker, he instead crossed lightsabers with Ventress. Upon learning that Skywalker had escaped with Rotta, Ventress broke off from her duel with Kenobi and fled the battlefield. Meanwhile, Skywalker and Tano piloted the Twilight into orbit of Teth, where Wullf Yularen and his Venator-class Star Destroyer were battling a Confederate armada of Munificent-class star frigates. As the Jedi tried to board Yularen's Star Destroyer, a trio of vulture droids firebombed the cruiser's main hangar. Unable to dock with Yularen's flagship, Skywalker and Tano headed directly to Tatooine aboard the Twilight.
Dooku was not pleased to learn from Ventress that the Jedi had extracted Rotta from Teth, but he continued to manipulate Jabba and the Hutt Clan towards joining the Confederacy. During a holographic report to Dooku, Ventress falsely stated that Skywalker had murdered Rotta before leaving for Tatooine. Using this deception, Dooku convinced Jabba that the Jedi Order intended to eradicate the Hutt Clan. Dooku thus departed from Jabba's Palace to personally kill Rotta, which would ensure he was never reunited with his father.
On Coruscant, Padmé Amidala received word of the Jedi's ongoing efforts to return Rotta to Tatooine. Consequently, she became determined to convince Jabba of the truth and broker the Republic's treaty with the Hutt Clan. Because Jabba was refusing all communication with the Republic, Amidala visited Ziro the Hutt, who lived in a palace on Coruscant. After Ziro rebuffed her attempt to reopen dialogue between the Hutts and the Republic, Amidala lingered around the palace and witnessed Ziro contact Dooku via hologram. Dooku informed Ziro that thanks to the Sith's web of deceit, Jabba would kill the Jedi when they arrived at his palace on Tatooine, after which the Republic would be forced to arrest Jabba. Accordingly, Ziro would be able to seize his nephew's control of the Hutt Clan. However, Ziro discovered Amidala eavesdropping on the conversation, and on Dooku's advice, he incarcerated Amidala within his palace.
As Skywalker and Tano arrived over Tatooine with Rotta aboard the Twilight, a pair of Confederate Rogue-class starfighters assaulted their freighter, causing them to crash-land in the Dune Sea. While Skywalker diverted Dooku's attention by engaging him in a lightsaber duel, Tano proceeded with Rotta to Jabba's Palace, but a trio of IG-100 MagnaGuards intercepted her outside the compound. Skywalker abandoned his confrontation with Dooku to rescue Tano, but he incorrectly assumed that she was already at Jabba's Palace. Skywalker thus arrived there ahead of his Padawan—much to the ire of Jabba, who still believed that Skywalker had slaughtered his son. With help from Skywalker's astromech droid R2-D2, Tano defeated her MagnaGuard assailants and reunited Rotta with his father. In spite of the Jedi's efforts, Jabba remained determined to execute Skywalker and Tano, and he ordered his bounty hunters to do so.
Back on Coruscant, Amidala was able to send word of her capture to the Republic via her protocol droid, C-3PO. Clone Commander CC-1010, nicknamed "Fox," immediately responded with a squad of clone shock troopers from the Coruscant Guard, and they raided Ziro's Palace to rescue her. Once Fox and his soldiers had arrested Ziro, Amidala used Ziro's personal holoprojector to contact Jabba, who received her message just as he was about to have Skywalker and Tano killed. Jabba was incensed to learn of Dooku and Ziro's conspiracy to unseat him, but he agreed to end all hostilities with the Jedi. Jabba subsequently signed a treaty with the Republic and granted the Grand Army its exclusive, long-awaited access to Hutt Space's supply routes. At the same time, Kenobi finished securing the Republic's victory on Teth and headed to Tatooine with Yoda, so that they could formalize the treaty with Jabba.
The Republic's alliance with the Hutt Clan resulted in a major setback for the Confederacy. Yet, Darth Sidious remained unconcerned, downplaying the impact of the Jedi's victory after Dooku apprised him of the news. The Republic incarcerated Ziro within the Judiciary Central Detention Center on Coruscant, and his lengthy sentence caused him to develop a deep resentment toward Amidala.
The war reaches Ryloth
The Twi'lek homeworld of Ryloth became the next major battlefront of the Clone Wars when the Techno Union invaded the planet, aiming to pillage its wealth and resources. The Separatist navy installed a blockade of battleships in orbit of Ryloth, while the Separatist Droid Army subjected the civilian population to a brutal occupation. Besides losing a number of cities and transport hubs, the Twi'leks were cut off from food and relief supplies and thus began to starve. In response, political activist Cham Syndulla founded a Twi'lek Resistance to combat the Confederate occupation. Jedi General Ima-Gun Di, Clone Captain Keeli, and their unit of soldiers provided aid to Syndulla and his freedom fighters. As open warfare engulfed Ryloth, the Separatist blockade eliminated Admiral Dao's Republic fleet, severing the Republic's supply lines to Ryloth and trapping Di, Syndulla, and their men in a canyon alongside many Twi'lek families.
With Ryloth in dire need of aid, the Jedi High Council prepared a shipment of food and medical supplies for the Twi'leks. Yet, because the Republic's Pelta-class frigates did not have enough range to reach Ryloth, the High Council selected the planet Toydaria as a suitable staging ground for the blockade runners. Complicating matters was the fact that Toydaria had declared neutrality in the war. As a result, the High Council asked Senator Bail Organa to oversee negotiations on Toydaria, alongside Jar Jar Binks. However, the Separatist navy intercepted the transmission between Organa and the High Council. Dooku thus dispatched Senator Lott Dod of the Trade Federation to thwart Organa's diplomatic efforts with King Katuunko, the monarch of the Toydarians.
Thanks to Dod's intervention, Katuunko publicly declined to have Toydaria sponsor the Republic's humanitarian shipment to Ryloth. However, Katuunko privately agreed to let Organa transfer his supplies from Toydaria to Ryloth. To prevent the Trade Federation from learning of the subterfuge, Binks distracted Dod and his staff at a formal banquet that night, while Organa oversaw the shipment's departure from Toydaria. By that time, the Separatist Droid Army had nearly overrun the Republic's defenses on Ryloth. Di, Keeli, and their men sacrificed their lives so that Syndulla and his comrades could escape from the canyon with their families. Shortly thereafter, the Republic's trio of Pelta-class frigates penetrated the Confederate blockade and deployed their relief supplies to the Twi'leks. Nevertheless, the Grand Army's inability to provide further military support to the Twi'lek Resistance eroded Syndulla's faith in the Republic.
Without reinforcements from the Republic, only Syndulla and his Twi'lek Resistance stood against the Separatist occupation of Ryloth. The Twi'leks suffered heavily in a confrontation with the Droid Army, and the Separatists forced the freedom fighters to surrender and disarm themselves. Still, the droid infantry continued to massacre the Twi'lek fighters, leading them to carve out hideouts in the shells of downed Confederate C-9979 landing craft. Syndulla and his rebels resorted to executing a guerrilla campaign, periodically eliminating battle droid patrols in the region. For the time being, the Twi'leks were left to wage the ongoing Battle of Ryloth on their own.
Organa and Binks's determination to help the Twi'leks of Ryloth convinced Katuunko to consider bringing Toydaria into the Republic. Since the Jedi Order hoped to establish a supply base in the Toydaria system, Master Yoda sought a meeting with Katuunko on the coral moon of Rugosa. However, Dooku learned of the rendezvous and sent Asajj Ventress to negotiate with the Toydarian Royal Delegation on behalf of the Confederacy. After a pair of Confederate Munificent-class star frigates intercepted his Republic frigate, Yoda reached the surface of Rugosa in an escape pod alongside his three-man detail from the Coruscant Guard: Lieutenant Thire and troopers Jek and Rys.
To circumvent a political debate with Yoda, Ventress proposed a contest. She would send her best troops to capture Yoda, who would face the challenge of evading apprehension. Katuunko, accordingly, would consider aligning Toydaria with the side of the victor. Although Katuunko was loath to subject Yoda to such a trial, Yoda accepted Ventress's terms and promised to arrive at their location by nightfall. Though they gravely lacked an advantage in numbers, Yoda and his troopers prevailed over Ventress's battalion of battle droids, even after she reneged on her agreement with Katuunko—first by ordering her droids to shoot to kill, and later by deploying droidekas as reinforcements.
When Katuunko informed Dooku of his desire to join the Republic, Dooku commanded his apprentice to assassinate Katuunko. Yoda and his men arrived just in time to save Katuunko, with Yoda using the Force to halt Ventress's lightsabers in mid-air, just centimeters from Katuunko's throat. Instead of surrendering, Ventress distracted Yoda by detonating pre-planted explosives near Katuunko's starship, the Thief's Eye. While Yoda's focus was consumed with telekinetically redirecting the incoming rubble, Ventress took the opportunity to escape aboard her solar sailer. In the wake of Yoda's victory, Katuunko formally pledged Toydaria's support to the Republic and agreed to host a base in his system. He and his delegation thereafter departed from Rugosa alongside Yoda and his soldiers.
Rise of the Malevolence
The Confederacy military wasted no time in developing new projects for its war machine. One result was the Malevolence, a colossal Subjugator-class heavy cruiser that became the prized flagship of General Grievous. The Malevolence's maiden voyage cut a swath through Republic territory, striking in a several star systems and annihilating all of the Republic ships that it encountered. Key to the battleship's success were its dual ion cannons, which disabled enemy starships' deflector shields and the rest of their onboard systems, thereby leaving the targets vulnerable to heavy turbolaser fire. Because the Malevolence left behind no witnesses, the Republic citizenry dubbed the unidentified threat as Grievous's "mystery weapon," sowing fear throughout the Republic.
The Jedi High Council soon sent one of its members, General Plo Koon, to hunt down Grievous's weapon. Koon and his flotilla of three Venator-class Star Destroyers tracked the Malevolence to the Abregado system, where Dooku and Grievous were overseeing the heavy cruiser's testing. The result of the ensuing battle was identical to those of its predecessors: The Malevolence disabled Koon's cruisers with an ion wave, then tore apart the defenseless craft using its array of turbolasers. Most of the remaining personnel who fled aboard escape pods were killed when Grievous sent teams of B1-series rocket battle droids aboard Droch-class boarding ships after them.
Both Chancellor Palpatine and the Jedi Council were reluctant to spare resources on a search for survivors of Koon's fleet. However, Anakin Skywalker and Ahsoka Tano—whose fleet was stationed in the nearby Bith system—took it upon themselves to do so. When they reached the Abregado system aboard the Twilight, the only remaining survivors were Koon and Clone Commander CC-3636, nicknamed "Wolffe," along with Sergeant Sinker and trooper Boost of the 104th Battalion's Wolfpack squad. Skywalker and Tano rescued Koon and the clones, and they escaped from the system aboard the Twilight, narrowly avoiding becoming the Malevolence's next victims. Dooku was greatly displeased by Grievous's failure to prevent their escape. Wolffe, meanwhile, later encountered Asajj Ventress at the Battle of Khorm and received an eye injury, which forced him to wear a cybernetic replacement.
With the veil over Grievous's mystery weapon lifted, the Senate commissioned Skywalker and the Republic Navy's Shadow Squadron of Y-wing starfighter pilots to eradicate the Malevolence. After the Malevolence attacked a Republic medical convoy in the Ryndellia system, Skywalker correctly deduced that Grievous's next target was the Kaliida Shoals Medical Center, a classified Outer Rim facility that was treating over 50,000 wounded clone troopers. Using a smugglers' shortcut known as the Balmorra Run, Skywalker, Tano, Koon, and Shadow Squadron barely beat the Malevolence to the Republic medcenter, which sat on the fringes of the Kaliida Nebula. While Shadow Squadron initiated its assault on the Malevolence, Doctor Nala Se and the rest of her staff began evacuating the medcenter with the help of the Naboo. Yet, they were unable to clear out all of the patients before the Malevolence completed its targeting cycle.
Shadow Squadron's initial attack on the Malevolence claimed the lives of almost half of the unit's twelve-pilot roster. On account of those casualties, Skywalker heeded Tano and Koon's recommendation to abandon their original target of the Malevolence's bridge. Instead, they concentrated their assault on the heavy cruiser's starboard ion cannon. Their proton torpedoes inflicted enough damage to cause the ion cannon to overload when Grievous tried to fire it upon the medcenter. Obi-Wan Kenobi and Wullf Yularen thereafter arrived with a three-cruiser fleet of Star Destroyers, and promptly opened fire on the Malevolence. With both the ion cannons and the hyperdrive disabled, Grievous was forced to order the Malevolence to retreat, setting course for Confederate space.
The Separatists dispatched reinforcements to aid the beleaguered Malevolence, but Jedi General Luminara Unduli intercepted them before they could reach the Kaliida Nebula. Even without those reinforcements, the Malevolence was able to hold its own, since its enormous size enabled it to withstand the Republic fleet's barrage of cannonades. Nevertheless, Dooku and Darth Sidious arranged a trap for Padmé Amidala, sending her to the Kaliida Nebula under the premise of negotiating a treaty between the Republic and the InterGalactic Banking Clan. When Amidala arrived, Grievous pulled her H-type Nubian yacht aboard the Malevolence via a tractor beam, aiming to take the esteemed senator hostage so as to secure safe passage for the Malevolence. The tactic worked as Dooku had predicted, with Skywalker ordering the Republic fleet's gunnery teams to stand down in order to protect his wife.
While Koon, Tano, and Yularen remained behind to command the fleet, Skywalker and Kenobi mounted a rescue mission to save Amidala. After using the Twilight to dock with the Malevolence, they rendezvoused with Amidala, who had destroyed her H-type Nubian yacht to delay Grievous. Amidala and Skywalker proceeded to the bridge, where they hot-wired the Malevolence's navigation computer to secretly input a new destination. Kenobi attempted to sabotage the battleship's hyperdrive, but Grievous intercepted him and chased him to the ship's internal rail jet, where Kenobi broke off from their duel. He, Amidala, and Skywalker escaped from the Malevolence aboard the Twilight, but Grievous gave pursuit with a squadron of vulture droids.
It was not long before Skywalker's sabotage came to light. Instead of jumping to hyperspace, the Malevolence collided with a nearby moon. Disgraced, Grievous fled from the battlefield aboard his personal starship, Soulless One. Thanks to that turn of events, the Republic claimed victory in[71] the Battle of the Kaliida Nebula,[41] bringing an end to the threat of the Malevolence.
Battle over Rishi Station
Over the following weeks, the intelligence-gathering arms of the Republic and Confederate war machines became sources of contention. When Grievous targeted Kamino, he knew that the Grand Army's system of listening posts in the vicinity could impede his efforts. To that end, Grievous dispatched a stealth team of BX-series droid commandos to silence Rishi Station, a Republic outpost located on a barren moon in the Rishi system. Under the cover of a meteor shower, the droid commandos landed on the moon and raided Rishi Station, killing most of the facility's garrison. Sergeant O'Niner, the station's lead officer, was among the casualties. The droids then hot-wired the station's all-clear signal, preventing the Republic Navy from learning that Grievous and his fleet were approaching Kamino by way of the Rishi system. In addition, Asajj Ventress infiltrated Kamino's defenses and served as a spy for Grievous, completing the preparations for his invasion. All of this occurred while the Mud Jumpers of the Republic's 224th were involved in a separate campaign on the planet Mimban.
In the aftermath of the Separatists' takeover of Rishi Station, Commander Cody and Captain Rex arrived there on a scheduled inspection of the base. After the droid commandos destroyed their shuttle, the Obex, Cody and Rex fled from the outpost. They soon encountered the remaining survivors of the earlier attack: troopers CT-1409, CT-782, and CT-5555, respectively nicknamed "Echo," "Fives," and "Hevy." Though the rookie soldiers had barely seen any combat action, Cody and Rex rallied them to retake Rishi Station, and they managed to overpower the squad of droid commandos. Yet, their victory was short-lived. Upon losing contact with the droid commandos, Grievous deployed troop reinforcements to ensure that Rishi Station remained under his control.
With time running out, Rex decided that instead of trying to disable the all-clear signal, they should destroy Rishi Station. Though Rex's plan was the nuclear option, the cessation of the beacon would alert the Republic fleet to Grievous's invasion. To destroy Rishi Station, Echo suggested the idea of using the outpost's supply of liquid Tibanna, a highly explosive fuel that served as a heat source during the moon's long winter. While Cody, Fives, and Hevy defended the station's main entrance from the incoming battle droids, Rex and Echo linked a trio of PLNK-series power droids, which contained the liquid Tibanna, to a detonation system. When Rex encountered problems with the detonator's handset, Hevy remained behind to repair it, while his comrades escaped to the crags beneath the station. However, Hevy was unable to repair the remote, so he chose to manually activate the explosives.
Thanks to Hevy's sacrifice, the destruction of Rishi Station disabled the alert beacon. Anakin Skywalker, Obi-Wan Kenobi, and Wullf Yularen subsequently arrived in the Rishi system with a Republic fleet. Knowing his armada lacked the tactical advantage, Grievous conceded defeat and withdrew his forces from the system. After the battle, Kenobi and Skywalker honored Echo and Fives for their efforts, as well as the late Hevy for his sacrifice. Furthermore, Rex inducted Echo and Fives into the 501st Legion.
Intelligence and counterintelligence
Eventually, the Separatists constructed Skytop Station, a core ship that they converted into a listening post in the Ruusan system. Skytop Station plagued the Republic's intelligence network by intercepting various transmissions and acquiring vital data for the Confederacy military. In the midst of this subterfuge, Grievous achieved a series of victories that jeopardized the Republic's foothold in the Outer Rim. He eliminated an entire Republic battle group at the planet Falleen on his way to conquer Bothawui, a strategic world in the Mid Rim. Rex, Skywalker, and Ahsoka Tano thereafter mobilized a Republic task force in defense of Bothawui.
During the ensuing Battle of Bothawui,Rex outflanked Grievous's flotilla using a squad of AT-TE walkers that he had hidden within Bothawui's asteroid field. Skywalker and Gold Squadron, a unit of V-19 Torrent starfighters, quickly pressed their advantage and crippled Grievous's frigates, turning the tide of battle in the Republic's favor. However, when Skywalker attempted to prevent Grievous from escaping aboard Soulless One, Skywalker instead lost his personal astromech droid, R2-D2, after debris hit his Delta-7B interceptor. In spite of Grievous's escape, the Republic forces nonetheless emerged victorious at Bothawui.
The loss of R2-D2 had potentially catastrophic consequences for the Republic. Since Skywalker had never wiped R2-D2's memory, the droid contained a trove of classified Republic Military data. Unbeknownst to the Republic, the scavenger Gha Nachkt found R2-D2 and promised the droid to Grievous. When Skywalker and Tano searched Nachkt's freighter, the Vulture's Claw, they failed to find R2-D2 amidst Nachkt's wares. Adding to Skywalker's problems was the fact that his replacement astromech, R3-S6, was a spy droid for Grievous.
Once the Republic's intelligence confirmed the existence of the Confederacy's new listening post, Skywalker received orders from Kenobi to find and eliminate the base. While his fleet scoured a targeted region of space, Skywalker elected to undertake a solo scouting mission to sweep the area's outer corridor. Yet, once Skywalker and R3-S6 were alone in the former's Delta-7B interceptor, R3-S6 activated the starfighter's homing beacon, leading Grievous and a pair of warships directly to their location. It was only due to the timely intervention of Rex and Tano, who hurriedly assembled a squad of soldiers and arrived aboard the Twilight, that Skywalker narrowly escaped demise at Grievous's hands.
As Nachkt brought R2-D2 to Skytop Station, the Twilight intercepted a transmission from the missing droid. Rex tracked the signal to Skytop Station's location in the upper atmosphere of one of the planet Ruusan's three moons. Although Kenobi ordered him to eradicate Skytop Station without rescuing R2-D2, Skywalker made retrieving his droid one of the mission's top priorities. While Rex, Tano, and their strike team planted thermal detonators at the facility's reactor, Skywalker recovered R2-D2 before Grievous's IG-100 MagnaGuards could abscond with the droid. However, R3-S6 delayed Rex, Tano, and their squad of troopers at the reactor room long enough for Skytop Station's security patrols to confront them.
Though Tano and her allies repelled the battle droids, their troubles were far from over. Grievous ambushed them, murdering most of the clone troopers in the process. Tano subsequently engaged Grievous in a lightsaber duel so that Rex and the other surviving soldier, Denal, could finish installing the explosives at the reactor. Once they had done so, Denal and Rex rendezvoused with Skywalker, R2-D2, and the Twilight in Skytop Station's main hangar. There, R3-S6 revealed his true allegiances by sealing the exits and activating a trio of vulture droids, thus preventing Rex and Skywalker from aiding Tano in her confrontation with Grievous.
At Skywalker's behest, Rex activated the explosives at the reactor, plunging Skytop Station on a descent into the moon's lower atmosphere. Once R2-D2 opened the hangar door from an exterior terminal, Tano arrived—having broken off from her duel with Grievous—and escaped with Denal, Rex, and Skywalker aboard the Twilight. Before they left the Ruusan system, Skywalker personally retrieved R2-D2, who had eliminated R3-S6. Grievous also escaped, though the loss of Skytop Station became yet another blemish on his career.
Separatist leadership targeted
As the Clone Wars entered a stalemate, several important members of the Confederacy found themselves in the Republic's crosshairs. One such leader was Nute Gunray, who entered into a brief alliance with Senator Onaconda Farr of Rodia. Although Rodia was part of the Republic, the Senate proved too slow to aid the Rodian population after pirate attacks demolished Rodia's inbound supply ships. Consequently, Farr lost faith in the Republic and accepted Gunray's offer to distribute relief supplies to Rodia. In return, Farr helped Gunray capture Padmé Amidala, against whom Gunray still held a grudge, when she came to Rodia on a diplomatic visit. Though Farr was conflicted about betraying Amidala, he incarcerated his old friend in a local detention tower until Gunray's arrival. However, when Gunray came to collect Amidala, Farr was shocked to learn that Gunray intended to execute her.
Although Amidala escaped from the detention tower, complications arose when Gunray's battle droids targeted both her and Jar Jar Binks, who had accompanied her to Rodia. Binks enlisted the aid of a large Kwazel Maw, which demolished most of Gunray's droids and his Sheathipede-class transport shuttle. Moreover, Gunray's indifference to the Rodians' suffering, as well as his brutal treatment of Amidala, convinced Farr that joining the Confederacy was a mistake. Farr aided Amidala in arresting Gunray on behalf of the Republic, concluding Rodia's dalliance with the Separatists. Sheev Palpatine thereafter sent the Rodians a convoy of much-needed supplies.
Under the command of Clone Commander CC-1004, nicknamed "Gree," the 41st Elite Corps arrived on Rodia to take Gunray into Republic custody. The Jedi High Council dispatched Jedi General Luminara Unduli, alongside Ahsoka Tano, to provide further security for Gunray's transfer to Coruscant, where the viceroy would stand trial. Since Darth Sidious believed that Gunray would not be able to withstand the Jedi's interrogation, Dooku tasked Asajj Ventress with rescuing Gunray. Dooku also paid off Captain Argyus, the leader of the Senate Commando detail that had been assigned to Gunray's transfer, to assist in the operation.
Ventress launched her assault just as Argyus, Gree, Tano, and Unduli were leaving Rodia with Gunray aboard the Star Destroyer Tranquility. A trio of Droch-class boarding ships penetrated the Tranquility's hull, then deployed a droid boarding party that eradicated much of the Elite Corps' Green Company. Ventress proceeded to the Tranquility's detention level, where she entered into a brief rematch with Tano, since the two had previously crossed blades during the Battle of Teth. Though Argyus, Gree, and Unduli came to Tano's aid and prevented Ventress from escaping with Gunray, Ventress used a cache of explosives that she had planted in the Tranquility's engine room to disrupt all of the cruiser's on-board systems. When Unduli pursued Ventress to the engine room, Ventress nearly overwhelmed her, and it was only thanks to Tano's assistance that Unduli was able to continue their lightsaber duel.
As Ventress continued to occupy the Jedi's attention, she signaled Argyus to make his move. Argyus gunned down two of his fellow Senate Commandos who were guarding Gunray, then liberated Gunray from his prison cell. Argyus and Gunray resisted Gree's attempts to stop them and commandeered the Consular-class frigate that had transferred Gunray to the Tranquility. Similarly, Ventress stole an escape pod and joined them aboard their frigate, though she executed Argyus when he insinuated that he would take full credit for the operation's success. Nevertheless, Unduli was able to transmit the tracking data for Gunray's frigate to fellow Jedi General Kit Fisto, whose fleet was close to Gunray's last known position.
Since Fisto was leading the hunt to recapture Gunray, Dooku saw an opportunity to test one of his agents. Because Grievous's recent defeats had undermined Dooku's faith in him, Dooku arranged a test for his best general. Using the homing beacon from Gunray's frigate, Dooku lured Fisto and his forces to Grievous's personal fortress on the third moon of Vassek. The Republic's Outer Rim Command Center also monitored Clone Commander Fil and Jedi Knight Nahdar Vebb, Fisto's former Padawan, who led a team of troopers to assist in the search for Gunray. Grievous remained unaware of Dooku's plan to reevaluate his performance.
Fisto, Vebb, and their soldiers infiltrated Grievous's fortress and eliminated a security detail of battle droids that they incorrectly assumed were protecting Gunray. In lieu of the viceroy, Dooku holographically contacted Fisto and Vebb and offered them an alternative prize. Once they realized that the fortress belonged to Grievous, Fisto and Vebb resolved to capture the elusive general, since Grievous's arrest would be pivotal for the Republic's war effort. Yet, when Grievous returned to his fortress, he proved to be far from easy prey. Grievous temporarily evaded the intruders in his lair, but he was forced to undergo repairs from his medical droid, EV-A4-D.
After having his IG-100 MagnaGuards lock down the perimeter, Grievous set about reclaiming the upper hand over his would-be captors. He used his fortress's built-in countermeasures—including an incinerator pit and his pet roggwart, Gor—to assail Fisto, Vebb, and their soldiers. Fil and the rest of his men perished, but Fisto managed to slay the vicious roggwart. Throughout it all, Vebb displayed a growing willingness to use excessive force in response to Grievous's tactics. Matters came to a head when Fisto sneaked into Grievous's control room, and Vebb refused to follow his former Master inside. Instead, Vebb stayed behind to confront Grievous on his own. Unable to help his former Padawan, Fisto could only watch through the surveillance system as Grievous slaughtered Vebb. Before escaping from the moon aboard his Delta-7B interceptor, Fisto dueled Grievous and managed to retrieve the late Vebb's lightsaber, which Grievous had claimed as a trophy. Though Grievous had bested Vebb and the clone troopers, Dooku had expected him to do so, and he was not pleased with Grievous's failure to defeat Fisto.
Dooku's temporary capture
Dooku was the next Confederate official who became a target for the Republic. As part of a manhunt for the Sith Lord, Anakin Skywalker infiltrated Dooku's current flagship, a Munificent-class star frigate, as it was patrolling the Outer Rim. Skywalker allowed himself to be captured in order to lead his forces to the frigate's location. While Obi-Wan Kenobi liberated Skywalker and helped him detain Dooku, Ahsoka Tano and Captain Rex besieged Dooku's frigate from aboard the Resolute. However, Dooku fled from the ongoing battle in his solar sailer, with Kenobi and Skywalker in close pursuit aboard a stolen Sheathipede-class transport shuttle. All three of them crash-landed on the planet Vanqor. Whereas Dooku gained safe passage from the Ohnaka Gang, a band of pirates, to the nearby world of Florrum, Kenobi and Skywalker were left stranded on Vanqor, and Tano had to retrieve them from the planet's surface.
Nevertheless, Dooku had not yet reached safety. The Ohnaka Gang took Dooku hostage on Florrum, and the pirates' leader, Hondo Ohnaka, offered him to the Republic in exchange for a hefty sum of one million credits, paid in spice. Before Sheev Palpatine agreed to the deal, the Jedi High Council dispatched Kenobi and Skywalker to Florrum to confirm that Ohnaka and his men indeed had custody of Dooku. However, after the Jedi arrived, Ohnaka drugged them and also took them prisoner, intending to ransom them to the Republic for an even larger payday. Unaware of Kenobi and Skywalker's situation, Palpatine dispatched Senator Kharrus and an escort team from the Coruscant Guard to deliver the spice ransom to Florrum and secure custody of Dooku.
Rogue elements within the Ohnaka Gang caused further trouble for the Republic. Ohnaka's lieutenant, Turk Falso, led a faction of pirates who shot down Kharrus's shuttle over Florrum, hoping to steal the ransom. Kharrus and the shuttle's crew died in the crash, leaving Jar Jar Binks, who was part of the delegation, as the ranking commander for Commander CC-5869, nicknamed "Stone," and his soldiers. By the time Binks, Stone, and their squad reached Ohnaka's base of operations, Dooku had escaped. He made his getaway by killing Falso and stealing his Flarestar-class attack shuttle. Rather than arresting Ohnaka, Kenobi and Skywalker left Ohnaka and his pirates alone. The Jedi departed with Binks and the clones aboard the Twilight, aboard which the Jedi had traveled to Florrum. Whereas Ohnaka and the Jedi parted on good terms, Dooku harbored a grudge against Ohnaka.
Crisis after crisis
The Quell system became the next flashpoint of the Clone Wars when a Confederate armada intercepted Jedi General Aayla Secura's fleet of warships. In the resulting Battle of Quell, the Separatist frigates pummeled Secura's cruisers with heavy bombardment. Soon, only Secura's flagship was maintaining altitude over the planet Quell. Skywalker, Tano, Captain Rex, and Wullf Yularen arrived aboard the Resolute to extract Secura; Clone Commander CC-5052, nicknamed "Bly"; and their crew from their doomed vessel. Rex, Skywalker, and Tano brought Secura, Bly, and a few of their troops aboard a Consular-class cruiser. Before they could reach the Resolute, a vulture droid attack inadvertently enabled their frigate's hyperdrive. The Jedi and clones found themselves on an unexpected detour, and they crash-landed on the remote planet Maridun. Yularen was left behind to oversee the Republic's campaign over Quell.
Stranded on Maridun, Bly, Rex, Secura, and Tano sought out medical attention for Skywalker, who had suffered critical injuries during the escape from Secura's flagship. They brought Skywalker to a village of Lurmen pacifists, who treated his wounds. Just as Skywalker's condition was improving, the Separatist General Lok Durd selected Maridun as a test site for the Confederacy's newest weapon. Durd had developed the Defoliator, a cannon that exterminated organic matter while sparing inorganic subjects, such as battle droids. Durd decided to use the Lurmen colonists as test subjects for his Defoliator Deployment Tank.
When Durd came to subjugate the Lurmen, the village's elder, Tee Watt Kaa, persuaded Bly, Rex, Secura, Skywalker, and Tano to leave in order to avoid a potential crossfire. However, the Jedi and clones returned once they realized that Durd was planning to test the Defoliator on the Lurmen village. In the skirmish that followed, the Jedi and clones used a pair of stolen Separatist shield generators to protect the Lurmen from the Defoliator's incendiary capsules. Yet, after Durd's droid infantry breached the Jedi and clones' defenses, Wag Too—the village healer and Watt Kaa's son—convinced other young members of the colony to help defend their home. They succeeded, while Skywalker managed to impair the Defoliator and captured Durd. Nevertheless, Watt Kaa questioned whether it had been worth it for Too and his friends to sacrifice their pacifism for the victory.
Shortly thereafter, a brief but bloody conflict erupted on the glacial world of Orto Plutonia. Both the Republic and the Confederacy maintained bases on Orto Plutonia, which attracted attention from a local settlement of Talz. In an effort to protect their solitude, the Talz obliterated both the Republic and Separatist outposts on their world. The Pantorans, who inhabited Orto Plutonia's single moon of Pantora, claimed Orto Plutonia as a protectorate. Consequently, Pantoran Chairman Chi Cho and Senator Riyo Chuchi requested a detachment of soldiers to investigate the loss of contact with Glid Station, the Republic base on Orto Plutonia. Rex, Skywalker, and Obi-Wan Kenobi oversaw the platoon of cold assault troopers from the Grand Army.
When Kenobi and Skywalker made contact with Chieftain Thi-Sen of the Talz, he communicated his desire to peacefully resolve the conflict. Yet, Cho dismissed the Talz as savages, declaring that the Convention of Civilized Systems did not apply to them. Despite efforts from Chuchi, Skywalker, and Kenobi to find a diplomatic solution, the headstrong Cho insisted on declaring war with the Talz in an effort to exterminate them. Open hostilities erupted when the Talz ambushed Cho, Rex, and their troops. Many Talz and clone troopers lost their lives until Chuchi received approval from the Pantoran Assembly to negotiate an end to the bloodshed.
Despite her youth and inexperience, Chuchi mustered the courage to personally establish a peaceful settlement with Thi-Sen. While Cho succumbed to fatal wounds that he had sustained, Chuchi agreed to cede complete jurisdiction of Orto Plutonia to Thi-Sen and the Talz. Chuchi thereafter departed from Orto Plutonia with Kenobi, Rex, Skywalker, and their troops, leaving the Talz in peace. In light of Cho's death, the Pantorans eventually elected Baron Papanoida as their new chairman.
The Battle of Ryloth comes to an end
The Techno Union continued to subjugate Ryloth, and Wat Tambor gained an appointment as the emir of the conquered world. The Republic Senate finally authorized an invasion force from the Grand Army to liberate the Twi'lek homeworld, reopening Ryloth as a Republic battlefront. Skywalker, Tano, and Wullf Yularen received the task of eliminating Confederate Captain Mar Tuuk's orbital blockade of Ryloth. The Republic's first assault on the blockade failed, since Tuuk's fleet obliterated the Star Destroyer Redeemer and forced Skywalker's other warships, the Defender and the Resolute, to retreat from the Ryloth system. Tano also suffered a devastating blow to her morale when she lost an entire unit of clone pilots, Blue Squadron, as part of her first command position.
Skywalker and Tano's next strategy had better results. Since the Defender had sustained heavy damages, Skywalker sacrificed the cruiser by personally ramming it into Tuuk's Lucrehulk-class Battleship. Tuuk fled from his command ship just prior to its demise, thereby ceding command of the blockade to the six frigates' OOM command battle droids. The ensuing chaos enabled the Resolute to return to the Ryloth system. Tano angled the Resolute's ventral hull toward the enemy blockade in order to lure its droid commanders into a trap. Once the frigates moved in, Tano launched several squadrons of starfighters from the Resolute and bombarded the frigates, leaving the blockade in disarray.
Thanks to Skywalker and Tano's efforts, Obi-Wan Kenobi and Mace Windu were able to safely enter Ryloth's atmosphere with a trio of Acclamator-class transgalactic military assault ships containing the invasion force. However, a Separatist encampment in the city of Nabat precluded Kenobi and Windu from landing their forces on the surface. From Nabat, the T-series tactical droid TX-20 targeted the Republic assault ships with aerial barrages from ground-based J-1 proton cannons. Windu withdrew the transports to a higher altitude until Kenobi, Commander Cody, and the 212th Attack Battalion's Ghost Company could eliminate the proton cannons in Nabat. Once there, troopers Boil and Waxer befriended Numa, a young Twi'lek orphan who had lost her parents when the Separatists stormed Nabat. With Numa's help, Kenobi and Ghost Company disabled the proton cannons and also rescued Nabat's Twi'lek residents, whom TX-20 had been using as living shields to protect his encampment from attack. Once freed, the Twi'leks mobbed TX-20 and destroyed him in retaliation for his subjugation of their home.
Ghost Company's liberation of Nabat allowed Windu and his transports to use the city as a landing zone. While Skywalker and Tano defeated the remnants of the Confederate blockade and secured the space around Ryloth, Kenobi freed more Twi'lek villages from the Techno Union's occupation. Kenobi soon retook the Jixuan desert, bringing Ryloth's southern hemisphere under Republic control. In response to the Republic's rising victories, Wat Tambor entrenched the majority of his droid infantry within the capital of Lessu. It fell to Windu and Commander Ponds to secure Lessu and apprehend Tambor. However, a unit of Armored Assault Tanks inflicted severe casualties to Windu's Lightning Squadron during an ambush at a canyon outside of Lessu. Because the Grand Army could not spare any reinforcements, Windu decided to enlist the help of Cham Syndulla and his Twi'lek Resistance.
When Windu sought him out, Syndulla still had reservations about working with the Republic, since the Grand Army had previously been unable to aid the Twi'lek Resistance. Syndulla also lacked trust in Ryloth's senator, Orn Free Taa, due to their political rivalry before the war. Yet, Syndulla changed his mind when Dooku ordered Tambor to plunder what he could from the Twi'lek villages, then exterminate everything else. In doing so, Dooku hoped to use Ryloth's demise as a political message about the ramifications of a Republic victory.
Ponds and Lightning Squadron witnessed Tambor's firebombing campaign firsthand, as Hyena-class bombers targeted all villages within range of Lessu, even those that were filled with innocent civilians. Skywalker and Tano concentrated their efforts on eliminating the bombers, but there were too many for their squadrons to handle. Tambor's ruthlessness reminded Syndulla and Taa of their common desire: achieving liberty for Ryloth. Under Windu's mediation, Syndulla promised not to exploit the situation for political power. Taa, meanwhile, agreed to Syndulla's stipulation to preserve Ryloth's independence, by ensuring that the Grand Army refrained from a post-invasion occupation of Ryloth. With that, Syndulla merged his forces with those of Windu, and the new allies organized a joint assault on Lessu.
Although Dooku ordered him to withdraw from Ryloth, Tambor delayed his departure to maximize the amount of plunder that he could seize from the Twi'leks. As a result, Windu and Advanced Recon Force troopers Razor and Stak infiltrated one of Tambor's inbound Multi-Troop Transports to gain passage across Lessu's plasma bridge, which was the only means of reaching the capital. Once Razor and Stak reactivated the bridge, Syndulla led his Twi'lek freedom fighters and the Republic clone troopers—riding blurrgs and All Terrain Recon Transports, respectively—as they charged into Lessu. While Syndulla oversaw the ground campaign, Windu arrested Tambor, who had lingered too long and was thus abandoned when his own tactical droid, TA-175, left aboard his shuttle. Despite Tambor's presence in Lessu, Dooku ordered TA-175 to have their Hyena-class bombers lay waste to the capital. However, Skywalker and Tano intercepted the bombers in their Delta-7B interceptors and wiped them out before they reached Lessu. Afterward, Tambor agreed to unconditionally surrender to Syndulla and Windu.
The Battle of Lessu, as it became known, finally brought the lengthy Battle of Ryloth to an end. Now free once more, the Twi'leks held a parade in Lessu to celebrate their victory, with Syndulla, Taa, and Windu in attendance. Syndulla and Windu's accomplishments at Lessu led them to become part of Twi'lek folklore, with songs naming their attack the Hammer of Ryloth.
Year Two (21BBY-20BBY)
The Blue Shadow Virus
In the Mid Rim, Naboo became the site of the Confederacy's foray into biological warfare. Operating out of a secret Trade Federation laboratory beneath Naboo's eastern swamps, Doctor Nuvo Vindi succeeded in weaponizing the Blue Shadow Virus, a lethal waterborne plague with no known cure, as an airborne strain. He also manufactured viral bombs to release the plague to key Republic star systems. When the Royal Naboo Security Forces discovered a patrol of Vindi's battle droids, Padmé Amidala and Jar Jar Binks returned to help Queen Neeyutnee and Captain Gregar Typho investigate the potential incursion. Amidala and Binks traced the battle droids' point of origin to the eastern swamps, where Vindi's forces captured them.
In response, Kenobi, Skywalker, and Tano led a raid on Vindi's laboratory to rescue Amidala and Binks, as well as prevent Vindi from escaping with his cache of bombs. Captain Rex and the clone units Calm Tree, Snow Wolves, and Wildfire provided tactical support for the Jedi's operation. After saving Amidala and Binks, Skywalker aided Kenobi in apprehending Vindi. In addition, the Republic task force's cadre of clone ordnance specialists managed to disarm Vindi's entire supply of viral bombs before he could release the plague to Naboo. Kenobi and Skywalker thereafter escorted Vindi to Naboo's capital, Theed, to stand trial for his crimes.
However, the crisis was not over. Vindi's personal LEP servant droid had secretly absconded with one of the vials containing the Blue Shadow Virus. The droid used a viral bomb to release the plague within the laboratory. While Kenobi and Skywalker traveled to the distant planet Iego to retrieve a potential cure, Amidala and Binks worked with Rex, Tano, and their men to eliminate the laboratory's remaining battle droids. If the droids escaped from the sealed compound, they would spread the outbreak to the rest of Naboo. Although the Blue Shadow Virus infected everyone save for Binks, the Republic personnel managed to eradicate the battle droids.
During their journey to Iego, Kenobi and Skywalker deactivated the Separatists' laser web over the planet, liberating the inhabitants from their confinement to the planetary surface. The two Jedi also obtained a sample of reeksa root, which was used to cure Amidala, Rex, Tano, and their men from the Blue Shadow Virus, bringing the incident to a close.
Victories and sacrifices
Felucia, a jungle world in the Outer Rim, became a frequent battlefront throughout the war. Early on, Felucia's strategic location on the Perlemian Trade Route led it to become the site of a campaign between the Confederacy and the Republic. Kenobi, Skywalker, and Tano attempted to repel a Separatist military presence from the world, but the battle droids overwhelmed their detachment of clone troopers, led by Commander Cody and Captain Rex. Once Commander Wolffe arrived with a fleet of Star Destroyers and breached the Confederacy's orbital blockade, Plo Koon and clone pilot Warthog rushed through the opening with a squadron of LAAT/i gunships.
From their starfighters, Koon and Warthog escorted the gunships to the surface, where they extracted Cody, Kenobi, Rex, Skywalker, and their men from the Republic's main staging area. Before leaving Felucia, the gunships also picked up Tano and her patrol of soldiers from elsewhere in the jungle. Though Tano initially refused to retreat, she and her soldiers boarded the gunships right before droid reinforcements compromised their position. The Republic's defeat at Felucia disrupted the Grand Army's efforts in the surrounding sector of space. Tano also faced disciplinary action from the Jedi High Council for disobeying her orders to evacuate from Felucia.
Devaron, another forested planet, soon became one of the war's next battlefields. Working for Darth Sidious, the bounty hunter Cad Bane collaborated with fellow mercenary Cato Parasitti to steal a holocron from the Jedi Archives' Holocron Vault on Coruscant. Bane then targeted Jedi Master Bolla Ropal, the keeper of the Jedi Order's Kyber memory crystal, a device that documented all known Force-sensitive younglings throughout the galaxy. At Sidious's request, Nute Gunray provided Bane with the Trade Federation's armada of Munificent-class star frigates, which Bane used to besiege Ropal's Republic outpost on Devaron. By the time Rex, Skywalker, Tano, and Wullf Yularen arrived in the Devaron system aboard the Resolute, Bane had already overrun the Republic base and had abducted Ropal, bringing him aboard his command ship. The Resolute tore through the majority of Bane's frigates and also disabled his command ship's hyperdrive, trapping Bane in-system. Yet, when Ropal refused to use the holocron to access the memory crystal, Bane had his crew of battle droids torture Ropal to death.
Due to a lack of resources, Rex, Skywalker, and Tano repurposed a trio of AT-TE walkers as unorthodox boarding craft for their assault force, consisting of Execute Battalion and Carnivore Battalion. Once the Jedi and clones had infiltrated his command ship, Bane lured them into an ambush with his droid infantry on the frigate's gunnery deck. Bane further separated Tano from her allies and took her hostage, using her as leverage to force Skywalker to open the Kyber memory crystal. Because the frigate's self-destruct sequence was active, Rex, Skywalker, Tano, and their detachment commandeered a shuttle and fled from the doomed frigate. Bane, still in possession of the holocron and the memory crystal, stowed away on their shuttle by killing trooper Denal and stealing his armor. Once aboard the Resolute, Bane seized a V-19 Torrent starfighter and jumped to hyperspace before Skywalker and Tano could apprehend him.
Following his victory at Devaron, Bane continued his work for Sidious and set out to abduct four Force-sensitive children who were listed in the Kyber memory crystal. After kidnapping the Nautolan Zinn Toa on the planet Glee Anselm, Bane captured Wee Dunn in Rodia's Kay-Tap square, thwarting Kenobi's efforts to stop him. However, Skywalker and Tano intercepted Bane before he could snatch a third child, Roo-Roo Page of the Gungans, in Jan-gwa city on Naboo. Bane endured a brief tenure in Republic custody, ending when he led Kenobi and Mace Windu into a trap on Black Stall Station, his base of operations. Though Bane escaped, Kenobi and Windu recovered the stolen holocron from his possession. Furthermore, Skywalker and Tano rescued Dunn and Toa from Sidious's secret facility on the volcanic world of Mustafar. Nevertheless, the Jedi Order remained unaware that Sidious was behind the entire ordeal.
In spite of its earlier setback at Felucia, the Republic maintained a presence in the Felucia system in the form of the Felucia Medical Station HCTFF2, a Haven-class medical station. Yet, the station lacked defensive measures, which made it an easy target for a small Confederate flotilla. When Kenobi, Skywalker, and Tano investigated the loss of contact with Felucia Medical Station HCTFF2, a Separatist automated vulture droid deployment station launched a squadron of vulture droids. The droid starfighters attacked the Jedi's T-6 shuttle, forcing them to crash-land on Felucia. While there, the Jedi helped the mercenaries Sugi, Embo, Seripas, and Rumi Paramita defend a Felucian farming village from extortion by the Ohnaka Gang, which hoped to pillage the farmers' nysillin crops.
Battle of Malastare
One of the longest and fiercest campaigns of the Clone Wars was the Battle of Malastare. In collaboration with Doge Nakha Urus and his Dug soldiers, Skywalker and Mace Windu led a battle group to safeguard the planet Malastare—whose fuel industry was vital to the Republic's war machine—from a Confederate incursion. However, an enormous detachment from the Separatist Droid Army came close to conquering Malastare. Desperate to ensure a Republic victory, Sheev Palpatine authorized the use of the electro-proton bomb, an experimental weapon that Doctor Sionver Boll had developed to disable only mechanical subjects. The electro-proton bomb generated an electromagnetic pulse that rendered all of the Confederacy's battle droids inert. The bomb's detonation zone also produced a massive sinkhole that engulfed some of the Republic's AT-TE walkers and command crews, requiring a rescue effort.
However, the crater was not the only byproduct of the electro-proton bomb. The blast also awoke a Zillo Beast, a member of a colossal species that had been thought to be extinct. The Zillo Beast proved to be impervious to everything from blasterfire to Skywalker's lightsaber. Because of an ancient enmity between the Dugs and the Zillo Beasts, Urus and his Dug Council demanded that the Republic help them exterminate the creature. Yet, Windu was adamant against doing so, as the creature could be the last of its kind. Windu's actions strained the Republic's diplomatic relations with the Dugs, since the Grand Army still needed access to Malastare's fuel. In order to appease Urus, Skywalker and Windu used Republic RX-200 Falchion-class assault tanks to non-lethally immobilize the Zillo Beast, making it appear as though the creature was dead. As a result, Urus and his council signed a treaty that provided the Republic with exclusive access to Malastare's fuel reserves.
In the wake of the Battle of Malastare, Palpatine ordered Skywalker and Windu to transport the Zillo Beast to Coruscant for study. Palpatine ordered Boll to synthesize the creature's highly durable scales to supplement a new iteration of clone trooper armor. However, the Zillo Beast escaped from the Republic Science and Technical Center and wreaked havoc across Coruscant, inflicting massive property damage and sowing terror among the populace. Unable to subdue the creature, the Jedi and their clone troopers were forced to kill the Zillo Beast.
Second Battle of Geonosis
It was not long before the Clone Wars returned to Geonosis. Though the Republic had occupied the desert world since the war's outset, the Grand Army's pan-galactic war effort required that much of Geonosis's occupying forces be distributed elsewhere. Thanks to the Republic's waning attention, the Confederacy was able to re-establish a major presence on Geonosis. Archduke Poggle the Lesser oversaw the construction of a series of new battle droid factories to expand the ranks of the Separatist Droid Army. Poggle's primary foundry earned substantial investments from the Trade Federation and the InterGalactic Banking Clan. During a visit to Lott Dod's palace on Cato Neimoidia, Padmé Amidala discovered a hologram disc with the factory's coordinates and stole it from the Banking Clan's senator, Rush Clovis. The Republic and the Jedi High Council subsequently learned of the existence of Poggle's new droid foundries.
Already, the Confederacy's total supply of battle droids far outnumbered the Republic's clone troopers, with Count Dooku claiming that the ratio was as high as one hundred to one. Hoping to halt the Geonosians' production of new battle droids, the Grand Army committed an immense Jedi-led invasion force to retaking Geonosis. Since Poggle had barricaded himself in his primary foundry, the Jedi mounted a three-pronged assault on the facility's ray shield generator. Jedi General Ki-Adi-Mundi and Clone Commander CC-1993, nicknamed "Jet," led the northernmost strike, while Obi-Wan Kenobi and Commander Cody oversaw the central charge. Anakin Skywalker and Ahsoka Tano—fresh from routing Confederate forces near the planet Dorin—spearheaded the southward strike with Captain Rex. Wullf Yularen commanded the Republic Navy's efforts, including other areas of the planet-wide campaign.
As the Second Battle of Geonosis began, the Geonosian defenses intercepted the majority of the Republic's LAAT/i gunships. Only Cody and his detachment of AT-TE walkers managed to reach Point Rain, the Republic's staging area near the ray shield generator, where Cody organized his walkers in a defensive formation. The Geonosians' LR1K sonic cannons and Nantex-class starfighters grounded the rest of the Republic's gunships. Kenobi was severely wounded when his gunship went down, and Cody had to send troopers Waxer and Boil to rescue him and trooper Trapper, the transport's only other survivor. Mundi also sustained injuries when his gunship crashed, but he and Jet cut through a cave of Geonosian soldiers, where their squad of clone flametroopers used flamethrowers to overwhelm the Geonosians. Rex, Skywalker, Tano, and their troops obliterated an enormous canyon barricade of battle droids and rendezvoused with Jet, Mundi, and their men.
As Cody and Kenobi continued to defend Point Rain from oncoming waves of Geonosian soldiers, Mundi and Skywalker combined their forces and pushed onward to reinforce their comrades. At the same time, Yularen was able to spare a single squadron of Y-wing starfighters to provide aerial support for Mundi and Skywalker's advance. Consequently, the Jedi and clones were able to secure Point Rain. For the final stage of their operation, Skywalker and Tano led a small squad of troopers through the ray shield, and they used a volley of Electro Magnetic Pulse grenades to disable the Geonosians' J-1 proton cannons. Once they had done so, Cody moved in with a detail of AT-TE walkers and eliminated the shield generator. The ray shield dissipated, allowing Rex, Mundi, and the main body of troops to land there aboard their gunships. The remaining Geonosians surrendered, thus ending the first phase of the Republic's invasion.
While Kenobi, Mundi, and the other wounded troops returned to the Republic fleet for medical treatment,[18] Rex, Skywalker, and Tano undertook the next phase of the invasion: crippling Poggle's main droid foundry. Luminara Unduli; her Padawan, Barriss Offee; and Commander Gree brought in infantry reinforcements to support Skywalker's assault. However, a single bridge was the only means of crossing the chasm that isolated Poggle's factory from the surrounding area. Since the bridge formed a natural bottleneck, the Republic's clone troopers would be completely exposed during their advance on the foundry. As a result, Unduli had Offee memorize the entire labyrinth of catacombs beneath the facility. While Offee and Tano infiltrated the foundry from the catacombs below, Unduli and Skywalker collaborated with Gree and Rex to lead a frontal assault on the facility as a diversionary tactic. Yet, though the droid factory was operating at only half-capacity, Poggle and his tactical droid, TX-21, had already amassed ten garrisons of new troops that were ready for deployment.
As Unduli, Skywalker, and their soldiers made headway against the foundry's droid defenses, Poggle allowed TX-21 to deploy twenty units of their newest creation: the super tank. The super tanks' ray shields enabled them to withstand barrages from the Republic's AV-7 Anti-Vehicle Cannons. In return, the super tanks launched a devastating volley of missiles, inflicting heavy casualties to the Republic troops. Gree and Rex led their soldiers into retreat, thereby drawing the super tanks onto the bridge across the chasm. Skywalker and Unduli climbed across the underside of the bridge, planting thermal detonators on their way to the other side. Once they had reached the factory, Skywalker and Unduli used the explosives to collapse the bridge, plunging the super tanks into the abyss.
Meanwhile, Offee and Tano reached the foundry's reactor via the catacombs, but TX-21 intercepted them with a super tank and a squad of Geonosian soldiers. Though Tano destroyed TX-21, the Geonosians purloined her and Offee's supply of thermal detonators. Unable to devise another means of eliminating the reactor, Offee and Tano commandeered the super tank and fired upon the reactor. Their attack generated a chain of explosions that ruptured the foundry's internal structure, bringing it plummeting to the ground.
Although Unduli accepted Offee's fate, Skywalker was unwilling to let go of his own pupil, and he frantically joined his troops' search for the lost Padawans. Trapped with Offee in the wreckage of their super tank, Tano used a power cell to boost her comlink's reception, leading their Masters to their location. As a result, Unduli and Skywalker were able to rescue Offee and Tano from the mounds of debris. While the main body of troops continued their cleanup efforts, Offee and Tano returned to the fleet for temporary recuperation.
As part of its continued campaign on Geonosis, the Grand Army eradicated other key Geonosian droid factories. Yet, Poggle remained at large, since he had escaped from his main foundry prior to its fall. Kenobi, who had recovered from his earlier injuries, joined Unduli in leading the manhunt for Poggle. As a sandstorm brewed, Unduli and trooper Buzz tracked Poggle to the Progate Temple, the headquarters of the Geonosians' secret queen, Karina the Great. Karina's minions—in truth, undead Geonosians who were being reanimated by her brain worms—killed Buzz and abducted Unduli, dragging her into the catacombs beneath the temple. Once the sandstorm had abated, Commander Cody, Kenobi, and Skywalker took a squad of troopers into the catacombs to rescue Unduli. However, the undead Geonosians took advantage of the tunnels' labyrinthine layout to deal casualties to Kenobi and Skywalker's search party.
Eventually, Cody Kenobi, Skywalker, and their remaining soldiers reached Karina's throne room, where Poggle had incarcerated Unduli. Despite Kenobi's attempt at negotiation, Karina refused to submit to Republic law. Instead, Karina had Poggle give Unduli a brain worm that would control her mind. Before the brain worm could infect Unduli, Cody and his soldiers turned their headlamps on Karina and the Geonosians, temporarily blinding them. Skywalker freed Unduli from her restraints, and together they handcuffed Poggle and brought him with them as they retreated with the rest of their comrades. Cody and his men eliminated the tunnel's supports on their way out, burying Karina underneath piles of rubble and killing her. Cody, Unduli, Kenobi, Skywalker, and their soldiers managed to escape with Poggle from the Progate Temple just before it collapsed. With that, the Second Battle of Geonosis ended in a Republic victory.
In the aftermath of the Republic's successful recapture of Geonosis, Mace Windu oversaw a campaign on the planet Dantooine. His soldiers sustained numerous injuries, thus requiring relief supplies from a medical station near the planet Ord Cestus. Since it was imperative for the Jedi to escort Poggle to Coruscant, Offee and Tano personally embarked on the assignment of picking up the medical shipment from the Ord Cestus medcenter. Kenobi, Mundi, Skywalker, and Unduli separately departed aboard a Venator-class Star Destroyer to transport Poggle to Coruscant. Complicating matters was the fact that a Geonosian brain worm infected trooper Scythe of Tango Company, the troop detail that was escorting Offee and Tano aboard their Pelta-class frigate, TB-73.
Before long, Scythe had infected most of his fellow soldiers with the brain worms. Under the parasites' mind control, the clone troopers gunned down TB-73's clone pilots and activated the bridge's security shields, thereby gaining control of the frigate. Offee and Tano learned of the infection when troopers Edge and Ox attacked them in the ship's mess hall. Lieutenant Trap, Tango Company's commanding officer, also opened fire at the Padawans, and Offee killed him in self-defense. In order to contain the parasites aboard their frigate, Offee went to disable the engines, while Tano contacted Kit Fisto, who was overseeing the Ord Cestus medcenter, to warn him of the outbreak. However, Scythe and his comrades intercepted Offee near the reactor room and infected her with a brain worm. With Offee gone, Tano was now the only uninfected person aboard TB-73.
When Offee confronted her, Tano briefly crossed lightsabers with her friend before escaping to the frigate's ventilation shafts. Meanwhile, after learning of the outbreak from Tano, Skywalker violently interrogated Poggle and learned that the brain worms were susceptible to subzero conditions. Consequently, Tano ruptured TB-73's coolant system, and the intense cold neutralized the brain worms that were controlling the clone troopers. Tano was just in time, as TB-73 arrived out of hyperspace a short distance away from the medcenter. Although Offee attacked Tano before she could reverse TB-73's engines, a pair of Republic tugboats used their tractor beams to reduce the frigate's speed, narrowly preventing a collision with the medcenter. With the brain worms contained, Fisto and his staff provided treatment to Offee, Tano, and the surviving members of Tango Company, guaranteeing a full recovery for all of them.
Hunt for Grievous
Even though the Republic's victories outnumbered its defeats, the Separatist Droid Army continued to make advances in the Outer Rim Territories. Soon, Grievous began to specifically target members of the Jedi High Council, including General Eeth Koth. Deep in the Outer Rim, Grievous and his Recusant-class Commerce Guild destroyer launched an assault on Koth's flagship, the Steadfast. Grievous then boarded the Steadfast with a strike team of BX-series droid commandos, which swiftly overwhelmed the Star Destroyer's detachment of clone troopers. While Koth ordered Captain Lock and his troops to evacuate from the Steadfast, Koth dueled Grievous aboard the bridge, and he nearly bested Grievous in lightsaber combat despite an arm injury. However, Grievous's IG-100 MagnaGuards electrocuted Koth, allowing Grievous to subdue the Jedi Master and take him hostage.
When Grievous broadcast his capture of Koth to the Jedi Temple on Coruscant, Koth used hand signals to inform the Jedi High Council of his location: the Saleucami system. Jedi Generals Adi Gallia, Obi-Wan Kenobi, and Anakin Skywalker volunteered to lead the ensuing operation to capture Grievous and rescue Koth. While Wullf Yularen and a Republic armada assailed Grievous's fleet above Saleucami, Kenobi and Commander Cody lured Grievous onto their Arquitens-class light cruiser. With Kenobi dueling Grievous as a diversion, Gallia, Skywalker, Captain Rex, and a squad of troopers arrived aboard an Eta-class shuttle and boarded Grievous's light destroyer to save Koth. Yet, Grievous had anticipated the Republic's tactics and had accordingly delegated command of his flagship to his tactical droid, TV-94. Still, Gallia and Skywalker destroyed TV-94 and his droid commandos aboard the bridge, then freed Koth from his containment field there.
Aboard Kenobi's light cruiser, things were not going as planned. Kenobi cut down Grievous's MagnaGuards, but neither Kenobi nor Grievous were able to maintain the advantage during their subsequent duel. Grievous soon headed back to the light cruiser's airlock, where Cody and three of his men intercepted him. Grievous evaded their attempts to subdue him, then ordered his destroyer's crew to open fire on the light cruiser's engines. The ensuing barrages destabilized the cruiser just as Kenobi, Cody, and their soldiers followed Grievous into the airlock. Grievous engaged in a short rematch with Kenobi and also briefly dueled Gallia, who had come to aid Kenobi's efforts. Yet, when the airlock ruptured, all of the combatants were forced to contend with the breach into the vacuum of space. While Grievous slipped away, Gallia helped Cody, Kenobi, and the other remaining trooper climb onto the enemy destroyer.
Grievous boarded a C-9979 troopship to reach Saleucami's surface, forcing Cody, Gallia, and Kenobi to suspend their pursuit of him. Instead, they joined Koth, Rex, and Skywalker aboard their shuttle to withdraw from Grievous's destroyer. Nevertheless, Grievous soon faced ramifications from targeting Kenobi's light cruiser in spite of its close proximity to his flagship. When the cruiser exploded, the debris collided with Grievous's landing craft, sending it crashing to Saleucami and forcing Grievous and his crew to transfer to the escape pods. Thanks to that turn of events, the Republic task force refocused its objectives. While Gallia escorted Koth to a medical frigate for treatment, Skywalker and Yularen stayed to complete the fleet's efforts against the remnants of the Confederate armada. Simultaneously, Kenobi headed to Saleucami's surface with Cody, Rex, and a troop contingent to track down the elusive Grievous.
On Saleucami, Grievous and his battle droids discovered that their escape pod's transmitter had not survived the crash, thereby preventing them from contacting their fleet in orbit. Since only one of the other escape pods had survived, Grievous and his crew headed to its location, trekking across Saleucami's farmlands. Meanwhile, after inspecting the C-9979 landing craft's crash site, Kenobi divided his forces. While Rex took a small squad—consisting of 501st troopers Hardcase; CT-5597, nicknamed "Jesse"; and CT-6116, nicknamed "Kix"—aboard BARC speeders to scour Saleucami's wetlands for Grievous, Cody and Kenobi remained with their main force of AT-TE walkers to continue the search on the dry territory.
During the course of Rex's patrol, a pair of droid commandos took a potshot at him, missing his heart by only two inches. Once Hardcase and Jesse had gunned down the droid snipers, they and Kix brought Rex to a nearby farmstead that the Lawquane family owned. Suu Lawquane agreed to let Rex spend the night in their barn to recover from his condition. After Kix, the squad's medic, dressed his wound with a bacta bandage, Rex reluctantly let his men resume the search without him, ceding command of the unit to Jesse. As dusk became night, Rex met Suu's husband: Cut Lawquane, a clone trooper who had deserted from the Grand Army. Despite their conflicting ideologies, Rex gradually found common ground with Lawquane based on their dedication to protect those whom they cared about. For Rex, those were his comrades within the Grand Army; for Lawquane, those were his and Suu's two children, Jek and Shaeeah.
Meanwhile, Hardcase, Jesse, and Kix headed for the C-9979 troopship's final escape pod with Cody, Kenobi, and their forces. Both groups converged on the site just as Grievous arrived there with his own squad of battle droids. After having the escape pod's crew signal his fleet for an extraction from the surface, Grievous marshaled his battle droids in a defense of their position. Though Kenobi engaged Grievous in yet another duel, he was unable to stop Grievous from climbing aboard a Sheathipede-class shuttle and reaching his fleet in orbit of Saleucami. Similarly, the Republic fleet failed to intercept Grievous before he departed from the system. Consequently, Kenobi's repeated attempts to detain Grievous ended in frustration.
Back at the Lawquane farmstead, another of the escape pods from the C-9979 landing craft caused trouble for Lawquane and his family. A unit of droid commandos had crashed in an escape pod near the family's homestead, and Jek and Shaeeah inadvertently reactivated all twenty of the lethal droids. While Suu took their children upstairs to take cover, Lawquane entrusted Rex with being the last line of defense for his family. Lawquane, meanwhile, engaged the droid commandos in direct combat when they converged on his homestead. Due to their combined efforts, Lawquane and Rex were able to defeat the droids. The next morning, Rex went to rendezvous with Kenobi and the main body of troops before they departed from Saleucami. Before leaving, Rex promised not to report Lawquane's whereabouts to his superior officers, having reached a better understanding of the former soldier.
Mandalore's fragile neutrality
In addition to propagating unrest within the Republic citizenry, the Clone Wars caused an increase in crime throughout the galaxy, especially as the Jedi Order devoted its concentration to the Republic's war effort. Many star systems became determined to preserve their neutrality from both the Republic and the Confederacy. As a result, over 1,500 systems coalesced into the Council of Neutral Systems, a body that advocated for their continued neutrality from the war. Eventually, the council gained a new leader: Duchess Satine Kryze, who ruled the planet Mandalore through a pacifistic regime known as the New Mandalorians. Yet, Kryze attracted criticism when rumors spread that she was assembling an army for the Confederacy. In truth, the real conspirators were Dooku and Darth Sidious, who entered into an alliance with the Death Watch, a Mandalorian splinter group that was bent on reviving Mandalore's warrior culture. The Death Watch's leader was Pre Vizsla, who—as the governor of Mandalore's single moon, Concordia—pretended to be Kryze's ally while conspiring with Dooku to end her rule.
The Death Watch drew the Republic's attention when one of its members assaulted a Republic cruiser, then committed suicide rather than submit to questioning. In response, the Jedi High Council sent Kenobi to investigate Mandalore's potential ties to the Separatists. Kryze, who was old friends with Kenobi, aided his investigation, as did Mandalore's prime minister, Almec. After a Death Watch bomber demolished the memorial shrine within Mandalore's capital city of Sundari, the bomber threw himself from a balcony to avoid being captured by Kenobi. Kenobi and Kryze thereafter accompanied the late bomber's body to Concordia, where Vizsla received them.
Kenobi's continuing investigation led him to the Death Watch's secret base within the Concordian mines, where two Death Watch soldiers overwhelmed him. Only Kryze's intervention saved Kenobi from dying in a rock crusher. While attempting to escape from the base, Kenobi and Kryze came across Vizsla, who revealed himself as Death Watch's leader. Vizsla used the Darksaber, an ancient weapon dating back to the Old Republic, to engage Kenobi in a lightsaber duel. However, Vizsla proved unable to defeat the Jedi Master, and Kenobi absconded from Concordia with Kryze. Afterward, Kryze resolved to plead her case before the Galactic Senate, and Kenobi joined Skywalker, Commander Cody, Captain Rex, and a squad of clone soldiers in providing protection for her voyage to Coruscant.
Unbeknownst to Kryze, another Death Watch agent was part of her inner circle of advisors. Senator Tal Merrik, who represented the planet Kalevala in the Mandalore system, smuggled a trio of deadly assassin probes onto Kryze's star liner, the Coronet. In the skirmish that followed, Cody, Rex, and Skywalker destroyed the first assassin probe in the Coronet's cargo hold, but a second one slipped past them and reached the dining chambers, where Kenobi protected Kryze and her retinue. Even after their destruction, both assassin probes deployed an array of minuscule probe killers, which wreaked havoc on the Jedi and clones, as well as Kryze's contingent of Mandalorian Protectors. Once he and his comrades eliminated the majority of the probe killers, Skywalker learned from the Coronet's cargo manifest that a Republic senator had approved the shipment containing the assassin probes. Merrik's ties to the Death Watch finally came to light when Kenobi questioned him and the other senators—Onaconda Farr, Orn Free Taa, and Kin Robb—who were Kryze's guests aboard the Coronet.
Although Rex destroyed the third and final assassin probe, Merrik remained at large. Merrik took Kryze hostage and slew all of the Coronet's bridge crew, then requested reinforcements from Vizsla. Once the Coronet dropped out of hyperspace, a trio of Droch-class boarding ships arrived to cover Merrik's escape. The boarding craft perforated the Coronet's hull and disgorged B2 super battle droids, which went head-to-head with the clone troopers and royal guards in the star liner's hallways. However, Merrik had rigged the Coronet's engines with explosives, and he used both those and Kryze as leverage to reach one of the boarding ships, even as Kenobi pursued him and the captive Kryze there. Kryze disarmed Merrik and pilfered his blaster, but neither she nor Kenobi were willing to kill Merrik with so many lives at stake. Skywalker nonetheless intervened, murdering Merrik and recovering the detonator for his explosives. Cody, Rex, and their men finished routing the Separatist boarding party, thereby ensuring a safe conclusion to the Coronet's eventful journey.
Even though Kryze had safely reached Coruscant, Vizsla continued to collaborate with the Confederacy to seize control of Mandalore. The Republic Senate was about to vote on whether to send a military force to stabilize Mandalore. Since the Mandalorians were not in favor of a Republic occupation, Vizsla and Dooku theorized that such a situation would cause Mandalore's population to view the Death Watch as heroic liberators. To that end, Palpatine had his agents alter a holographic recording of New Mandalorian Deputy Minister Jerec, one of Kryze's close allies. When Kryze spoke before the Senate, Palpatine presented Jerec's doctored testimony, which decried Kryze's pacifist policies and advocated for the Republic to intervene in Mandalore's affairs. The Senate session occurred the same day that Jerec perished in a Death Watch bombing on Kalevala, preventing Kryze from confirming the veracity of her friend's claims.
Adding to Kryze's troubles was the fact that Vizsla dispatched a Death Watch assassin to murder her on Coruscant. The assassin's first, very public attempt on Kryze's life accelerated the Senate's vote on the occupation of Mandalore, causing the Senate to authorize the invasion. Despite this setback, Kryze refused to back down. She sought out a meeting with Davu Golec, a Mandalorian contact within the Republic Ministry of Intelligence. Golec gave Kryze a disc containing Jerec's original message, but the Death Watch assassin gunned down Golec before he could reveal any more information. Now on the run from the Coruscant Security Force, Kryze finally decided to reach out to Kenobi for help.
As Senate Vice Chair Mas Amedda demanded that Kryze turn herself in to the Republic authorities, Kenobi and Kryze realized that the conspiracy surrounding Jerec's message had originated in the upper echelons of the Republic. After defeating the Death Watch assassin and forcing him to flee, Kenobi escorted Kryze to the Senate Building. There, Kryze turned herself in to the Senate Guard, while Kenobi transferred the disc containing Jerec's original message to Padmé Amidala. Amidala presented the recording at a following Senate session, convincing the Republic to rescind its occupation of Mandalore. As a result, Kryze managed to preserve her people's neutrality, while also averting a major expansion of the Republic's war effort.
Due to Kryze's victory in the Senate, Vizsla's alliance with Dooku disintegrated, and Dooku rescinded his support of the Death Watch. As a result, Dooku and Sidious lost their opportunity to bring Mandalore into the Confederacy. Furthermore, without the necessary backing of the Mandalorian populace, the Death Watch abandoned its plan to conquer Mandalore. Vizsla and his allies instead roamed the galaxy as vagabonds, eventually establishing a presence on the planet Carlac. Even though the New Mandalorians maintained their neutrality, a number of Mandalorians chose to enter the Clone Wars. Some of the planet Concord Dawn's reputed warriors provided training to the Republic Grand Army. Among their number was Fenn Rau of the Mandalorian Protectors, who served as a flight instructor for the Republic Navy. Rau also commanded Skull Squadron, a Mandalorian unit that supported Republic campaigns.
Crime on the rise
As crime continued to plague the war-torn galaxy, Mace Windu became the subject of a series of assassination attempts. Boba Fett allied himself with fellow bounty hunters Aurra Sing, Bossk, and Castas to attain justice for Windu's murder of his father, Jango, at the First Battle of Geonosis. The young Fett posed as a cadet within Clone Sergeant Crasher's Clone Youth Brigade as the unit embarked on a training mission aboard Admiral Kilian's flagship, the Endurance, just as Windu and Anakin Skywalker came aboard the Star Destroyer for a respite from the war front. After failing to kill Windu in his quarters aboard the Endurance, Fett sabotaged the cruiser's reactor, forcing Kilian to crash-land his vessel on nearby Vanqor. Afterward, Fett and his crew abducted Kilian, Commander Ponds, and a clone navigation officer in the hopes that the Confederacy would offer them a reward for their hostages.
When Skywalker and Windu traveled to the Endurance's crash site in search of Kilian and his crew, Fett set another trap. He detonated an explosive in the Endurance's bridge, pinning Skywalker and Windu underneath mounds of rubble. Both Jedi survived the attack, albeit barely. By this time, the Confederacy had begun to offer bounties on Jedi, some as high as a million credits. As a result, Fett and his allies sought to obtain evidence of Skywalker's and Windu's deaths so that they would be able to turn a profit from the incident. However, Skywalker's astromech droid, R2-D2, warded off the bounty hunters and managed to reach the Jedi Temple, where he notified Plo Koon and Ahsoka Tano of Skywalker and Windu's precarious plight. In response, Koon and Tano traveled with Commander Wolffe and his Wolfpack to Vanqor, where they rescued Skywalker and Windu before the remains of the Endurance finally collapsed.
Now having twice failed to execute Windu, Fett and his crew resorted to other methods to draw out their target. In a direct holotransmission to the Jedi Temple, Sing gunned down Ponds and threatened to kill Killian and his navigation officer in an attempt to provoke Windu into confronting them. Yet, since Windu was still recovering from the injuries that he had sustained on Vanqor, Koon and Tano instead went after Fett and his team. Koon and Tano tracked the bounty hunters to Florrum, where they had sought out Hondo Ohnaka and his pirate gang. Ohnaka, for his part, stayed out of Sing's plot against Windu, even after Sing murdered Castas for trying to sell her out to interested parties. A lethal confrontation ensued when Koon and Tano clashed with Fett and Sing. When Koon captured Fett, Sing abandoned her young protégé and rendezvoused with Bossk, who was guarding Kilian and his navigation officer.
Ultimately, Koon convinced Fett—who was already apprehensive of Sing's brutal exploitation of the hostages—to divulge the location of the prisoners. Tano arrived there just in time to prevent Bossk from executing Kilian and the clone officer. Tano also prevented Sing from escaping aboard her crew's starship, Slave I, by severing the craft's port stabilizer in mid-flight. Slave I crashed, taking down Sing with it. Though Tano and her colleagues assumed that Sing had perished in the crash, Ohnaka later extracted her from Slave I's wreckage, and she returned to her line of work. The Jedi Order, meanwhile, incarcerated Bossk and Fett in the Judiciary Central Detention Center on Coruscant, where they remained prisoners for quite some time.
In the meantime, the Mandalorians discovered that their hard-won neutrality was not without cost. The Clone Wars disrupted intergalactic trade, depriving many star systems of their much-needed supplies. The situation forced Mandalore to resort to the black market for food and other necessities. In Sundari, Tee Va and his fellow Moogan smugglers exploited corruption within the Mandalorian Guard, as well as the city's customs and education systems, to distribute slabin-diluted tea to local schools. While visiting Mandalore, Padmé Amidala helped Satine Kryze dismantle the Moogans' operation because the mixture of tea and slabin had a lethal affect on Sundari's youth.
Furthermore, a crisis arose when Prime Minister Almec used the black market to monopolize the planet's imports of supplies. Ahsoka Tano, who was serving as a guest instructor at Mandalore's Royal Academy of Government, helped Kryze and a group of young cadets—Amis, Lagos, Soniee, and Kryze's nephew Korkie—expose Almec as the culprit and arrested him.
The Clone Wars continued to change the galaxy, cultivating greed and corruption throughout the Republic and beyond. Whereas Palpatine assured the Senate that the Republic's war effort was faring well, some sources reported otherwise. Even as the Republic reinforced its fleet on the Hydian Way and had the loyalty of the Third Legion during a large-scale civil war on the planet Balith, another crisis unfolded. The war displaced countless civilians, leading Bail Organa, Padmé Amidala, and Senator Mon Mothma of Chandrila to host the Alderaan Refugee Conference. Amidala served as the keynote speaker at the summit, which addressed the Republic's efforts to aid the refugees. The conference was interrupted when Ziro the Hutt hired Aurra Sing to kill Amidala in revenge for his imprisonment on Coruscant. Ahsoka Tano and Gregar Typho both helped Amidala subdue Sing, who was nonetheless liberated from her ensuing incarceration and soon resumed her bounty hunting career.
The Shadowfeeds of Murkhana
Nine months into the Clone Wars, the Confederacy used the planet Murkhana, one of its major Outer Rim bastions, as the site of an important operation. Based in Murkhana City, a team of Confederate scientists deployed a series of hyperwave transceiver nodes to slice into the HoloNet, the Republic's intergalactic network for news and communication. Yet, instead of quietly collecting data on the Republic's military operations, Dooku exploited his infiltration of the HoloNet to launch an unprecedented propaganda campaign. The Confederacy hijacked the HoloNet and disseminated Shadowfeeds about Separatist accounts of wartime victories and falsifications of Republic war crimes. As a result, the populations of the Republic's Core Worlds began to fear that the Confederacy was on the verge of winning the war.
In order to shut down the Confederacy's Shadowfeeds, the Republic sent Captain Wilhuff Tarkin and numerous platoons from the Twelfth Army to invade Murkhana. During the battle, Tarkin personally led the first waves of clone troopers into Murkhana City. After overwhelming the Separatist ground forces, Tarkin and his soldiers detained the scientists who were operating the Shadowfeeds. Tarkin then tortured the enemy scientists into divulging the details of their jamming and steganographic technology, allowing Republic cryptanalysis operatives to dismantle the Shadowfeeds. The Republic forces also destroyed Murkhana's sole HoloNet relay to stop the Shadowfeeds from reaching worlds along the Perlemian Trade Route. Murkhana retained its Separatist ties, but much of Murkhana City remained littered with refuse from the battle.
In the wake of his victory on Murkhana, Tarkin executed thousands of beings who had abetted Dooku's takeover of the HoloNet, precluding the possibility of another communication breakdown. The Republic Navy's actions at Murkhana also led to the creation of the Commission for the Protection of the Republic. Tarkin, for his part, spent the next year serving Sheev Palpatine in a covert capacity. Tarkin garnered a number of similar victories for the Republic, eventually winning the captaincy of a Star Destroyer under Jedi General Even Piell.
Battle of Kamino
Even though Grievous and Asajj Ventress failed in their first attempt to invade Kamino, the clone homeworld remained a critical target for the Confederacy. Therefore, Dooku opted to authorize a second invasion of Kamino. He placed Grievous in overall command of the mission, while sending Ventress ahead of the assault to infiltrate Kamino's defenses aboard her personal starship, the Trident. However, Obi-Wan Kenobi and Anakin Skywalker learned of the imminent invasion from an intercepted transmission between Grievous and Ventress. Acting quickly, Kenobi and Skywalker traveled to Kamino aboard the Resolute, bringing along Commander Cody, Captain Rex, and elements of the 501st Legion to bolster Tipoca City's defenses. Shaak Ti, who supervised clone cadet training in Tipoca City, also committed her efforts to helping Lama Su secure the Republic's fortifications of the cloning facilities.
When Grievous entered the Kamino system with a fleet of warships, Wullf Yularen was ready with the Republic's blockade. Utilizing attack formation Echo-3, Grievous engaged Yularen's opposing fleet in combat. At Ti's command, Skywalker mobilized the Republic Navy's air strike, leading clone pilots aboard ARC-170, V-19, and Y-wing starfighters into orbit to hamper Grievous's warships. As the space battle raged around them, Grievous headed for Kamino's oceans with a contingent of battle droids. To bypass the Republic blockade, Grievous disguised his landing craft as debris from his destroyed warships. Ventress was waiting for Grievous deep beneath Kamino's waves with the Trident and her detachment of aqua droids. Once Grievous and his troops had arrived, Ventress dispatched her aqua droids to reassemble the fragments of Trident-class assault ships that Grievous had brought with him.
Even as Skywalker pressed his assault on the Confederate armada, both Kenobi and Ti sensed that something was amiss. By sacrificing his transports to protect his flagship, Grievous was exhibiting uncharacteristic recklessness. Suspicious of Grievous's tactics, Kenobi ventured into the oceans in a Kamino sub to investigate the wreckage from the downed Confederate vessels. Near the ocean floor, Kenobi witnessed the aqua droids readying the Confederacy's assault craft. When the aqua droids attacked his starship, Kenobi escaped back to sea level with the help of an aiwha.
Having diverted the Republic's attention to the space battle, Grievous and Ventress initiated their primary assault: the ground campaign. They launched from the oceans aboard their Trident-class assault ships, which clambered onto the Tipoca City Military Complex and drilled entry points for their troops. In doing so, the assault ships inflicted severe structural damage to the Military Complex and its array of cloning facilities. Kenobi quickly recalled Skywalker from the battle above Kamino, and they and Ti rushed to scramble their units of clone troopers in defense of Tipoca City. Since Grievous and Ventress did not have enough battle droids to seize control of the city, they sent their main body of troops to distract the Jedi and clones. After rendezvousing and meeting face-to-face for the first time, Grievous and Ventress split up to pursue separate objectives. While Grievous besieged the Military Complex's troop barracks, Ventress went after the last remaining sample of Jango Fett's DNA. The Confederacy hoped to use Fett's DNA to unlock new tactical possibilities against the Grand Army.
Before reaching the clone DNA room, Ventress slew Commander Colt of the Advanced Recon Commandos. Yet, before Ventress could abscond with the sample of Fett's DNA, Skywalker intercepted her at the DNA chamber and engaged her in a lightsaber duel. Similarly, Kenobi confronted Grievous outside the barracks, where they began yet another rematch as part of their longstanding rivalry. Meanwhile, 501st troopers Fives and Echo rallied a squad of young clone cadets to protect their home. Once Cody, Rex, and maintenance clone 99 brought them a supply of DC-15A blaster carbines and thermal detonators from the nearby armory, the cadets aided their commanding officers in defending the barracks from Grievous's B1 battle droids, capturing the droids in a classic pincer movement. Though the cadets and troopers successfully routed the droids, 99 died from enemy blasterfire while attempting to resupply his comrades. Cody, Echo, Fives, and Rex all mourned the loss of 99, for even though his cloning malformation barred him from active duty,[48] they believed that their comrade had died as a true soldier.
When aqua droids breached Tipoca City's command center, Shaak Ti left Lama Su at the command post, while she personally led the front-line offensive against the invading troops. Ti and her clone troopers succeeded in repelling the aqua droids to the Military Complex's main hangar, where the clone soldiers unleashed barrages of blasterfire upon the enemy droids with their Z-6 rotary blaster cannons. The clones also used RPS-6 rocket launchers to dislodge the Trident-class assault ships from their grip on the exterior walls of the Military Complex. As a result, the Grand Army made steady progress in its efforts to retake Tipoca City.
Ultimately, both Grievous and Ventress failed to achieve their objectives. Kenobi pursued Grievous to Tipoca City's exterior platforms, where Grievous evaded his foe and commandeered a Kaminoan flight pod. Similarly, Skywalker's duel with Ventress moved to the outer platforms, where Skywalker finally retrieved the sample of Fett's DNA from her. A squad of nearly twenty clone troopers came to Skywalker's aid and surrounded Ventress. Though Skywalker intended to let his soldiers execute Ventress, she escaped with Grievous in his stolen flight pod. Nevertheless, the Confederacy failed to win the Battle of Kamino, and the Republic emerged triumphant.
A number of Republic personnel received various forms of commendation for their performance in the Battle of Kamino. Cody and Rex promoted both Echo and Fives to the prestigious rank of Advanced Recon Commando, while Wilhuff Tarkin was decorated for his involvement in the campaign. The Kaminoans resumed their production of clone troopers for the Republic, and Ti continued to collaborate with Kamino's cloners to train and expand the ranks of the Grand Army for the remainder of the war.
Political intrigues
Not all battles of the Clone Wars were fought between the Republic's clone troopers and the Confederacy's battle droids. Occasionally, Dooku relied on his contacts in the trade guilds to engineer plots that forced planets into joining the Confederacy. One such scheme involved the moon Pantora, which was a member of the Republic. Under the pretext that the Pantorans owed outstanding debts, the Trade Federation suspended all commerce with the Pantora system and blockaded Pantora. When the Republic Senate appeared unsympathetic to their plight, the Pantorans began to rally against the Republic. Complicating matters was Dooku's offer to aid the Pantorans on the condition that they join the Confederacy. The incident occurred not long into Baron Papanoida's first term as chairman of Pantora. In response to the unfolding crisis, Papanoida sent Senator Riyo Chuchi to Coruscant to convince the Senate to side with Pantora.
Hoping to legitimize the blockade of Pantora, Lott Dod reiterated the Trade Federation's claims of neutrality, which the Commerce Treaty of 1647 guaranteed. Still, Chuchi refused to back down in her rebuttals of Dod's claims, earning the support of colleagues like Padmé Amidala. Yet, Dooku resorted to other tactics to convince the Pantorans to join the Confederacy. After Papanoida and his family arrived on Coruscant to meet with Chuchi, the Separatists hired Greedo and another bounty hunter to kidnap Papanoida's two daughters, Chi Eekway and Che Amanwe, from the family's apartment. At the same time, Dooku personally offered to help Papanoida find his daughters.
Ahsoka Tano, who was good friends with Chuchi, volunteered to aid Papanoida's search for his daughters. Papanoida and his son, Ion, tracked down Greedo at Jabba's Palace on Tatooine. Speaking to Jabba, Papanoida cited the Hutt Clan's treaty with the Republic and persuaded Jabba to let him confirm that Greedo was one of the kidnappers, by matching Greedo's blood against a blood sample from the crime scene. Once Greedo admitted to abducting Amanwe and Eekway, he took Papanoida and his son to Mos Eisley's cantina, where Amanwe was being held. After a short shootout with Greedo's comrades, Papanoida and Ion managed to rescue Amanwe.
Meanwhile, Chuchi and Tano paid a diplomatic visit to the Trade Federation's Droid Control Ship that was blockading Pantora. Aboard the vessel, they located and liberated Eekway from a holding cell. Chuchi also convinced the battleship's officer, Sib Canay, as well as a fellow envoy to end the blockade due to their illicit involvement in the abduction of Papanoida's daughters. Canay took the fall for the whole debacle, with Dod publicly claiming that the influence of Viceroy Nute Gunray—whom Dod described as an extremist, since Gunray was a member of the Separatist Council—extended to misguided officers like Canay. In the end, the Trade Federation relinquished its blockade of Pantora and resumed trade with the Pantorans.
A potential rift later emerged between the Republic and the Hutt Clan, which had been allies ever since Dooku and Ziro the Hutt's plot to overthrow Jabba. Since Ziro possessed a holodiary that documented the Grand Hutt Council's illicit dealings, Jabba and the Hutt Council decided to forcefully obtain custody of Ziro from the Republic. To that end, the Hutts hired Cad Bane to spring Ziro from the Republic Judiciary Central Detention Center. Bane did so by collaborating with fellow bounty hunters Aurra Sing, Shahan Alama, and Robonino to engineer a hostage crisis in the Republic Senate. Bane's high-profile breach of Coruscant's security consequently forced Sheev Palpatine to release Ziro from prison. Jedi Masters Obi-Wan Kenobi and Quinlan Vos tried to recapture Ziro, but Ziro's ex-lover, the renowned singer Sy Snootles, killed him on Teth and retrieved the Hutt Council records as part of a prior arrangement with Jabba. Due to the Confederacy's million-credit bounties on Jedi, Bane—who had also pursued Ziro to Teth—attacked Kenobi and Vos, but their skirmish resulted in a draw.
No end in sight
Over a year into the Clone Wars, figures on both sides of the conflict nearly succeeded in ending the bloodshed. Their venture for peace emanated from the Republic Senate's endless debates about escalating its campaign against the Confederacy. Many of the Republic' social services—including education, infrastructure, healthcare, and basic amenities—had suffered from budget cuts in favor of military spending. Furthermore, the war effort's fiscal cost dragged the Republic into debt, leaving it on the verge of bankruptcy. In response, Senator Gume Saam proposed a bill to open new lines of credit with the InterGalactic Banking Clan, which would facilitate future loans for the Grand Army's expenses. In truth, Saam's proposal was a war profiteering ploy, since the legislation would deregulate the banks and thus allow the Banking Clan, the Trade Federation, and the Techno Union to reap immense profits from the war.
Though Bail Organa persuaded the Senate to table Saam's bill, Padmé Amidala remained concerned about the war's pervasive bloodshed. Consequently, she sought out a private meeting with her old friend Mina Bonteri, who represented her homeworld of Onderon in the Separatist Senate. In doing so, Amidala circumvented the Republic's law against speaking with Confederate officials, a policy that prevented the Republic from recognizing the Confederacy as a legitimate state. Amidala and Ahsoka Tano used the latter's special Jedi clearance to smuggle themselves onto Raxus, where Amidala persuaded Bonteri to introduce a proposal to the Separatist Senate to initiate diplomatic negotiations with the Republic. Bonteri's measure passed, thereby raising the prospect of an end to the war.
A potential resolution to the Clone Wars jeopardized the Sith's plans for galactic conquest, since their endgame had not yet come to fruition. Moreover, Saam and other Confederate-leaning members of the Republic Senate, including Lott Dod and Nix Card of the Banking Clan, were determined to pass the financial deregulation bill by any means necessary. Card proposed that they engineer a Confederate assault on Coruscant, which had not experienced a large-scale attack in over a millennium. Dooku agreed to Card's idea, since it would sow fear on the Republic capital and thus motivate the Senate into approving Saam's bill. Grievous subsequently sent a six-member team of demolition droids to sabotage Coruscant's central power distribution grid. Their bombing coincided with the Separatist Senate's offer for peace talks, thereby sullying the apparent sincerity of Bonteri's monumental peace initiative.
As Grievous's bombing plunged Coruscant into a planet-wide blackout, Dod and Saam decried the Confederacy for its unprovoked assault. As Card had predicted, the Senate voted to deregulate the Banking Clan, with multiple senators calling for an expansion of the Grand Army. Even as Amidala and her like-minded allies advocated for reductions to military spending, the Sith derailed her and Bonteri's joint initiative for peace. Dooku had his agents murder Bonteri, then alleged that Bonteri had perished in a Republic assault, which he used as justification to withdraw the Separatist Senate's offer for negotiations. Bonteri was survived by her son, Lux, who embarked on a quest to kill Dooku in retaliation for his mother's death.
In the absence of the peace initiative, both sides of the conflict escalated their war efforts, further prolonging the Clone Wars. The Confederacy secured a loan from the Banking Clan to finance three million new battle droids for the Separatist Droid Army. Concurrently, Republic Senator Halle Burtoni of Kamino introduced an emergency appropriations bill to produce five million more clone troopers for the Grand Army, using funding from the Banking Clan. However, the Banking Clan issued an interest rate hike on all loans due to its newfound deregulation. Moreover, Dooku utilized scare tactics by hiring the bounty hunters Robonino and Chata Hyoki to intimidate numerous senators into supporting Burtoni's pro-military proposal. Even though Amidala convinced the Senate to defeat Burtoni's resolution, a pair of assassinations—Senators Onaconda Farr of Rodia and Mee Deechi of Umbara—destabilized the situation once more. Ultimately, the Senate's militarist faction won out, rejecting Amidala's proposal to reduce military spending in favor of a scheduled increase in clone trooper production.
Year Three (20BBY-19BBY)
The apprentices of Count Dooku
As the war's second year progressed, a cycle of betrayals and vengeance consumed the Sith hierarchy, which in turn affected a number of campaigns between the Confederacy and the Republic. At the Battle of Sullust, Asajj Ventress spearheaded the Separatist navy's strike on a Republic fleet. Flying her personal Ginivex-class fanblade starfighter, Ventress led the droid tri-fighters of Trident Groups One and Two in overwhelming the Resolute. Wullf Yularen narrowly escaped from his flagship before it went down. Building on her success, Ventress gave chase to Obi-Wan Kenobi and Anakin Skywalker in their Delta-7B interceptors. However, both Kenobi and Ventress crashed in the hangar of the Separatist command ship, with Skywalker following them there.
From afar, Darth Sidious sensed Ventress's growing power in the Force, and he recognized her as a threat. Suspecting that Dooku was training Ventress as a means of supplanting him, Sidious demanded that Dooku prove his allegiance to him by eliminating Ventress. Though reluctant to do so, Dooku obeyed his Master's wishes. Dooku recalled Confederate reinforcements that were inbound to the Sullust system, then informed Ventress that she was no longer his apprentice—and that she would die. Shell-shocked from Dooku's betrayal, Ventress dueled Kenobi and Skywalker until Dooku ordered TJ-912, the tactical droid in charge of the Separatist armada over Sullust, to sacrifice their flagship and obliterate it.
Kenobi and Skywalker made it off the enemy command ship, but both they and Dooku presumed that Ventress died when the Providence-class dreadnought was destroyed from friendly fire. Afterward, Dooku had TJ-912 withdraw their fleet from the Sullust system, conceding victory to the Republic. In actuality, Ventress had survived, albeit barely. Captain Ratch and his band of scavengers found her in the wreckage of her starfighter and brought her aboard their freighter, the Raider. Ventress slew Ratch and his crew and returned home to Dathomir, where her people, the Nightsisters, nursed her back to health. When Ventress and her fellow Nightsisters Naa'leth and Karis failed to assassinate Dooku at his palace on Serenno, Ventress conspired with Mother Talzin, the leader of her Nightsister clan, to exact her revenge on Dooku by different means.
From Dathomir's village of subservient Nightbrothers, Ventress procured a formidable warrior who would replace her as Dooku's next apprentice: Savage Opress. Before gifting Opress to Dooku, Talzin and her Nightsister witches imbued Opress with their magicks, bringing him under their control. Officially, Talzin declined Dooku's proposal for an alliance between the Nightsisters and the Confederacy, as her clan had no interest in becoming involved in the Clone Wars. In any case, Dooku opted to assess Opress's abilities by sending him to an active battlefront on Devaron. There, the Separatist Droid Army was laying siege to the Temple of Eedit, a Jedi temple that doubled as an outpost for the Grand Army. Opress was the sole survivor of the battle, as he butchered Clone Commander Trauma and his clone soldiers, as well as Jedi Master Halsey and his Padawan, Knox.
Impressed by Opress's performance, Dooku trained his new apprentice in the ways of the Sith, hoping to depose Sidious in accordance with the Rule of Two. Opress's next task was to abduct King Katuunko of Toydaria, for Dooku still harbored a grudge against Katuunko due to the latter's refusal to ally Toydaria with the Confederacy. However, Opress's massacre on Devaron had caught the attention of the Jedi High Council. After clone commandos Boss, Fixer, Scorch, and Sev of Delta Squad recovered Halsey's and Knox's bodies from the Temple of Eedit, Kenobi and Skywalker went to investigate Opress's connection to Dathomir. The two Jedi headed to Toydaria after learning from Talzin that Opress was currently there.
Everything came to a head at Toydaria. Opress cut through the Toydarian palace's royal guards, but when Kenobi and Skywalker interfered, Opress Force-choked Katuunko to death. When Opress brought Katuunko's corpse aboard Dooku's Providence-class dreadnought in orbit of Toydaria, Dooku was furious that Opress had disobeyed his orders to keep Katuunko alive. At that moment, Ventress entered Dooku's chambers and activated the spell that ensured Opress's loyalty to her. An intense duel erupted as Opress and Ventress tried to kill Dooku, but it escalated into a three-way confrontation when Opress broke free of Ventress's control and turned on both of his former masters. Evading Opress, Ventress pursued Dooku to the lower decks. But even in single combat, she was unable to defeat the Sith Lord. Ventress barely made it into an escape pod, and she departed from Dooku's dreadnought, now facing an uncertain future.
Meanwhile, Opress again encountered Kenobi and Skywalker after they reached Dooku's dreadnought aboard the Thief's Eye, the personal yacht of the late Katuunko. When Dooku's battle droids opened fire on them in the main hangar, Opress and his Jedi adversaries escaped separately from the cruiser, bringing the showdown to an end. Opress limped home to Dathomir, where Talzin sent him on a quest to save his long-lost brother, Darth Maul, who had once been Sidious's apprentice and was in fact Talzin's son.
Brother
Savage Opress is still on the quest for his long-lost brother, Darth Maul, he was sent on by Mother Talzin, but with each day he becomes stronger and more uncontrollable. As a result, Count Dooku informs General Grievous of Opress' growing power, while Asajj Ventress and Anakin Skywalker also sense something is amiss, concerning both of their respective companions, Latts Razzi and Ahsoka Tano.
Meanwhile, while Opress is on the run from authorities after an altercation at a local diner on Stobar, he finds faint clues about Maul's whereabouts in the dust clinging to an assortment of cargo crates and, after tracing their origin back to a freighter which had recently visited Lotho Minor, he forces the captain to take him there. Skywalker, meanwhile, visited the same diner shortly after the altercation, resulting in a standoff where the diner's owner, Loubo, tried to defend the diner with a frying pan before the misunderstanding was cleared up.
Once they have arrived and Opress has pinpointed Maul's location in the local junk lands, he callously ditches the captain for flying past the location where Opress's pendant glowed, and proceeds to search for his brother. The amulet Mother Talzin has given him to track Maul soon fails, but a resident Anacondan named Morley offers his guidance. Dodging the place's indigenous hazards – Refuse incinerator droids, a band of hostile Junkers and a deluge of acid rain – they arrive at a lodge where Opress' amulet flares back to life, indicating that Maul is nearby. But at this very moment Morley betrays Opress, plunging him down a chute into the junk land's underworld where his "master" would deal with Opress.
Down in the tunnels beneath the junk, Opress is stalked and attacked by a spider-like creature who is eventually revealed to be an emaciated and deranged Maul, transformed into a centauroid half-spider cyborg. Morley takes this inopportune moment to reappear, asking for "leftovers", and under Opress' tight grip reveals that while he did exploit Maul for his own gain, it was not him who had turned him into a cyborg or left him in his current insane state, before he is choked to death. When Opress talks to him, Maul tells him in between his mad ravings about how he was reduced to this pitiful state and that he seeks revenge on the Jedi, especially the one who did this to him. However, Opress' quest, and the menace it presents, has not gone unnoticed by the strongest Force wielders in the galaxy, and Yoda has no choice but to reveal to Obi-Wan Kenobi that an old enemy has come back from the dead to haunt him once more.
Reunited, Darth Maul and Savage Opress travel back to Dathomir, where they are led by Mother Talzin to her village, where she removes Maul's spider-like cybernetics and uses magicks to create new cybernetic legs, as well as restore Maul's sanity. Once back to full health, Maul decides to wreak his revenge on the man who reduced him to his state: Obi-Wan Kenobi.
To bring him to them, Maul and Opress travel to a village on the planet Raydonia, slaughter the inhabitants and send a hologram message to the Jedi Temple, challenging Obi-Wan to come to them. Despite Mace Windu's suggestion to send in a Jedi task force, Obi-Wan decides that he must go alone to rectify his mistake. But as Windu expresses his concerns about this undertaking, Yoda cryptically states that Obi-Wan will not be alone in this endeavor – and as he speaks, in a certain place on Tatooine, Asajj Ventress learns of a reward placed on the head of Savage Opress and goes off after him.
Obi-Wan travels to the Raydonian village and is quickly taken down by Maul and Opress, who take him aboard their hijacked freighter to be tortured to death. However, just before they take off, Ventress has landed on the planet, found their ship and hitched a ride. Appearing before the two brothers, she taunts them, making them abandon an unconscious Obi-Wan to search for her. Ventress returns to Obi-Wan, wakes him up and lends him one of her lightsabers for his defense when Maul and Opress return. The two team up in order to fight the brothers, but find themselves outmatched and just barely escape by jettisoning the ship's cockpit, leaving Maul and Opress adrift. Despite this setback, Maul is satisfied that the Jedi will yet come after him once more and that he will get his revenge after all.
Citadel prison break
A year and nine months into the Clone Wars, the Nexus Route—a little-known hyperspace lane that connected Coruscant with the heart of Separatist space—gained critical importance for both the Republic and the Confederacy. When Jedi General Even Piell and his crew unearthed the coordinates of the Nexus Route, the Confederacy targeted him for capture. As a Confederate flotilla overwhelmed his Star Destroyer, Piell divided the Nexus Route's coordinates with his naval captain, Wilhuff Tarkin. Both of them memorized half of the information as a safeguard against torture. The Separatists thereafter abducted Piell, Tarkin, and their clone navigation officers and incarcerated them in Lola Sayu's infamous Citadel prison, which was being overseen by Warden Osi Sobeck.
After receiving word of Piell's capture, the Jedi High Council assembled an infiltration team to rescue him and his crew from the Citadel. Kenobi and Skywalker received command of a squad of clone troopers, with additional support from Commander Cody, Captain Rex, and ARC troopers Echo and Fives. Much to Skywalker's later consternation, Ahsoka Tano joined the mission even though he ordered her not to do so. At the Jedi Temple, the Jedi and clones encased themselves in carbonite to mask their life form signatures from the Confederacy's blockade of Lola Sayu. The dangerous operation began when R2-D2 and a squad of reprogrammed B1 battle droids transported the Jedi and clones to the Lola Sayu system aboard a pilfered Sheathipede-class shuttle. Once they had bypassed the blockade and reached Lola Sayu's surface, R2-D2 unfroze his comrades from their carbonite blocks.
Despite Tano's unexpected appearance, Kenobi and Skywalker let her join their operation. After free-climbing a cliff to reach the Citadel, the infiltration team rescued Piell, as well as Tarkin and their clone officers. Along the way, they evaded Sobeck's countermeasures, which ranged from wall-mounted blaster cannons and electrical emitters, to elite BX-series droid commandos. Nevertheless, the squad incurred casualties from Sobeck's traps. As part of their plan's next stage, Kenobi and Skywalker divided their forces. While Skywalker and Tano brought Tarkin, Rex, Fives, Echo, and several troopers into the caverns beneath the Citadel, Kenobi, Piell, Cody, and the other soldiers created a diversion by exploding one of the Citadel's upper decks. Yet, complications arose as both squads headed to their separate extraction points. R2-D2 and his reprogrammed droids landed the shuttle at the Citadel's rear landing pad, but Sobeck's tactical droid, K2-B4, intercepted them there. Moreover, Sobeck recaptured Cody, Kenobi, Piell, and their men, but R2-D2 and his battle droids freed them from Sobeck's droid security teams.
To reach their extraction point at the Citadel's external fuel pipeline, Skywalker, Tano, Tarkin, and their soldiers used thermal detonators to rupture a blocked cavern as well as a pursuing squad of battle droids. However, when R2-D2 and the shuttle missed their scheduled rendezvous, Skywalker and Tano resorted to their backup plan. After using more of their explosives to detonate the fuel in the exterior pipeline, Skywalker, Tano, Tarkin, and their men proceeded to the prison's main landing pad. They arrived at the airfield just as Kenobi, Piell, and their squad mounted a desperate offensive to eliminate the battle droids that had separated them from their shuttle. While Kenobi, Piell, Skywalker, and Tano concentrated on destroying an incoming squad of battle droids aboard Single Trooper Aerial Platforms, Echo and Fives focused their attention on the ground-level enemy infantry. Yet, just as Echo tried to board the shuttle, a droid commando fired a turret blast at the craft, causing a fiery explosion that consumed the shuttle and, presumably, Echo.
Without their shuttle, the four Jedi escaped from the Citadel's airfield with Tarkin, as well as Cody, Rex, Fives, and their remaining troopers. As they made their way across Lola Sayu's inhospitable terrain, Kenobi and Skywalker notified the Jedi High Council that they would require an extraction from Lola Sayu. Consequently, the Council sent four of its members—Kit Fisto, Adi Gallia, Plo Koon, and Saesee Tiin—to the Lola Sayu system with a battle group of four Star Destroyers. In the meantime, Piell and his allies headed for an island that the Council had selected as their extraction point. En route, an endless number of battle droid squads pursued the Jedi and clones, leading R2-D2 to sacrifice his reprogrammed battle droids to delay the enemy forces as long as possible.
It was not long before Sobeck personally took charge of the effort to recapture his prisoners. Under pressure from Dooku to recover the Nexus Route intelligence, Sobeck dispatched a hunting party of ravenous anoobas to locate the Jedi and clones, then followed with a squad of droid commandos. Although the Jedi and clones defeated Sobeck's anoobas and LM-432 crab droids, their momentary victory came at a severe cost. Piell died from fatal wounds from one of the anoobas, using his final breaths to pass his half of the Nexus Route coordinates to Tano. She and her comrades took a brief respite from the battle to lay Piell to rest, cremating his body in one of Lola Sayu's rivers of sulfurous lava.
Shortly thereafter, Fisto, Gallia, Koon, and Tiin arrived in the Lola Sayu system with their fleet of Star Destroyers. While Admiral Coburn commanded the Republic fleet's assault on K2-B4's blockade of warships, Fisto, Gallia, and Tiin served as wing commanders and, in their Delta-7B interceptors, escorted Koon and Commander Wolffe's space gunship so that they could extract their comrades from the surface. Koon and Wolffe reached the appointed rendezvous point just after Sobeck arrived there with his battle droids to recapture Kenobi, Skywalker, Tano, Tarkin, and their soldiers. Frustrated by his prisoners' periodic evasion of recapture, Sobeck simply decided to kill Tarkin to ensure that his half of the Nexus Route intelligence died with him. Yet, Tano saved Tarkin by igniting her shoto lightsaber through Sobeck, killing him. Tano and her allies then escaped with Koon and Wolffe aboard their gunship, and all of them safely returned to Coburn's fleet with Fisto, Gallia, and Tiin. The Republic armada jumped to hyperspace, thereby resulting in a major defeat for the Confederacy.
On Coruscant, the Jedi Council was saddened to learn of Piell's sacrifice. Moreover, the Jedi encountered difficulties before they could debrief the Nexus Route coordinates. Whereas Tarkin had orders to provide his half of the information directly to Sheev Palpatine, Tano remained committed to Piell's dying wish that she deliver her share of the coordinates only to the High Council. Master Yoda subsequently met with Palpatine to figure out a solution to the matter. The entire incident also led Skywalker and Tarkin to find common ground based on their similar criticisms of the Jedi Code and the Jedi Order's role as generals. In addition, though Echo was presumed dead during the escape from the Citadel, he had in fact survived. The Techno Union purchased Echo from the Separatists and subjected him to extensive reconstructive surgery, fusing him with a large amount of cybernetics as part of a research project.
Conflict returns to Felucia
Later in the war, the Grand Army reopened Felucia as a battlefront against the Separatist Droid Army. As part of the Second Battle of Felucia, Rex, Skywalker, and Tano led divisions of AT-TE walkers and HAVw A6 Juggernauts deep into Confederate-controlled territory. To preserve his grip on the Felucia system, General Grievous dispatched a C-9979 landing craft with droid reinforcements to tactical droid TZ-33's outpost on Felucia. With the aid of Plo Koon, Skywalker and Tano mounted a three-pronged offensive on TZ-33's base. Once their AT-TE walkers launched a volley of fire at the outpost and baited TZ-33 to deploy his droid infantry through the facility's front gate, Rex and Skywalker led a squad to breach the front gate's defenses. While Koon, Commander Wolffe, and their jetpack-equipped troopers charged the outpost's left flank, Tano worked with Sergeant Sinker, Corporal Comet, and Boost and other soldiers to scale the rear wall. All three teams converged at the outpost's central command post, where they eliminated TZ-33 and his remaining infantry.
However, Tano found herself unable to help her allies sack TZ-33's outpost. She was declared missing in action after Trandoshan hunters captured her and brought her to the moon Wasskah, where the Trandoshans hunted her and other captives for sport. In spite of numerous perimeter sweeps of TZ-33's outpost, Koon and Skywalker failed to find Tano, and they withdrew their forces from Felucia the following morning. Nevertheless, Tano returned to active duty after escaping from Wasskah with several Jedi younglings, who had also been stranded there for quite some time.
Civil War on Mon Cala
Following the murder of Mon Calamari King, Yos Kolina, the Separatists and the Republic sent representatives to assist in the ascension of a new king. The Quarren Isolation League under Chieftain Nossor Ri wanted a Quarren king, not Kolina's son, Prince Lee-Char to rule. The Separatist observer, Commander Riff Tamson stirred the Quarren against both the Republic, Mon Calamari and the Prince. The Prince's military, Captain Gial Ackbar, Senators Padmé Amidala, and Meena Tills tried to negotiate with Quarren to no avail. The Jedi Council then sent Master Kit Fisto and Commander Ahsoka Tano to reinforce Anakin Skywalker and the Mon Calamari Guard against the Quarren's and Tamson's forces.
At first, the Republic and the Mon Calamari were able to hold against the Separatist forces after Commander Monnk's SCUBA troopers reinforced them. However, the Republic forces were forced to retreat with the prince to the depths below when Tamson blows up their ship.
Meanwhile, the Jedi High Council had called the Gungan Grand Army to reinforce the prince and his forces. Tamson countered this when he rallied his Trident ships to create whirlpools around the battle sites. Tamson attempted to personally take out the prince, but Kit Fisto engaged him long enough for Lee-Char and Ahsoka Tano to escape.
Skywalker, Amidala, Fisto, and Binks were eventually captured by Tamson, who proceeded to torture them for answers using Mon Calamari eels, although to no avail. To get an answer faster, Tamson bit a hole in Amidala's helmet. However, he soon rushed back to the throne room when he learned that Lee-Char was apprehended. With Tamson gone, Fisto and Skywalker used the Force to remove the water from Amidala's helmet, and Binks proceeded to seal the puncture with his saliva.
Meanwhile, Tamson sentenced Lee-Char to public execution while proclaiming leadership over both the Quarren and Mon Calamari. This caused Nossir Ri to doubt what Tamson had initially promised. As the prisoners are brought to witness the execution, Ri communicated the Quarren's support to Ackbar, who united all the prisoners. Just before the prince was executed, the Quarren, Mon Calamari, Jedi, Gungans, and clones engaged the droids in battle once again. Tamson told Lee-Char that he was the one who killed his father. The prince pursued him as he tried to escape by throwing explosive knives at the Mon Calamari. Lee-Char got one in Tamson and shot it, and this move killed Tamson, and the Separatists remains were left to sink.
After the end of the battle, Lee-Char was crowned the new king of the Quarren and Mon Calamari.
Takeover of Mandalore
The Mandalorian Death Watch allie with the Sith Lords Darth Maul and Savage Opress, launching a coup against the New Mandalorian government in an attempted takeover of Mandalore. Together, the Death Watch and the Sith assembled an army of criminals, from Black Sun and the Pyke Syndicate to the foot soldiers of the Hutt Cartels, all coming together as a coalition known as the Shadow Collective. In order to undermine the rule of the New Mandalorian leadership, the Collective's criminal element was ordered to attack New Mandalorian territory across Mandalore—including the New Mandalorians' capital city of Sundari—in order to sow panic and chaos, only for the Death Watch to arrive as rescuers, saving the people from the offworld attackers.
The Shadow Collective's plans succeeded, and Pre Vizsla was able to dethrone the New Mandalorian leader, Duchess Satine Kryze, and replace her as Prime Minister and self-titled Mand'alor. However, Vizsla's ambitions led him to betray his Sith allies and have them imprisoned. While in prison, Darth Maul came across the former Prime Minister of the New Mandalorian people, Almec, and elected to use the disgraced leader to replace Vizsla. Breaking free of his incarceration, Maul stormed the Sundari Royal Palace with his apprentice and Almec in tow, challenging Vizsla to a duel for leadership. Honorbound, Vizsla accepted, and the two combatants fought ferociously through the throne room, but ultimately it was Maul who proved victorious, slaying Vizsla and taking his place as leader of Death Watch. Installing Almec as the new Prime Minister, Maul secured a puppet ruler to lead the New Mandalorians while keeping his presence in the background a secret to the populace at large.
The Mandalorian civil war erupted in the capital city of Sundari after the Shadow Collective deposed Duchess Satine Kryze and her New Mandalorian government. Maul challenged Pre Vizsla, the leader of Death Watch, to a leadership battle to determine which of them would rule Mandalore. Maul defeated and killed Vizsla in single combat, however not all of the Death Watch forces agreed to acquiesce to the sudden shift of leadership. Bo-Katan Kryze, the Duchess' sister and a Vizsla loyalist, gathered her forces and rebelled against Maul's rule, leading to the fighting. Obi-Wan Kenobi also participated in the battle, as did Darth Sidious, who fought Maul and Maul's brother, Savage Opress. In the ensuing fight, Savage was killed by Darth Sidious, while Maul was captured by the Sith Lord and imprisoned in the Spire on Stygeon Prime.
Bombing of the Jedi Temple
As the Clone Wars continued throughout the galaxy, many citizens of the Galactic Republic started to disagree with the ways of the Jedi, and no longer viewed them as peacekeepers due to their new role as generals leading the fight against the Confederacy of Independent Systems. Barriss Offee, Padawan to Jedi Master Luminara Unduli, grew to harbor similar views—ultimately believing that both the Jedi and the Republic had lost their way. As a result of this mindset, she sought to make a statement against the Jedi by detonating a bomb within the Jedi Temple. Enlisting the help of citizen Letta Turmond, a radical anti-war activist, Offee gave Turmond NM-K reconstitutor nano-droids to feed to her husband, Jackar Bowmani, turning Bowmani into a living bomb. Bowmani was a munitions expert in the Jedi Temple, giving Turmond and Offee direct access to the temple hangar.
Jackar Bowmani was working in the Jedi Temple hangar when the nano-droids within him detonated, killing Bowmani and multiple bystanders. The casualties who died as a result of the explosion were six Jedi, including Jedi Knight Tutso Mara, as well as several clone troopers and maintenance workers. In addition to the fatalities, several workers were injured by the attack and subsequently taken to the temple's medical facility.
As rumors began to spread of possible Jedi involvement in the attack, Grand Master Yoda recalled General Anakin Skywalker and his Padawan Ahsoka Tano from their defense on Cato Neimoidia. Upon their return to Coruscant, the Jedi Council assigned Skywalker and Tano the task of discovering the culprit behind the attack. As neither of them were present in the temple at the time of the bombing, Yoda believed that they could be trusted to lead the investigation.
Skywalker and Tano were partnered with Russo-ISC, a crime scene analysis droid, to investigate the crime, and Tano and Russo began to interview the witnesses. During these interviews, Tano and Russo learned about potential suspect Jackar Bowmani, who went missing after the bombing. After informing Skywalker about the suspect, Skywalker found Letta Turmond in a protest that was occurring outside the Temple and brought her in for questioning. She claimed that Bowmani could not have been involved, but after further investigation nano-droids were discovered at the site of the bomb and later in Bowmani's bloodstream, allowing the Jedi to believe that Bowmani himself was the bomb. Skywalker and Tano went to Bowmani and Turmond's house to further investigate, and found traces of nano-droids in the food, confirming their suspicions. The Jedi were interrupted by Turmond, who ran when asked to come in for further questioning. Once captured, Turmond was arrested for the bombing of the Jedi Temple and sent to prison. With Turmond locked away, any suspicions that a Jedi could have been involved were lost.
Shortly after the funeral ceremony for the Jedi victims of the attack, Offee killed her co-conspirator and framed Tano for the deed. Tano escaped from Republic custody in the hope of proving her innocence, but was consequently hunted as a fugitive by the Jedi and Republic Military. Following her capture, Tano was expelled from the Order and subsequently placed on trial for murder and treason. Although the charges were dismissed after Skywalker apprehended Offee and forced her to make a full confession, Tano declined the Council's offer of reinstatement and chose to seek a new path instead.
Mission to Skako Minor
During the campaign between the Galactic Republic and Confederacy of Independent Systems over control of the Core Worlds planet Anaxes and its important shipyards, Republic forces began to lose ground, sustaining unusually heavy losses. Clone Captain Rex of the 501st Legion realized that the Separatist forces, led by Admiral Trench, were somehow using his own battle plans and strategy algorithm to counter the Republic Military. However, besides Rex, only two other people had ever known of the algorithm's existence: the late ARC troopers CT-5555 "Fives" and CT-1409 "Echo". With Fives' confirmed death on Coruscant and Echo's seeming death in an explosion during the Battle of Lola Sayu, Rex should have been the only person alive who knew about the algorithm.
However, Echo had not actually died at the Citadel: he had barely survived the destruction of the Sheathipede-class Type B shuttle he had been attempting to retrieve,
An infiltration of the Separatists' Cyber Center on Anaxes involving the irregular clone commando unit Clone Force 99, the so-called "Bad Batch", led to the discovery of a signal from Skako Minor that sounded like a human voice and identified itself with Echo's number of CT-1409. Despite lacking official permission, Skywalker, Rex and the Bad Batch travelled to Skako Minor, found Echo, and were able to rescue him and return to Anaxes.
Siege of Mandalore
Mandalore's neutrality during the pan-galactic Clone Wars ultimately failed to stem the violent history of the Outer Rim world. In 19 BBY, the Sith Lord Darth Maul utilized his criminal organization known as the Shadow Collective to conquer Mandalore, ousting Duchess Satine Kryze and her pacifistic regime of the New Mandalorians. Yet, Maul's takeover of the Mandalorian Death Watch led one of the splinter group's lieutenants, Bo-Katan Kryze, to form the Mandalore resistance, a rebel cell that opposed Maul's leadership. Maul further deepened his enmity with Kryze after he murdered her sister, Satine.
As part of a campaign against Maul's super commandos, Kryze rescued Jedi Master Obi-Wan Kenobi from Maul's captivity. Before Kenobi left Mandalore, Kryze told him to inform the Galactic Republic of the state of the embattled planet, since she hoped that a Republic invasion would result in Maul's demise. Yet, the Jedi High Council believed that the Republic Senate would refuse to intervene in the affairs of a neutral star system like the Mandalore system.
Maul, meanwhile, was defeated and captured by his former Sith Master, Darth Sidious. Even though Maul later escaped from Sidious' custody, he remained absent from Mandalore. Still, the Mandalore resistance kept the Republic apprised with intelligence regarding the world, including the fact that Prime Minister Almec, the puppet leader whom Maul had installed during his coup, maintained ties to the Shadow Collective. For their part, Jedi Generals like Kenobi and Mace Windu were determined not to let Mandalore fall to the Confederacy of Independent Systems. To that end, Kenobi and Windu led a Republic offensive against Maul and his Shadow Collective; however, Maul remained at large. In the end, Sidious and the Confederacy quashed the Shadow Collective, robbing Maul of his criminal power base.
Following Maul's escape from Dathomir with Gar Saxon and Rook Kast, Kryze and several of her loyalists such as Ursa Wren were tracking Maul through his dealings and communications on Oba Diah with Marg Krim and the Pyke Syndicate. After witnessing former Jedi Padawan Ahsoka Tano, who Kryze had encountered before on Carlac, escape the Pykes with her new associates the Martez sisters, Kryze and her warriors followed Tano back to Coruscant and recruited her to help deal with Maul, their mutual enemy.
Kryze's desire for a Republic invasion of Mandalore was eventually fulfilled. She and Tano tracked Maul for some time, and using codes Tano had stolen from the Pykes, they learned that he had returned to the Mandalorian capital of Sundari. Lacking the numbers for a prolonged siege and with time of the essence, Tano contacted her former master, Jedi Knight Anakin Skywalker, on his "Fulcrum" frequency.
The Grand Army of the Republic was focused on other battlefronts as part of the Outer Rim Sieges, and Jedi Generals Skywalker and Kenobi had just completed a battle on the planet Yerbana. Despite wanting to assist Tano, Skywalker was unable to come personally because he and Kenobi were sent to Coruscant to respond to an attack by General Grievous, who had kidnapped the Supreme Chancellor. In his absence, Skywalker split the 501st Legion and allocated his former apprentice the 332nd Company of clone troopers, who had repainted their helmets to match her facial markings. To get around the fact that Tano, having left the Jedi Order, was no longer part of the Republic Military and thus could not officially be placed in command of the unit, Skywalker promoted Captain Rex, an old friend of Tano's, to Commander and officially designated her as an advisor. He also returned Tano's lightsabers to her. Before parting ways, Kenobi advised Tano to capture Maul rather than kill him, as Kenobi had apparently done so once, but he had a habit of not staying dead.
Maul, however, had foreseen Kryze seeking the help of the Jedi, and had planned for it. However, he hoped for Kenobi to accompany her, wishing to finally take his revenge on the Jedi Master. The darksider was supported by the puppet Prime Minister Almec and super commandos Gar Saxon and Rook Kast. He also had the support of his reformed Shadow Collective.
Tano, Rex and Kryze arrived at Mandalore with their forces in three Venator-class Star Destroyers. A fleet of LAAT gunships and Kom'rk-class fighters descended upon Sundari from orbit. On the way down, the attacking force received a transmission from Almec, who indignantly told Kryze that the presence of Republic forces violated a century-old treaty and that she would be seen as an enemy in the eyes of the Mandalorian public for this action. Kryze retorted that she did not care and that she was coming for him since he was a puppet of Maul. Kryze then contacted Ursa Wren, in the city, for information on Maul's whereabouts, and Wren reported that he was definitely in the city, but she could not lock down his exact position.
Almec ordered Saxon to ready Sundari's defences, and Kast to inform the syndicate. The approaching forces soon came under attack from flying supercommandos, with a gunship being shot down. Kryze's warriors took to the air on their jetpacks to fight the enemy. As Shadow Collective supercommandos boarded a few gunships and killed the troopers inside, Kryze took to the air as well, followed by the clone troopers equipped with jetpacks. Rex, preparing to join the battle, apologized to Tano that he hadn't brought her a jetpack, but she assured him she didn't need one and proposed a race to see who would get down to the Sundari shipping docks first before leaping out of the gunship, causing him to chuckle. Leaping from ship to ship, Tano fought the enemy supercommandos she encountered, clearing them out of one gunship before eventually landing on a damaged LAAT hurtling towards Sundari. Finding that the pilot was unable to eject, Tano cut off the canopy to help him, for which he thanked her before doing so. Tano jumped off the stricken gunship before it crashed into the dock, facing a squad of supercommandos. She was swiftly backed up by Wren and her forces, as well as the clone troopers. Tano did not advance into the city until after Rex caught up to her, remarking that she'd won, to which he responded that some things never changed.
The Mandalorian and Republic forces were quickly able to take the shipping docks, and Saxon and Kast's forces began to be pushed back as well. Informed of the development, Almec ordered the two and their forces to the Undercity and promised they would be met. Maul, having expected the assault, was waiting down in the sewer system, planning to set a trap for the Jedi Kryze brought with her, whom he had been hoping would be his old enemy Kenobi. Saxon was pursued by a squad of clone troopers led by Captain Vaughn.
Tano regrouped with Rex and Kryze, before the Mandalorian set out with her squad to go after Almec at the Sundari Royal Palace. Tano ordered Rex to go reinforce Wren at the docks to decrease the chances that Maul might escape the city, to which he pointed out that if the former Sith was gone, all of their effort would play into his hands. Rex was then contacted by Vaughn, who reported that he and his squad had tracked Saxon entering the Undercity. Tano responded that she would be there, and she and Rex headed out. Arriving at the undercity portal, Tano was informed by Vaughn that Saxon had entered the city's sewage and maintenance pipes, and that he had seemed to be in a hurry. Tano set out into the tunnels with Vaughn and his squad.
At the palace, Almec was informed by Kast of Tano's entry into the tunnels, as Maul had predicted, just before Kryze and her Nite Owls attacked. Kryze subdued several warriors before taking down Almec after a brief fight, demanding to know Maul's whereabouts. Cowed, Almec taunted her that Maul had wanted her to bring the Jedi to Mandalore, but she had brought the wrong one. Kryze immediately attempted to contact Tano to warn her, but got only static.
Down in the tunnels, Kast and her warriors watched Tano and her troops pass through the tunnels. Kast revealed herself and fired a missile at Tano, which knocked her down as she deflected it into a wall. The clones rushed after the Mandalorians, and Tano called after Vaughn to wait as she recovered herself. Running after her troops, Tano was too late as Kast and Saxon's warriors killed them all. Entering an open junction, Tano found Vaughn, who apologized to her just before he died. Tano was immediately surrounded in three directions by Kast, Saxon and their warriors. Maul emerged from the fourth tunnel as Tano took up a stance with her lightsabers, demanding to know why she had come instead of Kenobi.
Rex and Tano's company of clone troops laid siege to Maul's holdings on Mandalore, causing Maul to respond with an army of his loyal forces. Entire regions of Mandalore erupted into battle zones, and, in the event dubbed The Night of a Thousand Tears, gunships used their weaponry to devastate fields of Mandalorian recruits. Tano and some of her allies baited Maul into a trap. Tano briefly crossed lightsabers with Maul, luring him into a plaza where her comrades snared him in a ray shield.
Afterwards, Kryze was appointed the regent of Mandalore. Nevertheless, the Republic's success did not last long. Chancellor Palpatine, who was in fact Darth Sidious, issued Order 66, which forced the Grand Army's clone troopers to execute their Jedi commanding officers. During the ensuing chaos on Mandalore, Tano was presented with the opportunity to kill Maul, but she instead chose to save Rex. Unlike the rest of the clone troopers, Rex was not forced to attack Tano, as he had removed his control chip, an organic brain implant that compelled each clone trooper to comply with Order 66, some time prior. Both Rex and Tano escaped from Mandalore, as did Maul, while a fresh wave of violence gripped the Mandalorian homeworld.
Last Days of the Republic
Battle over Coruscant
The super tactical droid General Kalani would state his calculations showed the Separatists were on the verge of victory at the war's end, but the war's third year had shown that the Republic now held all of the momentum. While the Republic was crumbling due to attacks launched by Dooku, the Separatists had been pushed back to the spiral arms of the galaxy. This campaign, called the Outer Rim Sieges, would result in most of the Republic's Jedi and military forces fighting on these outer worlds. Another part of the sieges occurred when Grievous launched a massive offensive that pushed the Republic Military to the brink, so Jedi Generals were sent far from the Core Worlds to help the clone army. Ultimately, while the Republic had began to overwhelm the Separatist armies and the Confederacy had lost much of its territory, with what remained being targeted in the sieges, Grievous's overwhelming offensive was still a threat, and the Republic Army was also engaging in desperate campaigns across the galaxy, while the Separatists were encircling the Republic, moving ever-nearer to the systems of the Core.
Due to most Jedi and clones fighting in the Outer Rim, the Republic's capital of Coruscant was left relatively undefended. However, Republic strategists did not worry. They believed the Separatists would not dare attack the capital, but Grievous and Dooku launched an assault on Coruscant. The inexperienced Coruscant Home Defense Fleet was taken by surprise, and Grievous was able to sneak onto the surface of the planet.
Grievous eventually managed to capture Palpatine and hold him hostage. Grievous brought the Chancellor back to his flagship, the Invisible Hand. The large-scale naval battle between the Separatist and Republic forces continued, and during this attack Kenobi and Skywalker raced to save the Chancellor. The battle resulted in the death of Dooku, which was a massive blow to the Separatists and left Grievous as its new head of state. The Jedi managed to escape the ship along with the Chancellor. Grievous also escaped and fled to Utapau.
Rise of the New Order
On Utapau, Grievous, along with the rest of the leaders of the Confederacy of Independent Systems, awaited instructions from Sidious, who soon enough sent the Confederacy to the Mustafar system before Republic forces arrive. Not long after, Republic forces led by Obi-Wan Kenobi attacked the base. Kenobi managed to confront Grievous and the two began to fight. In the hassle, Kenobi managed to rip open the armor covering Grievous' gut sack. The Jedi then shot it with the General's blaster several times, killing the cyborg. The death of Grievous put Nute Gunray in charge. Meanwhile, on Coruscant, Palpatine revealed his true nature as the Dark Lord of the Sith to Skywalker, prompting Skywalker to tell Jedi Master Mace Windu. Not long after, Mace Windu along with Kit Fisto, Saesee Tiin, and Agen Kolar attacked the Chancellor. Palpatine quickly admitted to this and killed Fisto, Tiin, and Kolar. He later killed Mace Windu with the help of Anakin Skywalker, who needed Sidious to save his wife Padmé from death. The Sith quickly declared the Jedi the enemies of the Republic and sent out Order 66, which saw the clone troopers turning on their Jedi generals. Skywalker then surrendered to Sidious and the Sith Lord dubbed him Darth Vader. Vader was sent to the Jedi Temple where he killed every Jedi left in it. On Utapau, Clone Commander Cody ordered his men to fire upon Kenobi, but the Jedi survived this, however. On Kashyyyk, Commander Gree with another clone attempted to assassinate Grand Master Yoda, however the master beheaded the two with his lightsaber before they could blast him. Many other Jedi were killed during Order 66, including Ki-Adi-Mundi, Aayla Secura, Plo Koon, and Stass Allie.
After murdering the Jedi on Coruscant, Vader headed to Mustafar to eliminate Nute Gunray and the rest of the Separatist leaders, who were hiding on the planet. The fallen Jedi turned Sith Lord then received an order from Sidious to send a shutdown signal that turned off all remaining Separatist droids, ending the cataclysmic war in the process.

 The origins of the Clone Wars dated back to the time of the Old Republic, which reigned over a millennium prior to the war. That era marked a dark age in galactic history, as the Sith battled their ancient enemies, the Jedi, for control of the galaxy. The Sith suffered from infighting, which ultimately led to their defeat, but although the Jedi believed they had vanquished their foes, the Sith had merely retreated into hiding. Darth Bane, the last surviving Dark Lord of the Sith, founded a philosophy known as the Rule of Two, which dictated that the entire Sith Order would be comprised solely of a master and an apprentice. Operating in the shadows, the Sith accumulated power and influence in preparation for the endgame of their grand plan: galactic domination and revenge against the Jedi.
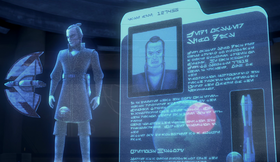 Sidious found a replacement for Maul in Count Dooku, a former Jedi Master who had left the Order and become integral to the Sith plan for galactic conquest. Sidious and Dooku, the latter of whom adopted the name Darth Tyranus, plotted to manipulate the Republic into a sham war with an opposing state. The Jedi would be forced to serve as generals for a Republic army of soldiers, who would eventually serve as their executioners. Furthermore, the conflict would destabilize the Republic and render it vulnerable to the Sith takeover.
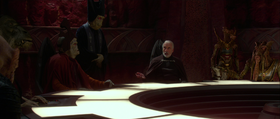 Eight years after the Invasion of Naboo, a pan-galactic Confederacy of Independent Systems began to take shape when Count Dooku commandeered a HoloNet relay station in the Raxus system and berated the Republic with condemning rhetoric. Over the next two years, a Separatist Crisis arose when thousands of star systems seceded from the Republic and flocked to the Confederacy. The Separatist Crisis sent the Republic into a frenzy, particularly as Dooku repeatedly spurned Palpatine's public requests for negotiation. The Republic Senate soon became divided over the passage of a Military Creation Act. Advocates of the bill argued that the Republic required a military force to defend itself from the Separatists, whereas others such as now-Senator Padmé Amidala believed that the measure would provoke full-scale civil war between the Republic and the Confederacy. Such a war became increasingly inevitable, with the Sith Lords poised to lead both sides of the approaching conflict that would tear the galaxy asunder.
 Skywalker was with Amidala on the nearby world of Tatooine and relayed Kenobi's message to Coruscant, where Palpatine and the High Council heard the news that the commerce guilds had joined the Confederacy. Against the Council's orders, Amidala and Skywalker rushed to rescue Kenobi on Geonosis. While Kenobi was in his custody, Dooku claimed that the entire Republic was under the sway of a Dark Lord of the Sith named Darth Sidious, and tried to persuade Kenobi to help him destroy the Sith. Kenobi refused, and after Amidala and Skywalker were similarly captured, the Geonosians sentenced all three of them to execution in the Petranaki arena.
 The Battle of Geonosis commenced when Windu and his Jedi strike team infiltrated the Petranaki arena to save Amidala, Kenobi, and Skywalker from gladiatorial combat with three beasts: an acklay, a nexu, and a reek. While the Geonosian spectators fled the arena, Dooku unleashed a massive infantry of B1 battle droids, B2 super battle droids, and droidekas against the Jedi. During the ensuing ground battle, Council member Coleman Trebor came within seconds of ending the conflict when he nearly managed to kill Dooku, but Jango Fett gunned him down before he could do so. Windu thereafter beheaded Fett, an act that would earn him the ire of his son, Boba. Within a short span, only Amidala, Kenobi, Skywalker, Windu, and a fraction of their Jedi allies were still standing. With his battle droids encircling the ring of survivors, Dooku demanded their unconditional surrender, but Windu refused to allow himself and his comrades to become hostages.
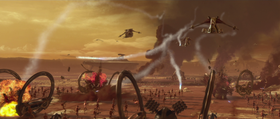 When Kenobi and Skywalker reached the hangar, Dooku defeated them in a lightsaber duel, injuring Kenobi and severing Skywalker's right forearm. The duel continued when Yoda, Dooku's former Jedi Master, arrived and proved more than a challenge for the Sith Lord. Dooku was able to escape only by collapsing a pillar on top of Kenobi and Skywalker, forcing Yoda to choose between pressing his attack and saving his fellow Jedi. Amidala arrived at the hangar with another gunship, but she and her squad of clone troopers were unable to shoot down Dooku's solar sailer. Although Dooku and the Separatist Council had escaped with their forces, the Republic declared victory in the Battle of Geonosis.
 As the Clone Wars engulfed world after world across the galaxy, the Jedi were forced to relinquish their traditional roles as peacekeepers in favor of military commands within the Grand Army of the Republic. Knights and Masters accepted the new rank of Jedi General. Even Padawans contributed to the Republic's war effort, with some serving as battlefield commanders. Among the newly promoted Jedi Generals was Anakin Skywalker, whom the Jedi High Council elevated to Knighthood. Unbeknownst to his colleagues, Skywalker had secretly married Padmé Amidala following the Battle of Geonosis, a relationship that would have repercussions for the entire war.
 Early in the Clone Wars, the Confederacy seized the Outer Rim world of Lola Sayu, the site of the infamous Republic prison known as the Citadel. The Citadel had been constructed five centuries earlier to hold Jedi who turned against the Republic. The Separatists converted the facility into a prisoner-of-war camp, using it to house Republic captives. The Separatists also invaded Millius Prime, one of the thousand moons of the remote planet Iego, and drove away its inhabitants, the peaceful Angels. The Separatists established military sites on both Iego and Millius Prime, but later withdrew from the system. Before departing, they seeded Iego's asteroid field with a security grid of laser emitters that trapped its residents on the surface.
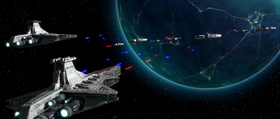 In the immediate aftermath of the Battle of Geonosis, Grievous and the Separatist Droid Army wrested control of the galaxy's major hyperspace lanes, isolating the Republic from the bulk of its Grand Army. Since their forces were spread thin, the Jedi Generals were unable to gain traction in the Outer Rim Territories, especially as worlds continued to flock to the Confederacy. As such, the Hutt Clan—which controlled Hutt Space with its network of supply routes reaching to the Outer Rim—became a coveted ally for both the Republic and the Confederacy. In a bid to secure the Hutts' supply routes for the Separatists, Dooku hatched a plot to kidnap Rotta, the son of Hutt crime lord Jabba Desilijic Tiure, and frame the Jedi Order for the crime. Dooku collaborated with Jabba's uncle Ziro, who hoped to depose his nephew as leader of the Hutt Clan. The first stage of Dooku's plan required that the Jedi's attention be diverted elsewhere; to that end, Dooku ordered his forces to conquer Christophsis, a crystalline Outer Rim world valued for its location and resources, and also the site of a Republic relief effort overseen by Senator Bail Organa. The Confederate Admiral Trench blockaded Christophsis with a massive detachment from the Confederacy navy, while Separatist ground forces subjugated the planet's inhabitants. After a number of native Christophsians mounted a futile defense of their homeworld, they requested aid from the Jedi High Council.
 Yularen briefly returned to Christophsis aboard his flagship, the Resolute, to send Tano to the planetary surface aboard a shuttle, then withdrew to rendezvous with reinforcements from the Republic Navy. Tano reached Kenobi and Skywalker just as they were preparing defenses for the next droid attack. Due to the continued lack of support from the Republic Navy, Kenobi and Skywalker remained trapped on-world with their troops, unable to comply with Yoda's order to return to Coruscant. Loathsom mounted another strike on the Republic forces, this time utilizing a mobile deflector shield to maintain a perimeter just beyond his advancing droid troops. The shield rendered the AV-7 Anti-vehicle Cannons useless, forcing the Jedi and clones to devise another strategy.
 Ventress brought the captive Rotta to an abandoned B'omarr Order Monastery on the jungle planet Teth, located in Wild Space, and fortified the site with two full battalions of battle droids. After a scouting team of Republic Advanced Recon Force troopers tracked Rotta to Teth, Skywalker and Tano proceeded there with Captain Rex and Torrent Company, Rex's command unit within the Grand Army's famed 501st Legion, to rescue the Huttlet. Kenobi, meanwhile, entered into negotiations with Jabba, who granted the Republic a single planetary rotation to save Rotta and return him safely to Tatooine.
 When Kenobi entered the monastery in search of Skywalker, he instead crossed lightsabers with Ventress. Upon learning that Skywalker had escaped with Rotta, Ventress broke off from her duel with Kenobi and fled the battlefield. Meanwhile, Skywalker and Tano piloted the Twilight into orbit of Teth, where Wullf Yularen and his Venator-class Star Destroyer were battling a Confederate armada of Munificent-class star frigates. As the Jedi tried to board Yularen's Star Destroyer, a trio of vulture droids firebombed the cruiser's main hangar. Unable to dock with Yularen's flagship, Skywalker and Tano headed directly to Tatooine aboard the Twilight.
 Back on Coruscant, Amidala was able to send word of her capture to the Republic via her protocol droid, C-3PO. Clone Commander CC-1010, nicknamed "Fox," immediately responded with a squad of clone shock troopers from the Coruscant Guard, and they raided Ziro's Palace to rescue her. Once Fox and his soldiers had arrested Ziro, Amidala used Ziro's personal holoprojector to contact Jabba, who received her message just as he was about to have Skywalker and Tano killed. Jabba was incensed to learn of Dooku and Ziro's conspiracy to unseat him, but he agreed to end all hostilities with the Jedi. Jabba subsequently signed a treaty with the Republic and granted the Grand Army its exclusive, long-awaited access to Hutt Space's supply routes. At the same time, Kenobi finished securing the Republic's victory on Teth and headed to Tatooine with Yoda, so that they could formalize the treaty with Jabba.
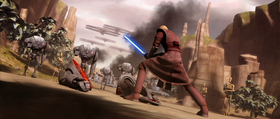 The Twi'lek homeworld of Ryloth became the next major battlefront of the Clone Wars when the Techno Union invaded the planet, aiming to pillage its wealth and resources. The Separatist navy installed a blockade of battleships in orbit of Ryloth, while the Separatist Droid Army subjected the civilian population to a brutal occupation. Besides losing a number of cities and transport hubs, the Twi'leks were cut off from food and relief supplies and thus began to starve. In response, political activist Cham Syndulla founded a Twi'lek Resistance to combat the Confederate occupation. Jedi General Ima-Gun Di, Clone Captain Keeli, and their unit of soldiers provided aid to Syndulla and his freedom fighters. As open warfare engulfed Ryloth, the Separatist blockade eliminated Admiral Dao's Republic fleet, severing the Republic's supply lines to Ryloth and trapping Di, Syndulla, and their men in a canyon alongside many Twi'lek families.
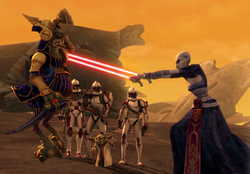 Organa and Binks's determination to help the Twi'leks of Ryloth convinced Katuunko to consider bringing Toydaria into the Republic. Since the Jedi Order hoped to establish a supply base in the Toydaria system, Master Yoda sought a meeting with Katuunko on the coral moon of Rugosa. However, Dooku learned of the rendezvous and sent Asajj Ventress to negotiate with the Toydarian Royal Delegation on behalf of the Confederacy. After a pair of Confederate Munificent-class star frigates intercepted his Republic frigate, Yoda reached the surface of Rugosa in an escape pod alongside his three-man detail from the Coruscant Guard: Lieutenant Thire and troopers Jek and Rys.
 The Confederacy military wasted no time in developing new projects for its war machine. One result was the Malevolence, a colossal Subjugator-class heavy cruiser that became the prized flagship of General Grievous. The Malevolence's maiden voyage cut a swath through Republic territory, striking in a several star systems and annihilating all of the Republic ships that it encountered. Key to the battleship's success were its dual ion cannons, which disabled enemy starships' deflector shields and the rest of their onboard systems, thereby leaving the targets vulnerable to heavy turbolaser fire. Because the Malevolence left behind no witnesses, the Republic citizenry dubbed the unidentified threat as Grievous's "mystery weapon," sowing fear throughout the Republic.
 Shadow Squadron's initial attack on the Malevolence claimed the lives of almost half of the unit's twelve-pilot roster. On account of those casualties, Skywalker heeded Tano and Koon's recommendation to abandon their original target of the Malevolence's bridge. Instead, they concentrated their assault on the heavy cruiser's starboard ion cannon. Their proton torpedoes inflicted enough damage to cause the ion cannon to overload when Grievous tried to fire it upon the medcenter. Obi-Wan Kenobi and Wullf Yularen thereafter arrived with a three-cruiser fleet of Star Destroyers, and promptly opened fire on the Malevolence. With both the ion cannons and the hyperdrive disabled, Grievous was forced to order the Malevolence to retreat, setting course for Confederate space.
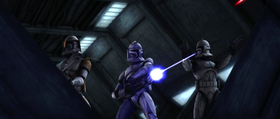 In the aftermath of the Separatists' takeover of Rishi Station, Commander Cody and Captain Rex arrived there on a scheduled inspection of the base. After the droid commandos destroyed their shuttle, the Obex, Cody and Rex fled from the outpost. They soon encountered the remaining survivors of the earlier attack: troopers CT-1409, CT-782, and CT-5555, respectively nicknamed "Echo," "Fives," and "Hevy." Though the rookie soldiers had barely seen any combat action, Cody and Rex rallied them to retake Rishi Station, and they managed to overpower the squad of droid commandos. Yet, their victory was short-lived. Upon losing contact with the droid commandos, Grievous deployed troop reinforcements to ensure that Rishi Station remained under his control.
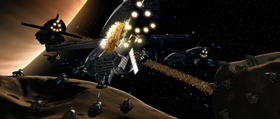 Eventually, the Separatists constructed Skytop Station, a core ship that they converted into a listening post in the Ruusan system. Skytop Station plagued the Republic's intelligence network by intercepting various transmissions and acquiring vital data for the Confederacy military. In the midst of this subterfuge, Grievous achieved a series of victories that jeopardized the Republic's foothold in the Outer Rim. He eliminated an entire Republic battle group at the planet Falleen on his way to conquer Bothawui, a strategic world in the Mid Rim. Rex, Skywalker, and Ahsoka Tano thereafter mobilized a Republic task force in defense of Bothawui.
 Though Tano and her allies repelled the battle droids, their troubles were far from over. Grievous ambushed them, murdering most of the clone troopers in the process. Tano subsequently engaged Grievous in a lightsaber duel so that Rex and the other surviving soldier, Denal, could finish installing the explosives at the reactor. Once they had done so, Denal and Rex rendezvoused with Skywalker, R2-D2, and the Twilight in Skytop Station's main hangar. There, R3-S6 revealed his true allegiances by sealing the exits and activating a trio of vulture droids, thus preventing Rex and Skywalker from aiding Tano in her confrontation with Grievous.
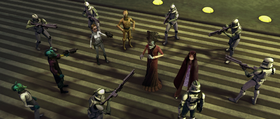 Although Amidala escaped from the detention tower, complications arose when Gunray's battle droids targeted both her and Jar Jar Binks, who had accompanied her to Rodia. Binks enlisted the aid of a large Kwazel Maw, which demolished most of Gunray's droids and his Sheathipede-class transport shuttle. Moreover, Gunray's indifference to the Rodians' suffering, as well as his brutal treatment of Amidala, convinced Farr that joining the Confederacy was a mistake. Farr aided Amidala in arresting Gunray on behalf of the Republic, concluding Rodia's dalliance with the Separatists. Sheev Palpatine thereafter sent the Rodians a convoy of much-needed supplies.
 Since Fisto was leading the hunt to recapture Gunray, Dooku saw an opportunity to test one of his agents. Because Grievous's recent defeats had undermined Dooku's faith in him, Dooku arranged a test for his best general. Using the homing beacon from Gunray's frigate, Dooku lured Fisto and his forces to Grievous's personal fortress on the third moon of Vassek. The Republic's Outer Rim Command Center also monitored Clone Commander Fil and Jedi Knight Nahdar Vebb, Fisto's former Padawan, who led a team of troopers to assist in the search for Gunray. Grievous remained unaware of Dooku's plan to reevaluate his performance.
 Nevertheless, Dooku had not yet reached safety. The Ohnaka Gang took Dooku hostage on Florrum, and the pirates' leader, Hondo Ohnaka, offered him to the Republic in exchange for a hefty sum of one million credits, paid in spice. Before Sheev Palpatine agreed to the deal, the Jedi High Council dispatched Kenobi and Skywalker to Florrum to confirm that Ohnaka and his men indeed had custody of Dooku. However, after the Jedi arrived, Ohnaka drugged them and also took them prisoner, intending to ransom them to the Republic for an even larger payday. Unaware of Kenobi and Skywalker's situation, Palpatine dispatched Senator Kharrus and an escort team from the Coruscant Guard to deliver the spice ransom to Florrum and secure custody of Dooku.
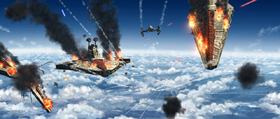 The Quell system became the next flashpoint of the Clone Wars when a Confederate armada intercepted Jedi General Aayla Secura's fleet of warships. In the resulting Battle of Quell, the Separatist frigates pummeled Secura's cruisers with heavy bombardment. Soon, only Secura's flagship was maintaining altitude over the planet Quell. Skywalker, Tano, Captain Rex, and Wullf Yularen arrived aboard the Resolute to extract Secura; Clone Commander CC-5052, nicknamed "Bly"; and their crew from their doomed vessel. Rex, Skywalker, and Tano brought Secura, Bly, and a few of their troops aboard a Consular-class cruiser. Before they could reach the Resolute, a vulture droid attack inadvertently enabled their frigate's hyperdrive. The Jedi and clones found themselves on an unexpected detour, and they crash-landed on the remote planet Maridun. Yularen was left behind to oversee the Republic's campaign over Quell.
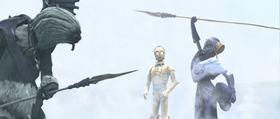 When Kenobi and Skywalker made contact with Chieftain Thi-Sen of the Talz, he communicated his desire to peacefully resolve the conflict. Yet, Cho dismissed the Talz as savages, declaring that the Convention of Civilized Systems did not apply to them. Despite efforts from Chuchi, Skywalker, and Kenobi to find a diplomatic solution, the headstrong Cho insisted on declaring war with the Talz in an effort to exterminate them. Open hostilities erupted when the Talz ambushed Cho, Rex, and their troops. Many Talz and clone troopers lost their lives until Chuchi received approval from the Pantoran Assembly to negotiate an end to the bloodshed.
 The Techno Union continued to subjugate Ryloth, and Wat Tambor gained an appointment as the emir of the conquered world. The Republic Senate finally authorized an invasion force from the Grand Army to liberate the Twi'lek homeworld, reopening Ryloth as a Republic battlefront. Skywalker, Tano, and Wullf Yularen received the task of eliminating Confederate Captain Mar Tuuk's orbital blockade of Ryloth. The Republic's first assault on the blockade failed, since Tuuk's fleet obliterated the Star Destroyer Redeemer and forced Skywalker's other warships, the Defender and the Resolute, to retreat from the Ryloth system. Tano also suffered a devastating blow to her morale when she lost an entire unit of clone pilots, Blue Squadron, as part of her first command position.
 When Windu sought him out, Syndulla still had reservations about working with the Republic, since the Grand Army had previously been unable to aid the Twi'lek Resistance. Syndulla also lacked trust in Ryloth's senator, Orn Free Taa, due to their political rivalry before the war. Yet, Syndulla changed his mind when Dooku ordered Tambor to plunder what he could from the Twi'lek villages, then exterminate everything else. In doing so, Dooku hoped to use Ryloth's demise as a political message about the ramifications of a Republic victory.
 In response, Kenobi, Skywalker, and Tano led a raid on Vindi's laboratory to rescue Amidala and Binks, as well as prevent Vindi from escaping with his cache of bombs. Captain Rex and the clone units Calm Tree, Snow Wolves, and Wildfire provided tactical support for the Jedi's operation. After saving Amidala and Binks, Skywalker aided Kenobi in apprehending Vindi. In addition, the Republic task force's cadre of clone ordnance specialists managed to disarm Vindi's entire supply of viral bombs before he could release the plague to Naboo. Kenobi and Skywalker thereafter escorted Vindi to Naboo's capital, Theed, to stand trial for his crimes.
 Felucia, a jungle world in the Outer Rim, became a frequent battlefront throughout the war. Early on, Felucia's strategic location on the Perlemian Trade Route led it to become the site of a campaign between the Confederacy and the Republic. Kenobi, Skywalker, and Tano attempted to repel a Separatist military presence from the world, but the battle droids overwhelmed their detachment of clone troopers, led by Commander Cody and Captain Rex. Once Commander Wolffe arrived with a fleet of Star Destroyers and breached the Confederacy's orbital blockade, Plo Koon and clone pilot Warthog rushed through the opening with a squadron of LAAT/i gunships.
 Following his victory at Devaron, Bane continued his work for Sidious and set out to abduct four Force-sensitive children who were listed in the Kyber memory crystal. After kidnapping the Nautolan Zinn Toa on the planet Glee Anselm, Bane captured Wee Dunn in Rodia's Kay-Tap square, thwarting Kenobi's efforts to stop him. However, Skywalker and Tano intercepted Bane before he could snatch a third child, Roo-Roo Page of the Gungans, in Jan-gwa city on Naboo. Bane endured a brief tenure in Republic custody, ending when he led Kenobi and Mace Windu into a trap on Black Stall Station, his base of operations. Though Bane escaped, Kenobi and Windu recovered the stolen holocron from his possession. Furthermore, Skywalker and Tano rescued Dunn and Toa from Sidious's secret facility on the volcanic world of Mustafar. Nevertheless, the Jedi Order remained unaware that Sidious was behind the entire ordeal.
 One of the longest and fiercest campaigns of the Clone Wars was the Battle of Malastare. In collaboration with Doge Nakha Urus and his Dug soldiers, Skywalker and Mace Windu led a battle group to safeguard the planet Malastare—whose fuel industry was vital to the Republic's war machine—from a Confederate incursion. However, an enormous detachment from the Separatist Droid Army came close to conquering Malastare. Desperate to ensure a Republic victory, Sheev Palpatine authorized the use of the electro-proton bomb, an experimental weapon that Doctor Sionver Boll had developed to disable only mechanical subjects. The electro-proton bomb generated an electromagnetic pulse that rendered all of the Confederacy's battle droids inert. The bomb's detonation zone also produced a massive sinkhole that engulfed some of the Republic's AT-TE walkers and command crews, requiring a rescue effort.
 Already, the Confederacy's total supply of battle droids far outnumbered the Republic's clone troopers, with Count Dooku claiming that the ratio was as high as one hundred to one. Hoping to halt the Geonosians' production of new battle droids, the Grand Army committed an immense Jedi-led invasion force to retaking Geonosis. Since Poggle had barricaded himself in his primary foundry, the Jedi mounted a three-pronged assault on the facility's ray shield generator. Jedi General Ki-Adi-Mundi and Clone Commander CC-1993, nicknamed "Jet," led the northernmost strike, while Obi-Wan Kenobi and Commander Cody oversaw the central charge. Anakin Skywalker and Ahsoka Tano—fresh from routing Confederate forces near the planet Dorin—spearheaded the southward strike with Captain Rex. Wullf Yularen commanded the Republic Navy's efforts, including other areas of the planet-wide campaign.
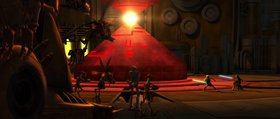 As Unduli, Skywalker, and their soldiers made headway against the foundry's droid defenses, Poggle allowed TX-21 to deploy twenty units of their newest creation: the super tank. The super tanks' ray shields enabled them to withstand barrages from the Republic's AV-7 Anti-Vehicle Cannons. In return, the super tanks launched a devastating volley of missiles, inflicting heavy casualties to the Republic troops. Gree and Rex led their soldiers into retreat, thereby drawing the super tanks onto the bridge across the chasm. Skywalker and Unduli climbed across the underside of the bridge, planting thermal detonators on their way to the other side. Once they had reached the factory, Skywalker and Unduli used the explosives to collapse the bridge, plunging the super tanks into the abyss.
 In the aftermath of the Republic's successful recapture of Geonosis, Mace Windu oversaw a campaign on the planet Dantooine. His soldiers sustained numerous injuries, thus requiring relief supplies from a medical station near the planet Ord Cestus. Since it was imperative for the Jedi to escort Poggle to Coruscant, Offee and Tano personally embarked on the assignment of picking up the medical shipment from the Ord Cestus medcenter. Kenobi, Mundi, Skywalker, and Unduli separately departed aboard a Venator-class Star Destroyer to transport Poggle to Coruscant. Complicating matters was the fact that a Geonosian brain worm infected trooper Scythe of Tango Company, the troop detail that was escorting Offee and Tano aboard their Pelta-class frigate, TB-73.
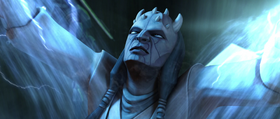 Even though the Republic's victories outnumbered its defeats, the Separatist Droid Army continued to make advances in the Outer Rim Territories. Soon, Grievous began to specifically target members of the Jedi High Council, including General Eeth Koth. Deep in the Outer Rim, Grievous and his Recusant-class Commerce Guild destroyer launched an assault on Koth's flagship, the Steadfast. Grievous then boarded the Steadfast with a strike team of BX-series droid commandos, which swiftly overwhelmed the Star Destroyer's detachment of clone troopers. While Koth ordered Captain Lock and his troops to evacuate from the Steadfast, Koth dueled Grievous aboard the bridge, and he nearly bested Grievous in lightsaber combat despite an arm injury. However, Grievous's IG-100 MagnaGuards electrocuted Koth, allowing Grievous to subdue the Jedi Master and take him hostage.
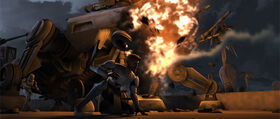 During the course of Rex's patrol, a pair of droid commandos took a potshot at him, missing his heart by only two inches. Once Hardcase and Jesse had gunned down the droid snipers, they and Kix brought Rex to a nearby farmstead that the Lawquane family owned. Suu Lawquane agreed to let Rex spend the night in their barn to recover from his condition. After Kix, the squad's medic, dressed his wound with a bacta bandage, Rex reluctantly let his men resume the search without him, ceding command of the unit to Jesse. As dusk became night, Rex met Suu's husband: Cut Lawquane, a clone trooper who had deserted from the Grand Army. Despite their conflicting ideologies, Rex gradually found common ground with Lawquane based on their dedication to protect those whom they cared about. For Rex, those were his comrades within the Grand Army; for Lawquane, those were his and Suu's two children, Jek and Shaeeah.
 The Death Watch drew the Republic's attention when one of its members assaulted a Republic cruiser, then committed suicide rather than submit to questioning. In response, the Jedi High Council sent Kenobi to investigate Mandalore's potential ties to the Separatists. Kryze, who was old friends with Kenobi, aided his investigation, as did Mandalore's prime minister, Almec. After a Death Watch bomber demolished the memorial shrine within Mandalore's capital city of Sundari, the bomber threw himself from a balcony to avoid being captured by Kenobi. Kenobi and Kryze thereafter accompanied the late bomber's body to Concordia, where Vizsla received them.
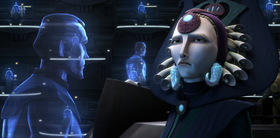 Even though Kryze had safely reached Coruscant, Vizsla continued to collaborate with the Confederacy to seize control of Mandalore. The Republic Senate was about to vote on whether to send a military force to stabilize Mandalore. Since the Mandalorians were not in favor of a Republic occupation, Vizsla and Dooku theorized that such a situation would cause Mandalore's population to view the Death Watch as heroic liberators. To that end, Palpatine had his agents alter a holographic recording of New Mandalorian Deputy Minister Jerec, one of Kryze's close allies. When Kryze spoke before the Senate, Palpatine presented Jerec's doctored testimony, which decried Kryze's pacifist policies and advocated for the Republic to intervene in Mandalore's affairs. The Senate session occurred the same day that Jerec perished in a Death Watch bombing on Kalevala, preventing Kryze from confirming the veracity of her friend's claims.
 As crime continued to plague the war-torn galaxy, Mace Windu became the subject of a series of assassination attempts. Boba Fett allied himself with fellow bounty hunters Aurra Sing, Bossk, and Castas to attain justice for Windu's murder of his father, Jango, at the First Battle of Geonosis. The young Fett posed as a cadet within Clone Sergeant Crasher's Clone Youth Brigade as the unit embarked on a training mission aboard Admiral Kilian's flagship, the Endurance, just as Windu and Anakin Skywalker came aboard the Star Destroyer for a respite from the war front. After failing to kill Windu in his quarters aboard the Endurance, Fett sabotaged the cruiser's reactor, forcing Kilian to crash-land his vessel on nearby Vanqor. Afterward, Fett and his crew abducted Kilian, Commander Ponds, and a clone navigation officer in the hopes that the Confederacy would offer them a reward for their hostages.
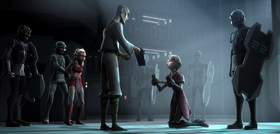 In the meantime, the Mandalorians discovered that their hard-won neutrality was not without cost. The Clone Wars disrupted intergalactic trade, depriving many star systems of their much-needed supplies. The situation forced Mandalore to resort to the black market for food and other necessities. In Sundari, Tee Va and his fellow Moogan smugglers exploited corruption within the Mandalorian Guard, as well as the city's customs and education systems, to distribute slabin-diluted tea to local schools. While visiting Mandalore, Padmé Amidala helped Satine Kryze dismantle the Moogans' operation because the mixture of tea and slabin had a lethal affect on Sundari's youth.
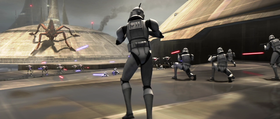 When Grievous entered the Kamino system with a fleet of warships, Wullf Yularen was ready with the Republic's blockade. Utilizing attack formation Echo-3, Grievous engaged Yularen's opposing fleet in combat. At Ti's command, Skywalker mobilized the Republic Navy's air strike, leading clone pilots aboard ARC-170, V-19, and Y-wing starfighters into orbit to hamper Grievous's warships. As the space battle raged around them, Grievous headed for Kamino's oceans with a contingent of battle droids. To bypass the Republic blockade, Grievous disguised his landing craft as debris from his destroyed warships. Ventress was waiting for Grievous deep beneath Kamino's waves with the Trident and her detachment of aqua droids. Once Grievous and his troops had arrived, Ventress dispatched her aqua droids to reassemble the fragments of Trident-class assault ships that Grievous had brought with him.
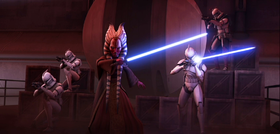 When aqua droids breached Tipoca City's command center, Shaak Ti left Lama Su at the command post, while she personally led the front-line offensive against the invading troops. Ti and her clone troopers succeeded in repelling the aqua droids to the Military Complex's main hangar, where the clone soldiers unleashed barrages of blasterfire upon the enemy droids with their Z-6 rotary blaster cannons. The clones also used RPS-6 rocket launchers to dislodge the Trident-class assault ships from their grip on the exterior walls of the Military Complex. As a result, the Grand Army made steady progress in its efforts to retake Tipoca City.
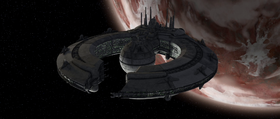 Hoping to legitimize the blockade of Pantora, Lott Dod reiterated the Trade Federation's claims of neutrality, which the Commerce Treaty of 1647 guaranteed. Still, Chuchi refused to back down in her rebuttals of Dod's claims, earning the support of colleagues like Padmé Amidala. Yet, Dooku resorted to other tactics to convince the Pantorans to join the Confederacy. After Papanoida and his family arrived on Coruscant to meet with Chuchi, the Separatists hired Greedo and another bounty hunter to kidnap Papanoida's two daughters, Chi Eekway and Che Amanwe, from the family's apartment. At the same time, Dooku personally offered to help Papanoida find his daughters.
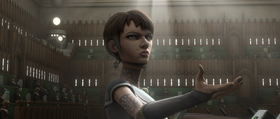 Though Bail Organa persuaded the Senate to table Saam's bill, Padmé Amidala remained concerned about the war's pervasive bloodshed. Consequently, she sought out a private meeting with her old friend Mina Bonteri, who represented her homeworld of Onderon in the Separatist Senate. In doing so, Amidala circumvented the Republic's law against speaking with Confederate officials, a policy that prevented the Republic from recognizing the Confederacy as a legitimate state. Amidala and Ahsoka Tano used the latter's special Jedi clearance to smuggle themselves onto Raxus, where Amidala persuaded Bonteri to introduce a proposal to the Separatist Senate to initiate diplomatic negotiations with the Republic. Bonteri's measure passed, thereby raising the prospect of an end to the war.
 As the war's second year progressed, a cycle of betrayals and vengeance consumed the Sith hierarchy, which in turn affected a number of campaigns between the Confederacy and the Republic. At the Battle of Sullust, Asajj Ventress spearheaded the Separatist navy's strike on a Republic fleet. Flying her personal Ginivex-class fanblade starfighter, Ventress led the droid tri-fighters of Trident Groups One and Two in overwhelming the Resolute. Wullf Yularen narrowly escaped from his flagship before it went down. Building on her success, Ventress gave chase to Obi-Wan Kenobi and Anakin Skywalker in their Delta-7B interceptors. However, both Kenobi and Ventress crashed in the hangar of the Separatist command ship, with Skywalker following them there.
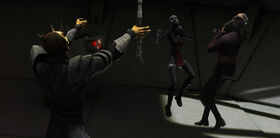 Everything came to a head at Toydaria. Opress cut through the Toydarian palace's royal guards, but when Kenobi and Skywalker interfered, Opress Force-choked Katuunko to death. When Opress brought Katuunko's corpse aboard Dooku's Providence-class dreadnought in orbit of Toydaria, Dooku was furious that Opress had disobeyed his orders to keep Katuunko alive. At that moment, Ventress entered Dooku's chambers and activated the spell that ensured Opress's loyalty to her. An intense duel erupted as Opress and Ventress tried to kill Dooku, but it escalated into a three-way confrontation when Opress broke free of Ventress's control and turned on both of his former masters. Evading Opress, Ventress pursued Dooku to the lower decks. But even in single combat, she was unable to defeat the Sith Lord. Ventress barely made it into an escape pod, and she departed from Dooku's dreadnought, now facing an uncertain future.
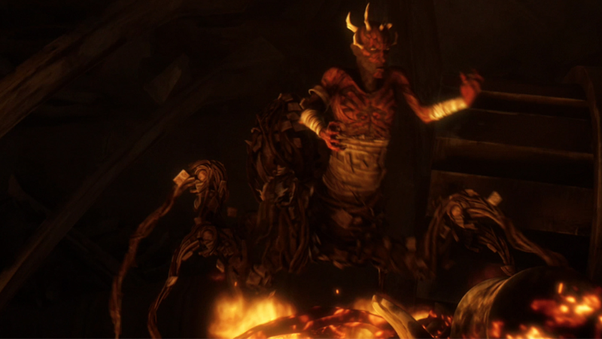 Down in the tunnels beneath the junk, Opress is stalked and attacked by a spider-like creature who is eventually revealed to be an emaciated and deranged Maul, transformed into a centauroid half-spider cyborg. Morley takes this inopportune moment to reappear, asking for "leftovers", and under Opress' tight grip reveals that while he did exploit Maul for his own gain, it was not him who had turned him into a cyborg or left him in his current insane state, before he is choked to death. When Opress talks to him, Maul tells him in between his mad ravings about how he was reduced to this pitiful state and that he seeks revenge on the Jedi, especially the one who did this to him. However, Opress' quest, and the menace it presents, has not gone unnoticed by the strongest Force wielders in the galaxy, and Yoda has no choice but to reveal to Obi-Wan Kenobi that an old enemy has come back from the dead to haunt him once more.
 A year and nine months into the Clone Wars, the Nexus Route—a little-known hyperspace lane that connected Coruscant with the heart of Separatist space—gained critical importance for both the Republic and the Confederacy. When Jedi General Even Piell and his crew unearthed the coordinates of the Nexus Route, the Confederacy targeted him for capture. As a Confederate flotilla overwhelmed his Star Destroyer, Piell divided the Nexus Route's coordinates with his naval captain, Wilhuff Tarkin. Both of them memorized half of the information as a safeguard against torture. The Separatists thereafter abducted Piell, Tarkin, and their clone navigation officers and incarcerated them in Lola Sayu's infamous Citadel prison, which was being overseen by Warden Osi Sobeck.
 Without their shuttle, the four Jedi escaped from the Citadel's airfield with Tarkin, as well as Cody, Rex, Fives, and their remaining troopers. As they made their way across Lola Sayu's inhospitable terrain, Kenobi and Skywalker notified the Jedi High Council that they would require an extraction from Lola Sayu. Consequently, the Council sent four of its members—Kit Fisto, Adi Gallia, Plo Koon, and Saesee Tiin—to the Lola Sayu system with a battle group of four Star Destroyers. In the meantime, Piell and his allies headed for an island that the Council had selected as their extraction point. En route, an endless number of battle droid squads pursued the Jedi and clones, leading R2-D2 to sacrifice his reprogrammed battle droids to delay the enemy forces as long as possible.
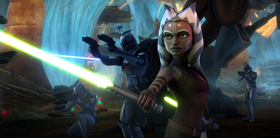 Later in the war, the Grand Army reopened Felucia as a battlefront against the Separatist Droid Army. As part of the Second Battle of Felucia, Rex, Skywalker, and Tano led divisions of AT-TE walkers and HAVw A6 Juggernauts deep into Confederate-controlled territory. To preserve his grip on the Felucia system, General Grievous dispatched a C-9979 landing craft with droid reinforcements to tactical droid TZ-33's outpost on Felucia. With the aid of Plo Koon, Skywalker and Tano mounted a three-pronged offensive on TZ-33's base. Once their AT-TE walkers launched a volley of fire at the outpost and baited TZ-33 to deploy his droid infantry through the facility's front gate, Rex and Skywalker led a squad to breach the front gate's defenses. While Koon, Commander Wolffe, and their jetpack-equipped troopers charged the outpost's left flank, Tano worked with Sergeant Sinker, Corporal Comet, and Boost and other soldiers to scale the rear wall. All three teams converged at the outpost's central command post, where they eliminated TZ-33 and his remaining infantry.
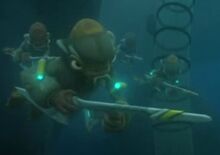 Following the murder of Mon Calamari King, Yos Kolina, the Separatists and the Republic sent representatives to assist in the ascension of a new king. The Quarren Isolation League under Chieftain Nossor Ri wanted a Quarren king, not Kolina's son, Prince Lee-Char to rule. The Separatist observer, Commander Riff Tamson stirred the Quarren against both the Republic, Mon Calamari and the Prince. The Prince's military, Captain Gial Ackbar, Senators Padmé Amidala, and Meena Tills tried to negotiate with Quarren to no avail. The Jedi Council then sent Master Kit Fisto and Commander Ahsoka Tano to reinforce Anakin Skywalker and the Mon Calamari Guard against the Quarren's and Tamson's forces.
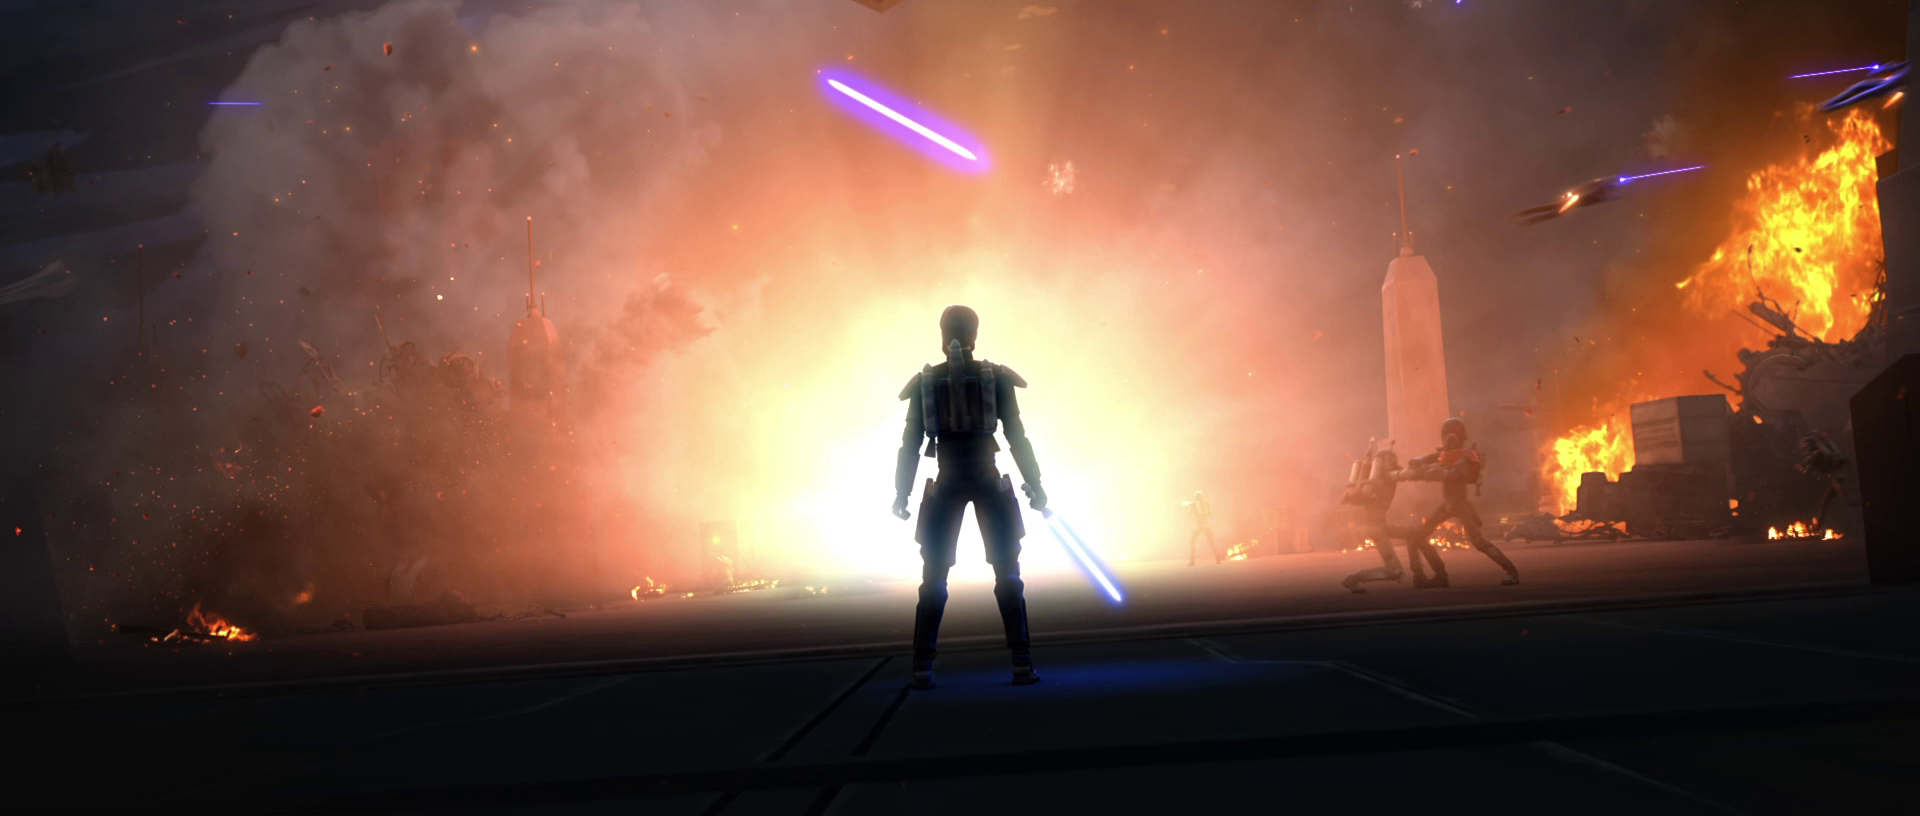 The Mandalorian civil war erupted in the capital city of Sundari after the Shadow Collective deposed Duchess Satine Kryze and her New Mandalorian government. Maul challenged Pre Vizsla, the leader of Death Watch, to a leadership battle to determine which of them would rule Mandalore. Maul defeated and killed Vizsla in single combat, however not all of the Death Watch forces agreed to acquiesce to the sudden shift of leadership. Bo-Katan Kryze, the Duchess' sister and a Vizsla loyalist, gathered her forces and rebelled against Maul's rule, leading to the fighting. Obi-Wan Kenobi also participated in the battle, as did Darth Sidious, who fought Maul and Maul's brother, Savage Opress. In the ensuing fight, Savage was killed by Darth Sidious, while Maul was captured by the Sith Lord and imprisoned in the Spire on Stygeon Prime.
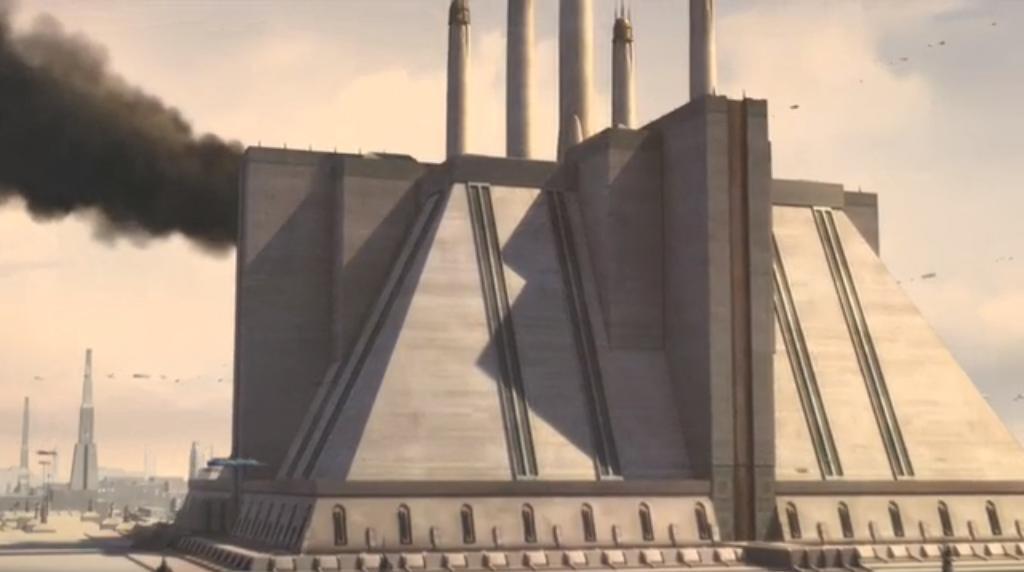 Jackar Bowmani was working in the Jedi Temple hangar when the nano-droids within him detonated, killing Bowmani and multiple bystanders. The casualties who died as a result of the explosion were six Jedi, including Jedi Knight Tutso Mara, as well as several clone troopers and maintenance workers. In addition to the fatalities, several workers were injured by the attack and subsequently taken to the temple's medical facility.
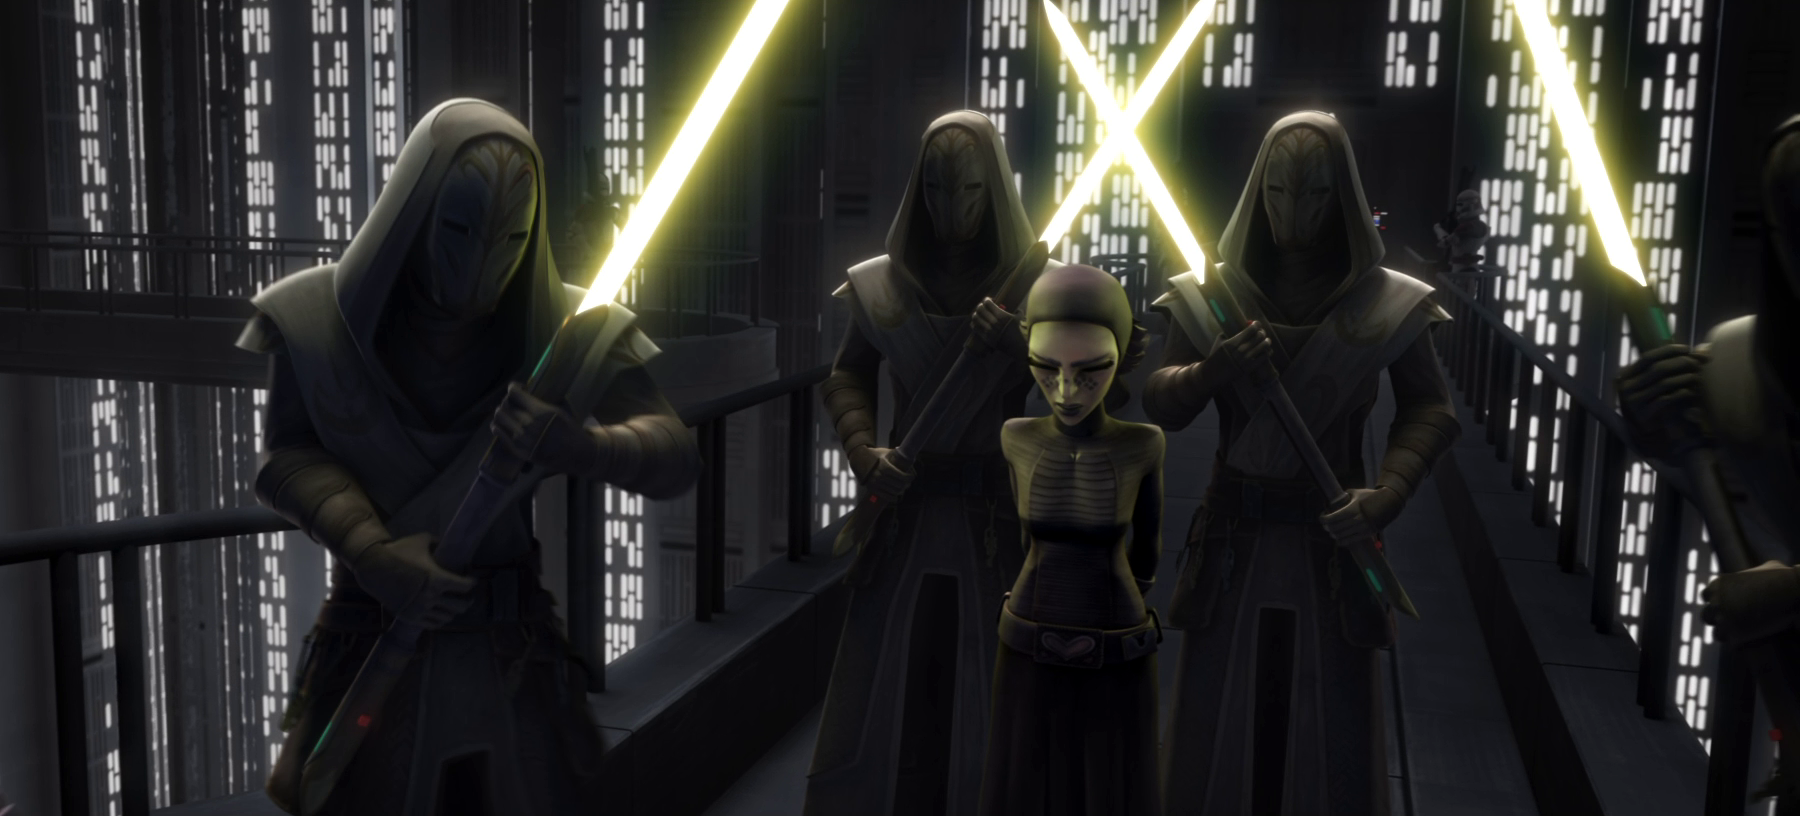 Shortly after the funeral ceremony for the Jedi victims of the attack, Offee killed her co-conspirator and framed Tano for the deed. Tano escaped from Republic custody in the hope of proving her innocence, but was consequently hunted as a fugitive by the Jedi and Republic Military. Following her capture, Tano was expelled from the Order and subsequently placed on trial for murder and treason. Although the charges were dismissed after Skywalker apprehended Offee and forced her to make a full confession, Tano declined the Council's offer of reinstatement and chose to seek a new path instead.
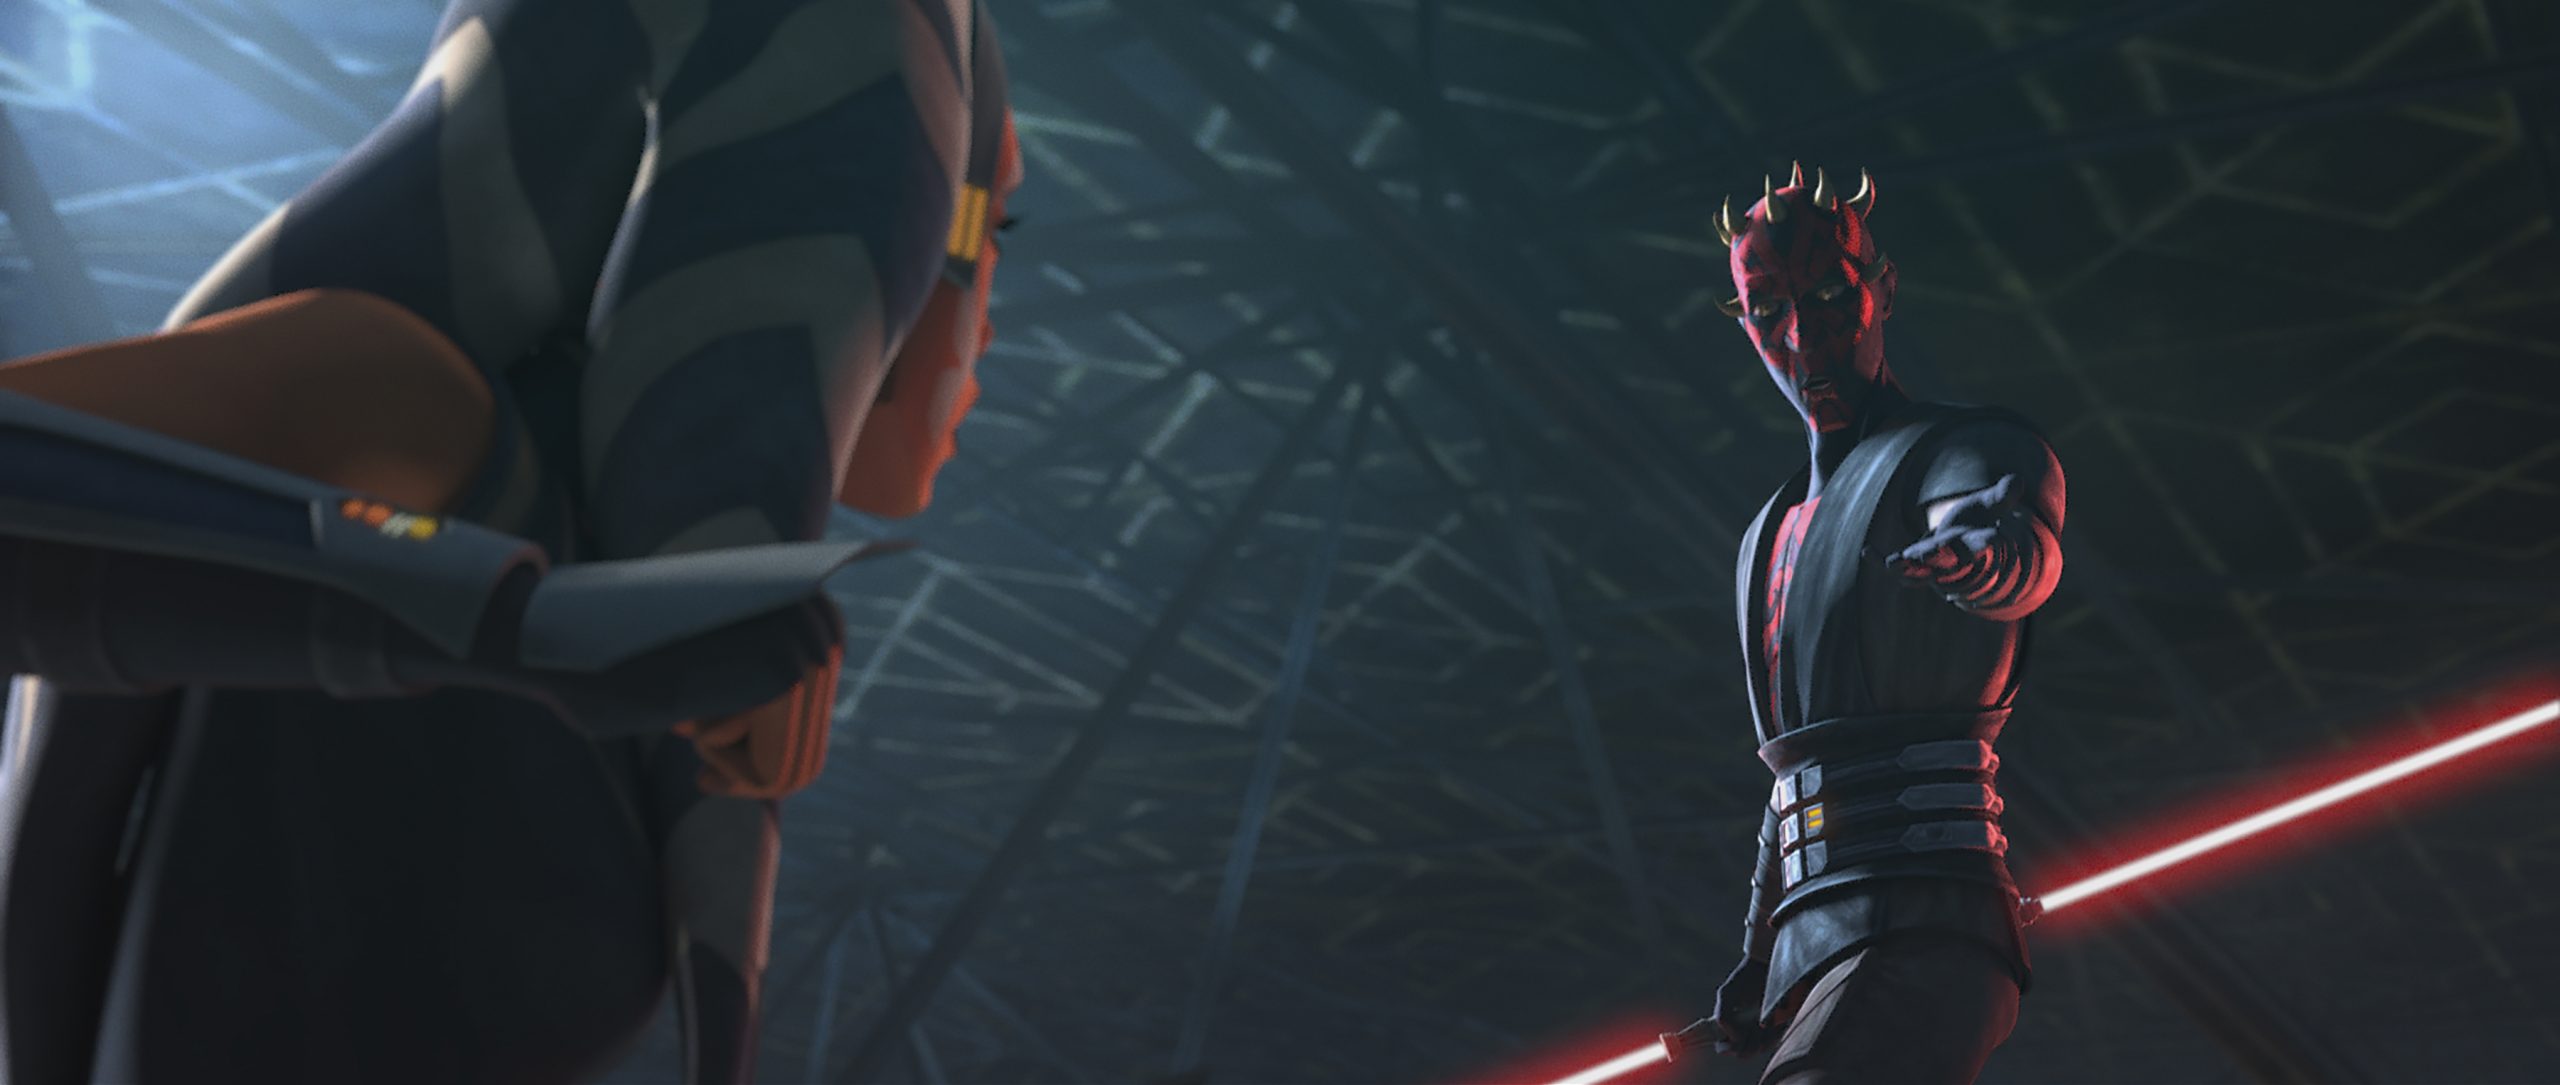 Rex and Tano's company of clone troops laid siege to Maul's holdings on Mandalore, causing Maul to respond with an army of his loyal forces. Entire regions of Mandalore erupted into battle zones, and, in the event dubbed The Night of a Thousand Tears, gunships used their weaponry to devastate fields of Mandalorian recruits. Tano and some of her allies baited Maul into a trap. Tano briefly crossed lightsabers with Maul, luring him into a plaza where her comrades snared him in a ray shield.
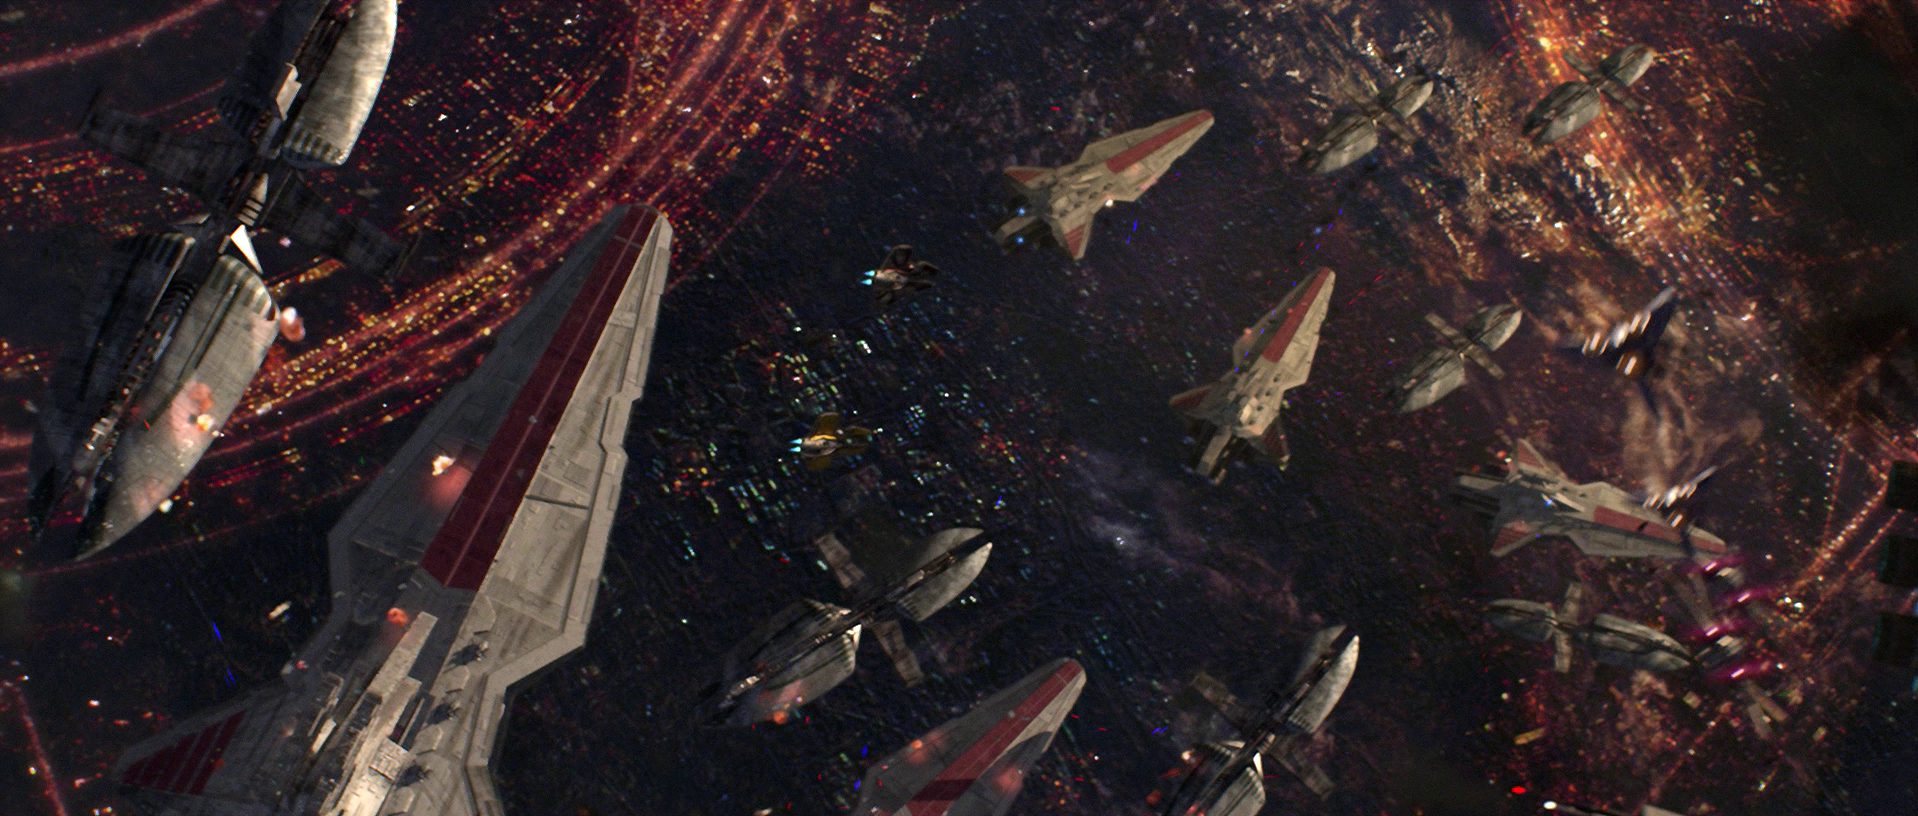 The super tactical droid General Kalani would state his calculations showed the Separatists were on the verge of victory at the war's end, but the war's third year had shown that the Republic now held all of the momentum. While the Republic was crumbling due to attacks launched by Dooku, the Separatists had been pushed back to the spiral arms of the galaxy. This campaign, called the Outer Rim Sieges, would result in most of the Republic's Jedi and military forces fighting on these outer worlds. Another part of the sieges occurred when Grievous launched a massive offensive that pushed the Republic Military to the brink, so Jedi Generals were sent far from the Core Worlds to help the clone army. Ultimately, while the Republic had began to overwhelm the Separatist armies and the Confederacy had lost much of its territory, with what remained being targeted in the sieges, Grievous's overwhelming offensive was still a threat, and the Republic Army was also engaging in desperate campaigns across the galaxy, while the Separatists were encircling the Republic, moving ever-nearer to the systems of the Core.
 On Utapau, Grievous, along with the rest of the leaders of the Confederacy of Independent Systems, awaited instructions from Sidious, who soon enough sent the Confederacy to the Mustafar system before Republic forces arrive. Not long after, Republic forces led by Obi-Wan Kenobi attacked the base. Kenobi managed to confront Grievous and the two began to fight. In the hassle, Kenobi managed to rip open the armor covering Grievous' gut sack. The Jedi then shot it with the General's blaster several times, killing the cyborg. The death of Grievous put Nute Gunray in charge. Meanwhile, on Coruscant, Palpatine revealed his true nature as the Dark Lord of the Sith to Skywalker, prompting Skywalker to tell Jedi Master Mace Windu. Not long after, Mace Windu along with Kit Fisto, Saesee Tiin, and Agen Kolar attacked the Chancellor. Palpatine quickly admitted to this and killed Fisto, Tiin, and Kolar. He later killed Mace Windu with the help of Anakin Skywalker, who needed Sidious to save his wife Padmé from death. The Sith quickly declared the Jedi the enemies of the Republic and sent out Order 66, which saw the clone troopers turning on their Jedi generals. Skywalker then surrendered to Sidious and the Sith Lord dubbed him Darth Vader. Vader was sent to the Jedi Temple where he killed every Jedi left in it. On Utapau, Clone Commander Cody ordered his men to fire upon Kenobi, but the Jedi survived this, however. On Kashyyyk, Commander Gree with another clone attempted to assassinate Grand Master Yoda, however the master beheaded the two with his lightsaber before they could blast him. Many other Jedi were killed during Order 66, including Ki-Adi-Mundi, Aayla Secura, Plo Koon, and Stass Allie.